
The Transistor was the first real prop I made (I don’t really know what counts as a fake proper), needless to say it was a somewhat ambitious project. I have learned a whole bunch from the process and there is plenty I would do different, but for anyone attempting their own giant glowing sword I wanted to share my experiences. And if you are looking for information on constructing the dress, check out this post.
To start I drafted a full size pattern, to get my head around what it was all going to look like. The answer was mainly, it was really big. My guess for dimensions was roughly 5 ft long total (hilt and blade), with the blade being 1 ft by 3ft: here is me modeling the monstrosity, note the look of ‘how am I going to make this?!?’ fear.

From there the construction breaks down into 3 main parts: hilt, blade and lights.
Blade
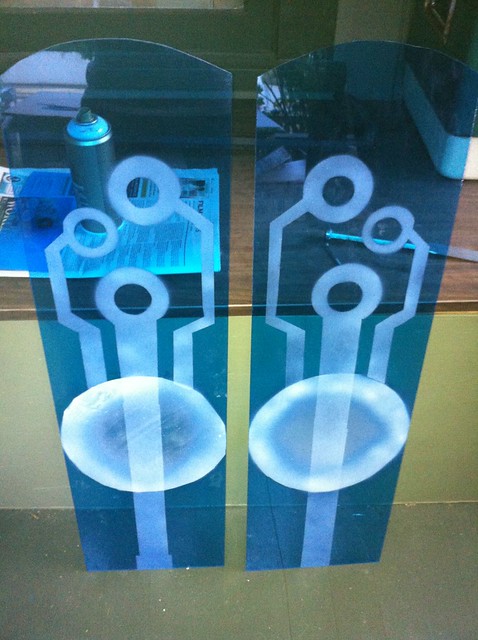
I made the blade from 2 sheets of 1/4 inch acrylic, I bought from TAP plastics. This is one of the main things I would do differently, I chose this material because buying it from a store was much cheaper than ordering online with the cost of shipping, but the color was far less accurate. Alternatives would be this color, or this acrylic which would also diffuse light better than just regular acrylic. TAP plastics cut two rectangles to size (1 ft x 3ft) and then I shaped the ends to a curve using a coping saw.
I taped off the pattern and sprayed on what would become the inside of the blade – you will need to make sure the two sides are mirrors of each other so they line up when the spray sides are facing each other. For the spray I used Montana Gold spray paint in Magic White – this sprays naturally frosted, which gave it the translucent quality I wanted.

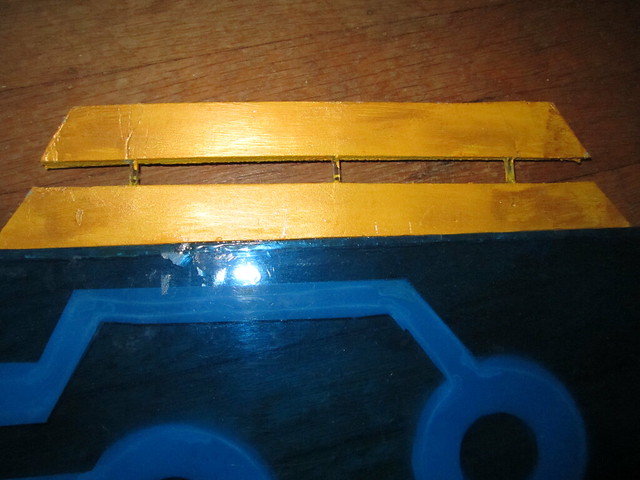
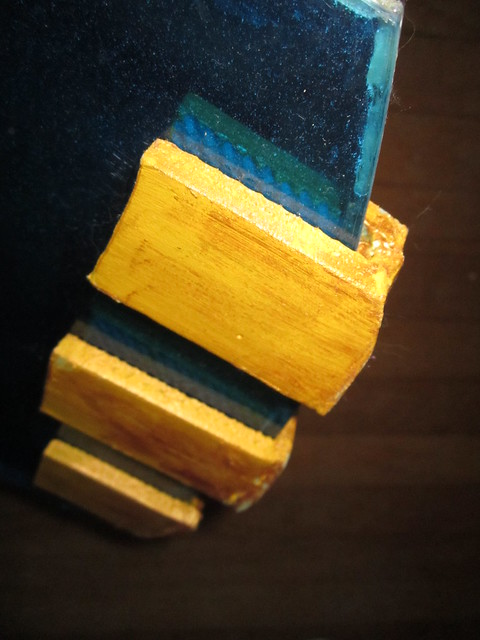
To create the box I glued thin acrylic square rod (1/4 thick) around the outside edge of one piece of the acrylic, the rod was bendy enough to curve and follow the bottom curved edge of the blade. I then (after gluing the lights in place), I glued the other section of acrylic on top. I used an epoxy glue to stick it all together. I messed this up the first time by using one that had a much too fast set time, I would ask at the hardware store for some recommendations but you’ll want some sort of 2 part epoxy.


The ‘wings’ for want of a better term were made of 1/4in EVA foam with a sheet of craft foam. I used leftover acrylic rod to space the two sets apart (and hid the rod between the thicker foam and the craft foam). I then just glued the wings straight to the edge of the blade. The end things were just 1/4in EVA foam, constructed in 3 sections and glued straight to the blade. Both the wings and ends were painted with an initial base coat of yellow acrylic and then dry brushed over the top in gold. I should have primed both with a water/glue mixture or plasti-dip but alas I did not know better (there are many good tutorials for painting EVA foam).
Lastly, for the red and black circles, all I did was cut out red and black circles from some vinyl fabric and glue them to the outside of the blade. If I did it again I would like to work on getting those sections to have more depth like the are supposed to, but at that point the con crunch was upon me and I had maxed my skills and budget.

Hilt
I took some creative licence on this part, some for functionality and some just to make it cooler (sort of). Anyway, because the blade was relatively thin I decided that all the electronics were going to be in the hilt, and thus I would need some way to access it. Though not as accurate I really like how the hilt turned out and would probably do it again.
The main section is just 1.5 in PVC piping. Attached to that was 2 PVC fittings that screwed together. The top section was a tube of EVA foam, the inside was 1/4 in foam with a wrapping of a thinner sheet of craft foam. The top portion was half of a clear Christmas ornament, painted red on the inside, and all of it was held together with lots of hot glue, epoxy and a couple of prayers.


The paint job was the same as the wings and end things – yellow base coat with a dry brushing of gold. The thinner section was originally painted white with acrylic, and then later repainted a light grey.
Joining the parts
I don’t really know what this part of a sword would be – but anyway, connecting the hilt to the blade.
The main connection was a notch cut into the PVC piping that the blade would slide into, this ended up being about 3/4 of an inch wide and 3 inches long. I hid this joining under the grey section on the Transistor.

The grey sections were made as a smaller triangle and a larger triangle of 1/4in EVA foam, the triangle had a section cut out of it to accommodate the hilt. The triangles were hot glued together and then covered in grey fabric to give a beveled look. The triangles were glued over the top of the join between hilt and blade, and the gap left between them was filled with another fabric covered section of foam.


I have mixed feelings about this, I like how the bevel came out with the fabric but the top down view is pretty messy and uneven. Were I to do it again I would try to construct it all as one piece that was covered in fabric to avoid the messiness. Or maybe do something altogether different….

Lights
The theory of the lights was good but could have been better in their execution. I used EL wire to make the lights. The wire was glued to the inside of the blade, like an acrylic, wire, and acrylic sandwich. It ran all the way around the outside of the design and was hot glued in places at various points. The electronics ran through the PVC piping, and the battery pack/switch sits in the hilt in the section that screws together.

The two main downsides of this method, is it is not particularly bright and not at all diffused. The light can really only be seen in low light conditions, not bad on the PAX expo hall floor or at night, but doesn’t really show up anywhere else. And the light is very clearly in a line, rather than diffused throughout the sword.

Other Resources
There are several people that have made great Transistors, that are quite different to how I constructed my own. I suggest taking a look at theirs and pull together the ideas that work best for your time/budget/skill. Also don’t hesitate to ask any questions!
This is an excellent and detailed video breakdown for their Transistor construction from TimmCosplay. I really like their overall construction!
Noblesse Obloge created a very detailed tumblr post on how they created their version of the Transistor (Part 1 and Part 2). Some parts are similar to mine, and I really like how their lights and raised circles came out!
Wheresmysamurai has some helpful details in their reddit post.
And another one from the Care and Feeding of Nerds, which is somewhat simpler, and really nice!