After seeing Into the Spiderverse I knew I was going to have to cosplay Spidergwen! I’ve always really enjoyed the design of her suit, and surprisingly enough, for all the cosplay I have done, I’ve never actually made a spandex body suit (let us not talk about the Black Widow fabric debacle). I’m very pleased with how this one turned out, and realize now that I wish more costumes had this range of motion!!!
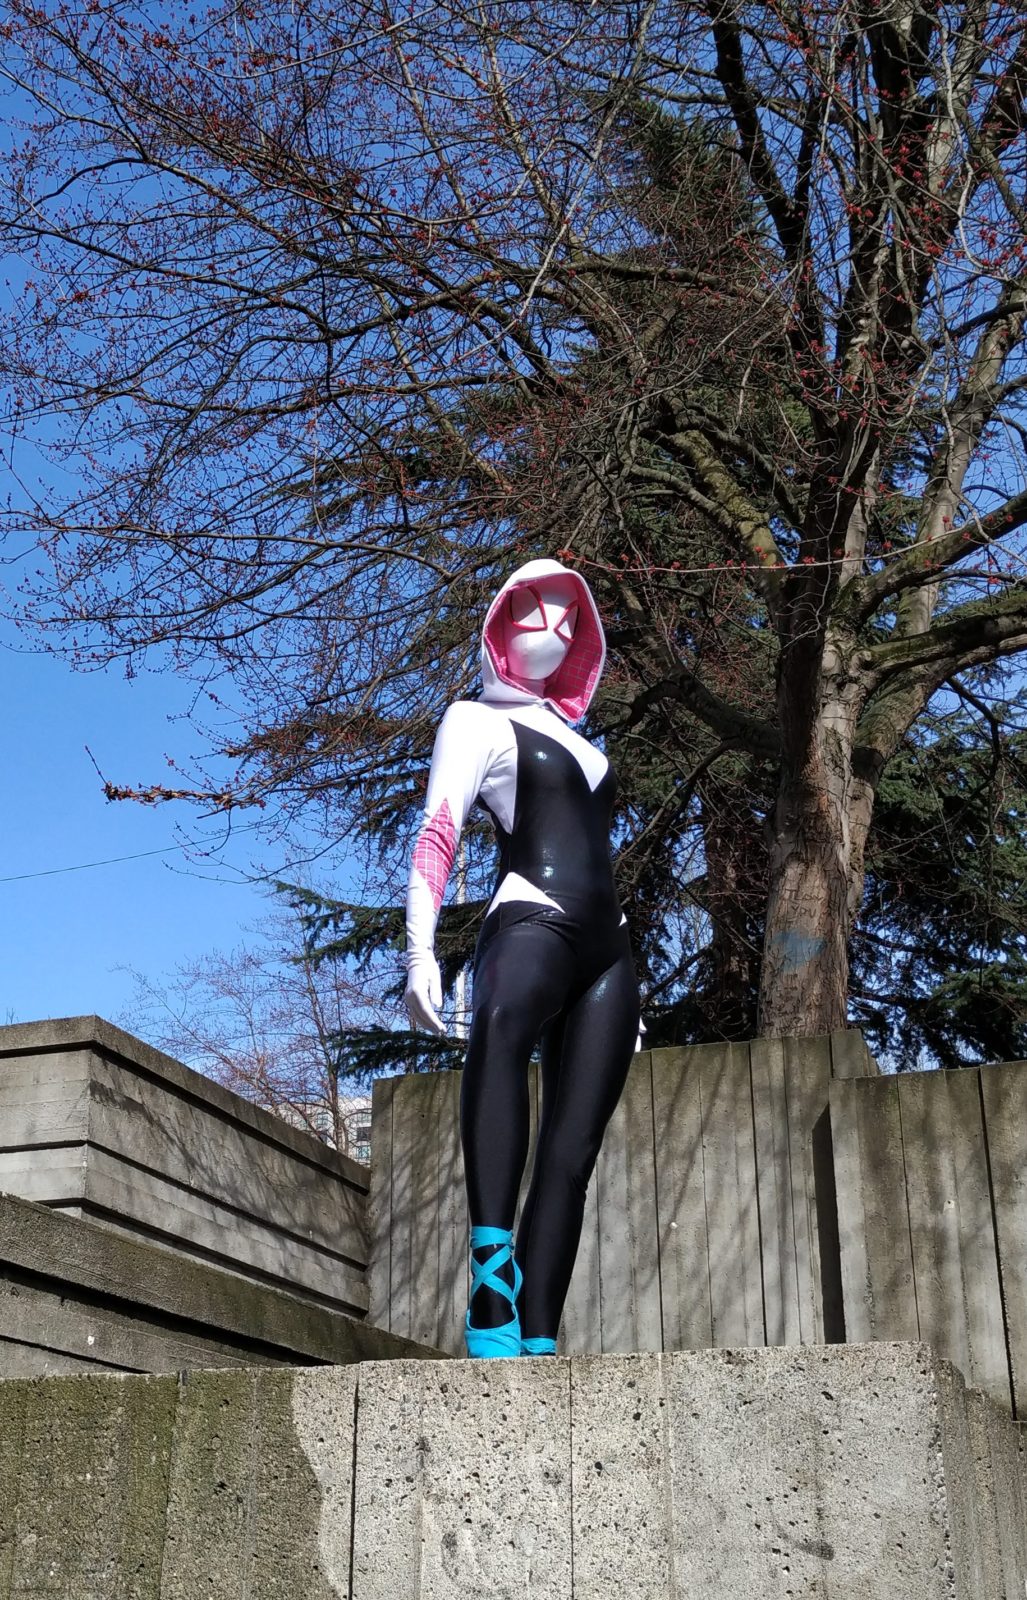
So if you are looking to make your own Spidergwen cosplay, then this is the place to start!
This cosplay and tutorial was made possible by my generous Patrons, head over to Patreon to check out awesome rewards!

For a visual walkthrough of how I made my Spidergwen cosplay, check out my video:
The Suit
One of the first decisions you’ll need to make for your Spidergwen cosplay is the material you’ll make the suit out of. There are a number of different options depending on the final look you’ll want to have.
A lot of people will use a sublimation printed fabric, which can give you the exact triangle print she has on her suit in the movie. The downside, is when the material stretches, because it is only printed on one side, the white underside of the fabric will show through and dull the overall look.
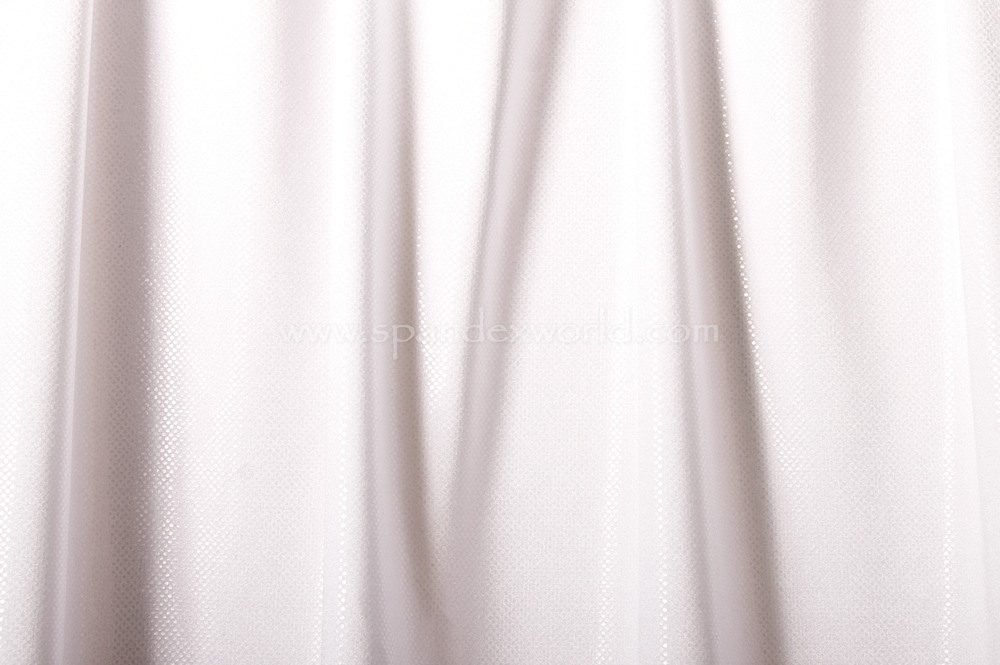
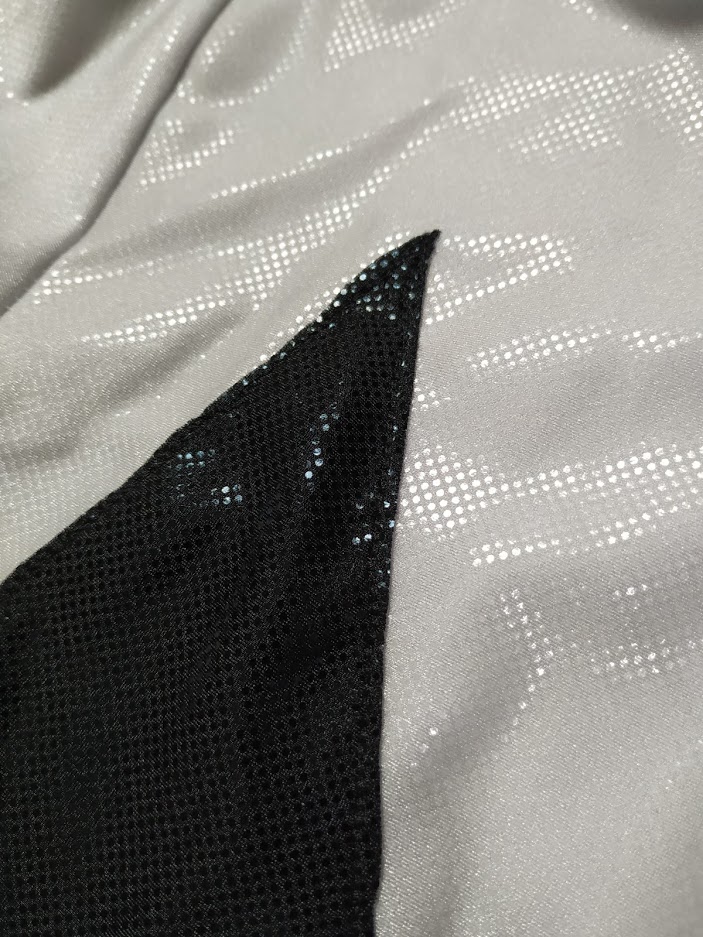
I chose to instead go for a material that was evocative of the print in the movie but not exact. I ended up getting a 4 way stretch spandex with a clear dot print pattern across it, in black and in white. I like that his pattern gave the final suit some shine, without being a wet look spandex, and the small dots also give the impression of the halftone dot pattern they used in a lot of the movie.

I drafted the suit pattern from my measurements, creating a suit with side seams and a center back seam to give a snug fit with minimal seam lines and wrinkles. Stretchy.org is a great resource for drafting your own pattern. I also have a pattern available in my store, including details for the patterning on the front and back, as well as gloves, hood and mask.

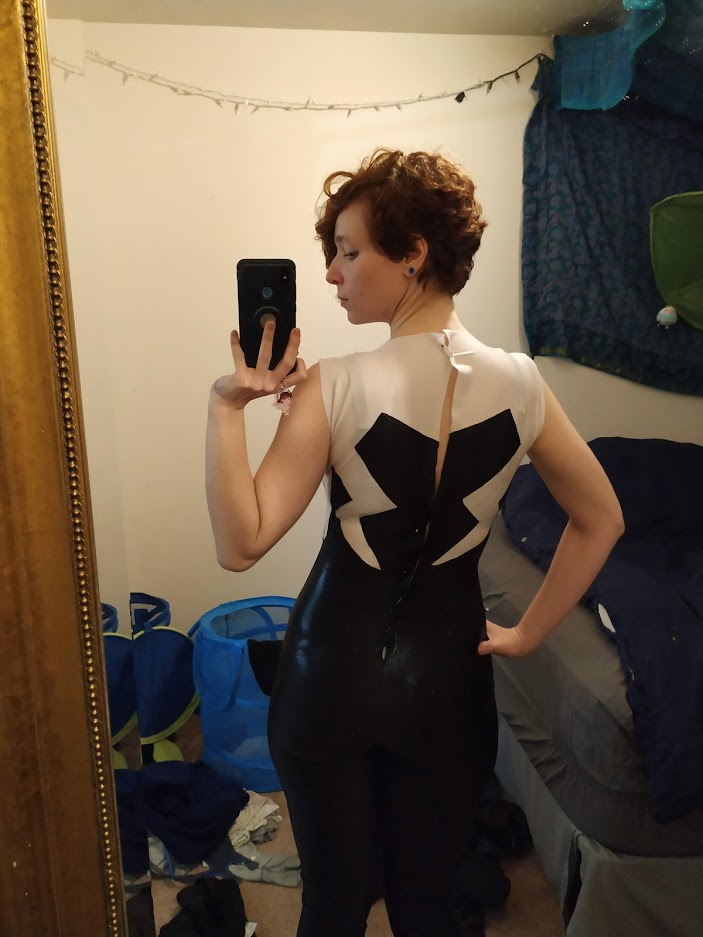
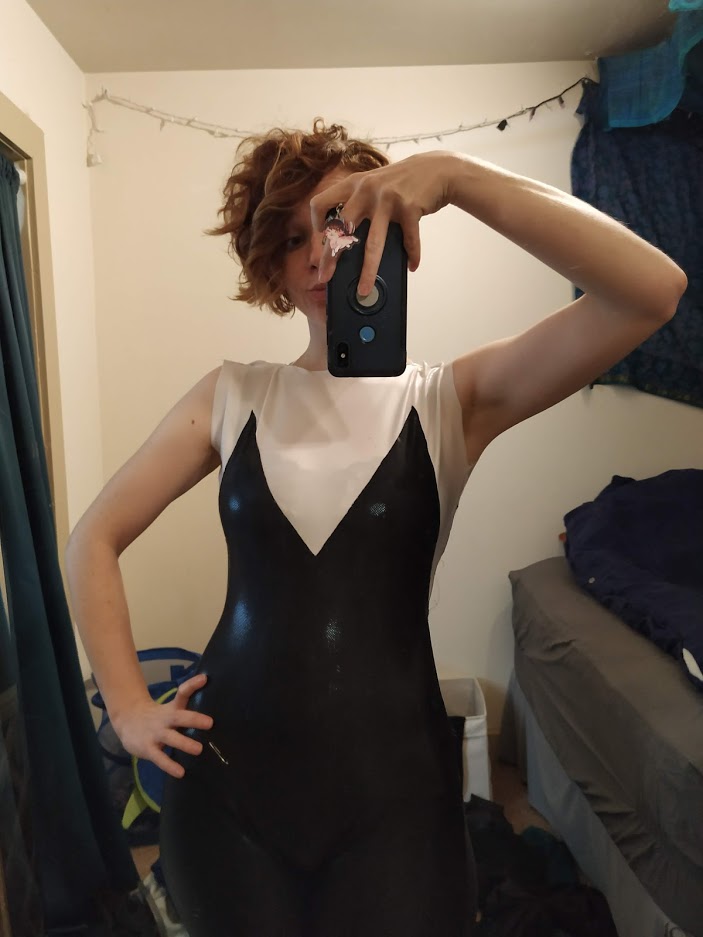
To construct the suit I started by making a full version of the body portion in the black spandex. Once I knew that fit, I had a friend mark the design on the front and back. After that I made just the top of the suit out of the white spandex (using the same pattern as the black) and marked the placement of the design on the white fabric. I then cut the design out of the black fabric and pinned it in place to the white fabric and top stitched the black fabric down using a stretch stitch. This gave a nice and clean edge to the pattern.
After I was happy with the fit I installed a center back zipper, which proved to be a touch more complicated than I had planned…. In the end I only needed the zipper to go about halfway down my back, as there was enough stretch to be able to get the suit on, and didn’t give me too much of a wedgie. To help the zipper blend in with the dramatic color change of the suit, I started with a white zipper and painted the bottom portion of it black with fabric paint, which helped it blend in much better!
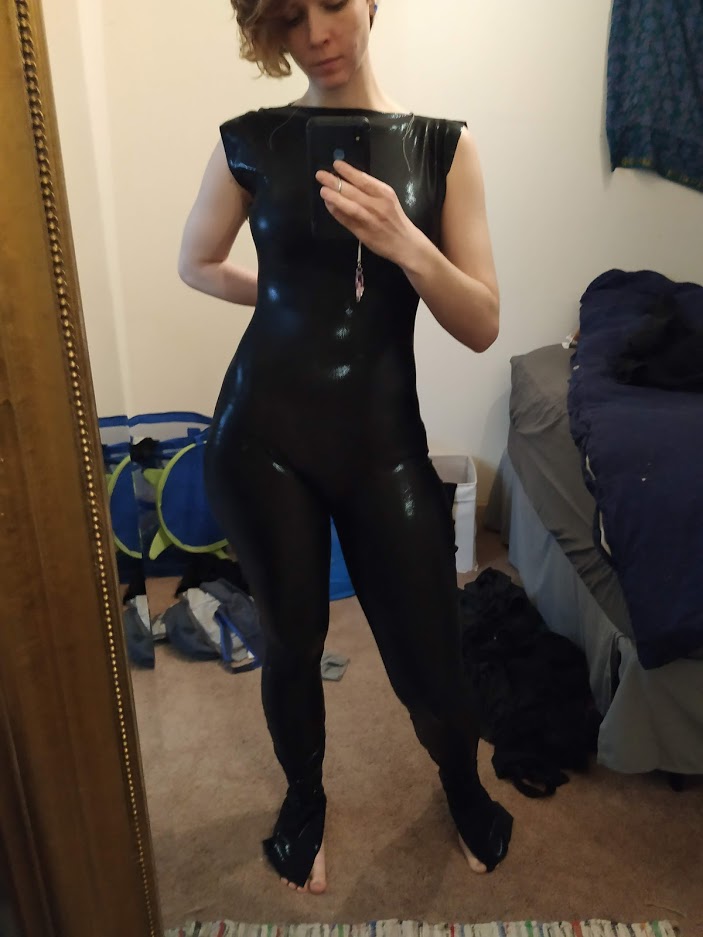
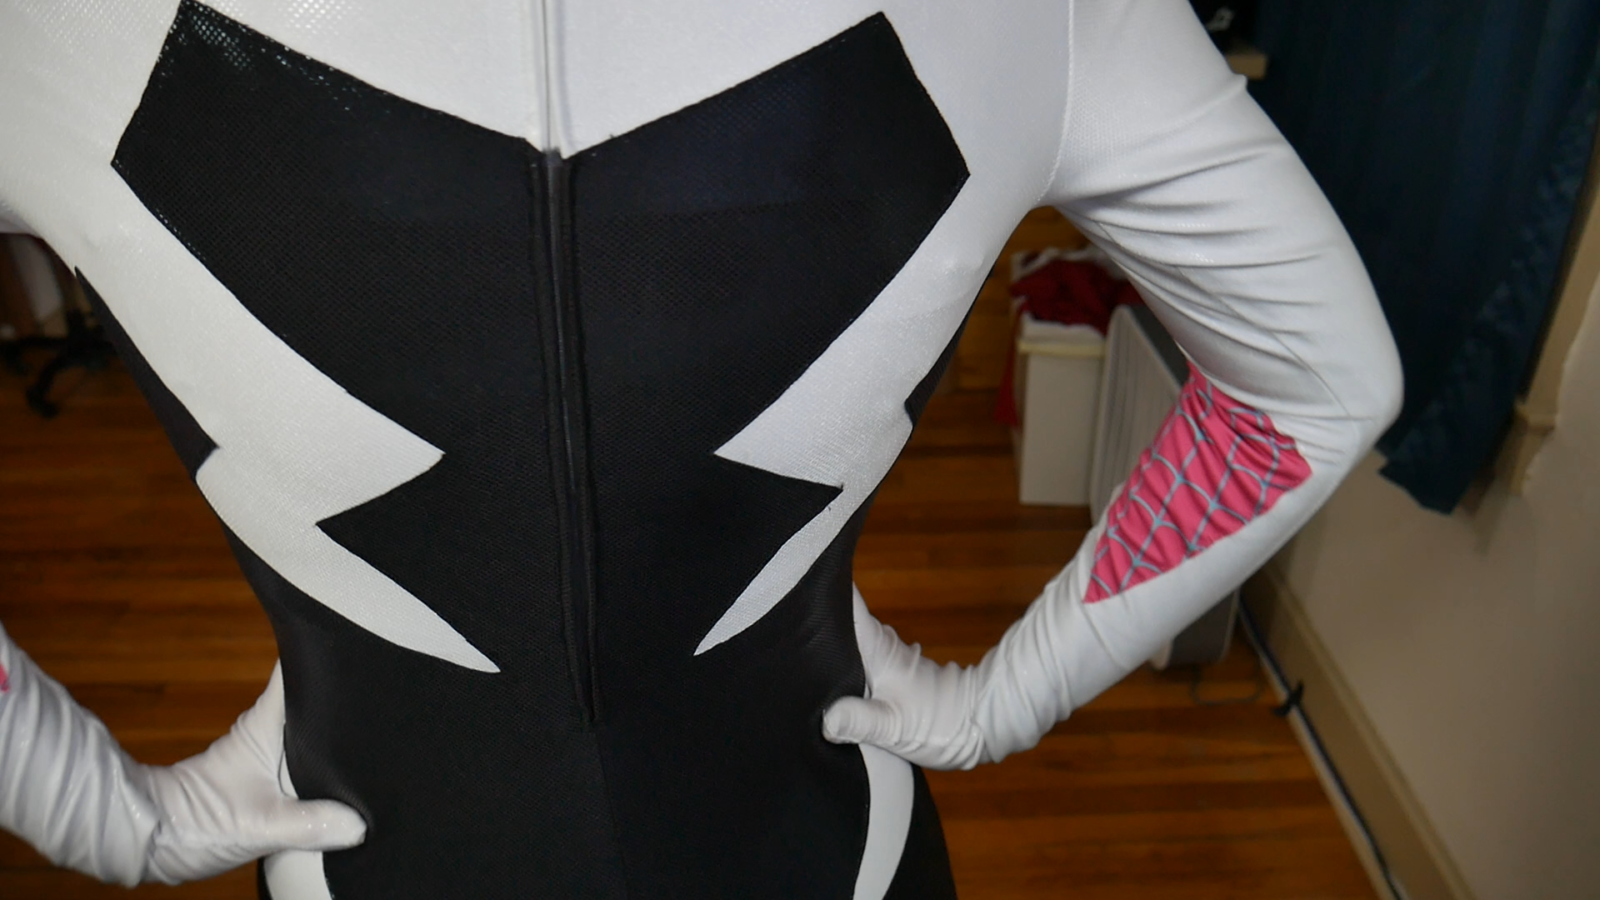
I added the collar after the zipper, though it should probably have gone in first, I was just not sure how I was doing the hood until later in the construction. Then I finished up the feet, and added the sleeves.The sleeves were a pretty standard pattern, though I extended the sleeve to include the glove as one piece on the back of the hand. I have an slit in the wrist (and overlapped the fabric slightly), to allow me to remove my hand without taking the whole suit off. I also top stitched the web fabric to the sleeve, like on the body.

The hood was a separate piece, based on many other hood patterns I have made, with white outer fabric and pink custom printed lining. You can buy the pink fabric from Spoonflower. I added interfacing at the brim to keep it stiff. The hood was then stitched in place on the collar/ suit seam for a few inches in the front, the rest of the hood is then snapped in place.
Shoes
To make the shoes I started with a pair of canvas slip ons, and trimmed them down to the shape of a ballet shoe. I then dyed the canvas using Rit All Purpose Dye in Teal and Aquamarine to get the color of her shoes from the movie. I then stitched twill tape in a matching color directly to the shoe and tie them in place!

Mask
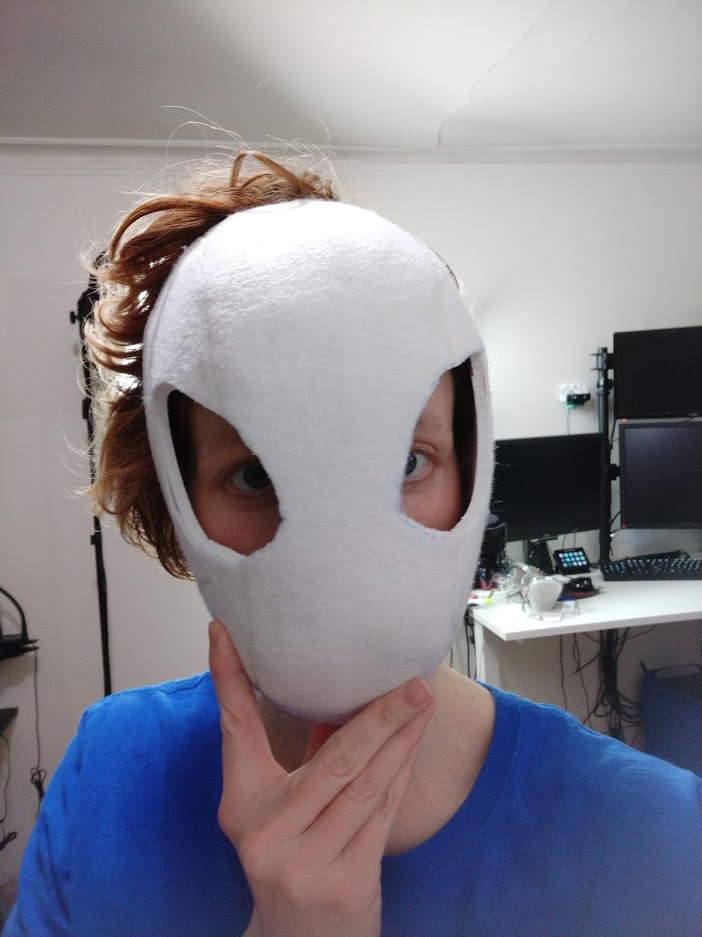
I made an EVA foam face shell to go under the mask, while the 3D printed ones are great, I wasn’t quite ready to shell out that much (pun intended). I made my face shell based on this pattern, with a few adjustments for a better fit on my head. A face shell isn’t necessary, but it does help give a better shape under the mask.
The fabric portion was made from the same white spandex as the suit. I drafted the pattern with side seams, and a center back seam, the pattern is included in my Spidergwen pattern. Check out this video for some great help in creating your own.
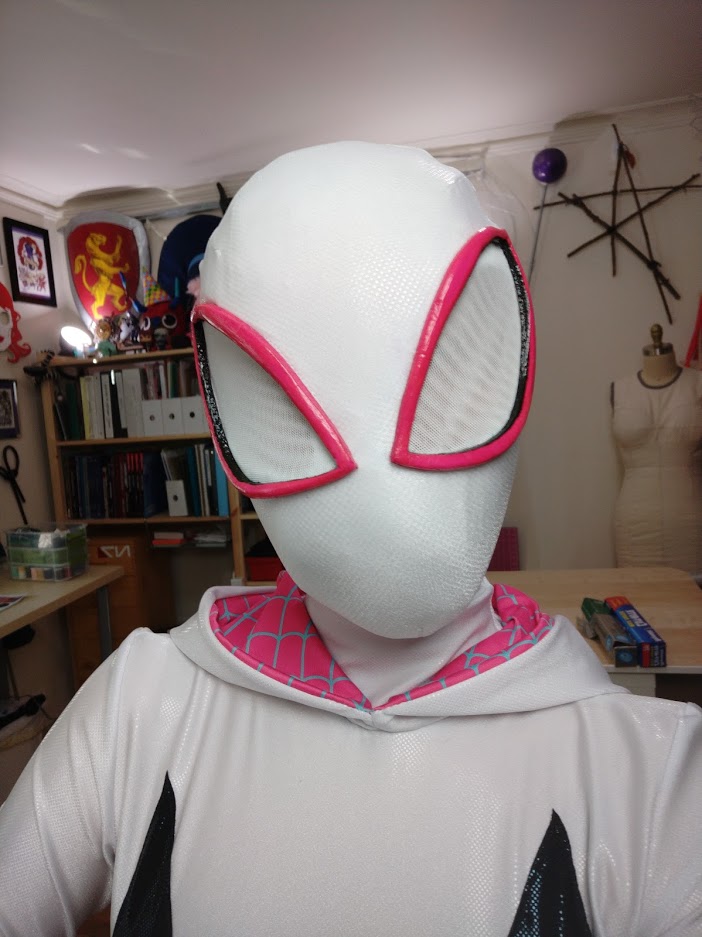
I sized and cut out the eyes with the mask stretched out. I stitched white stretch mesh over the eye holes, I used to layers so it was harder to see my face through the mask. The lenses were then made out of EVA foam that I beveled and painted with acrylic, before gluing them directly to the mask.
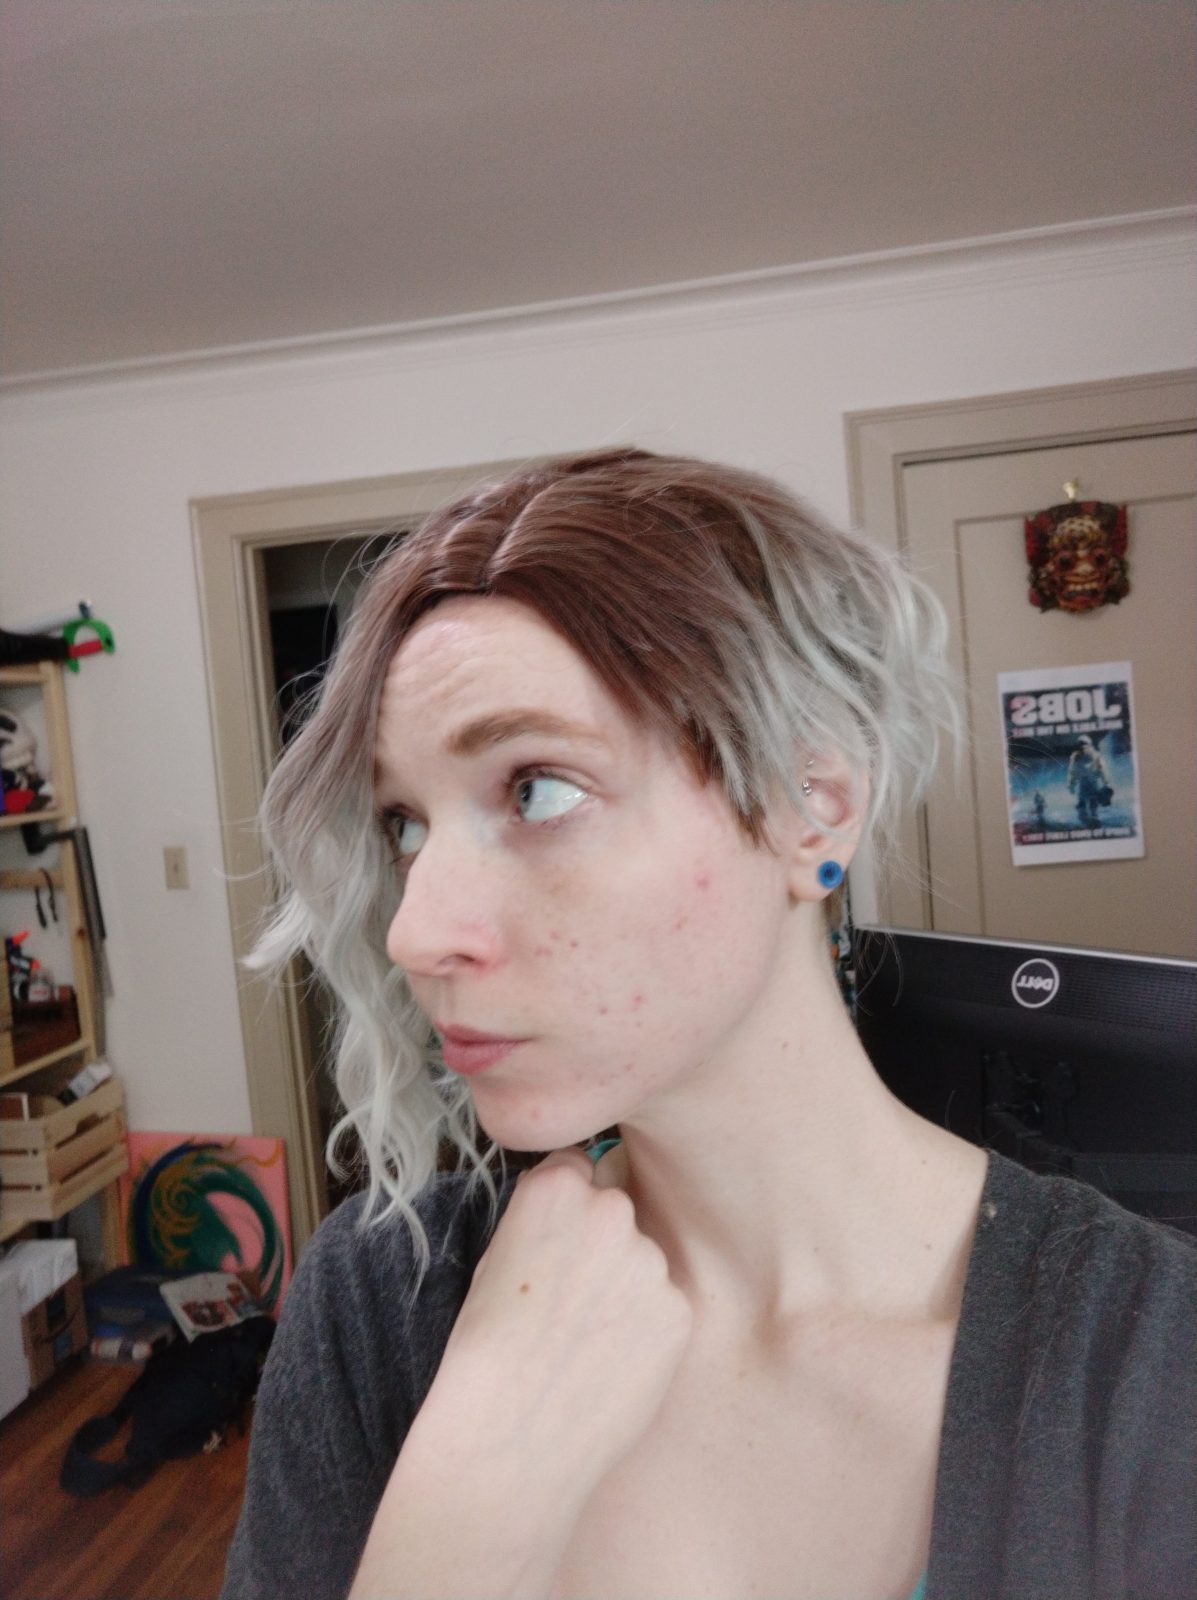
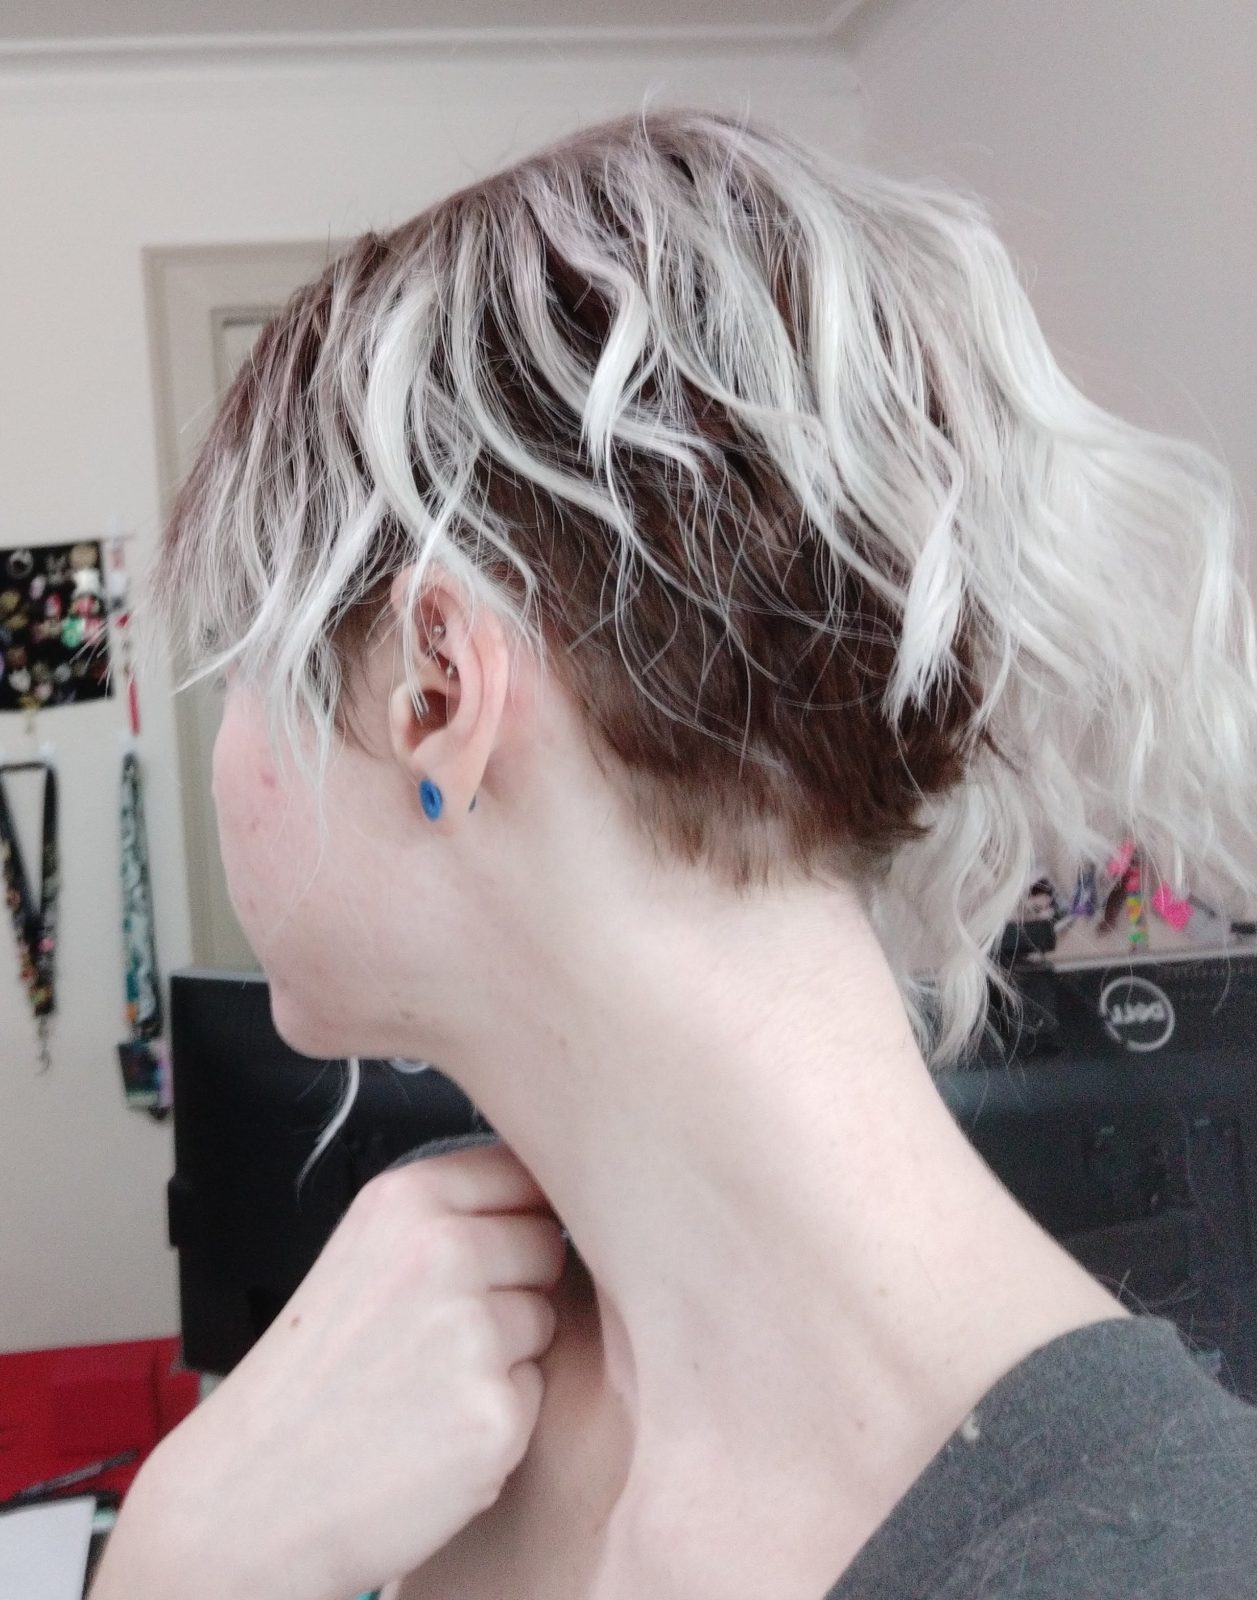
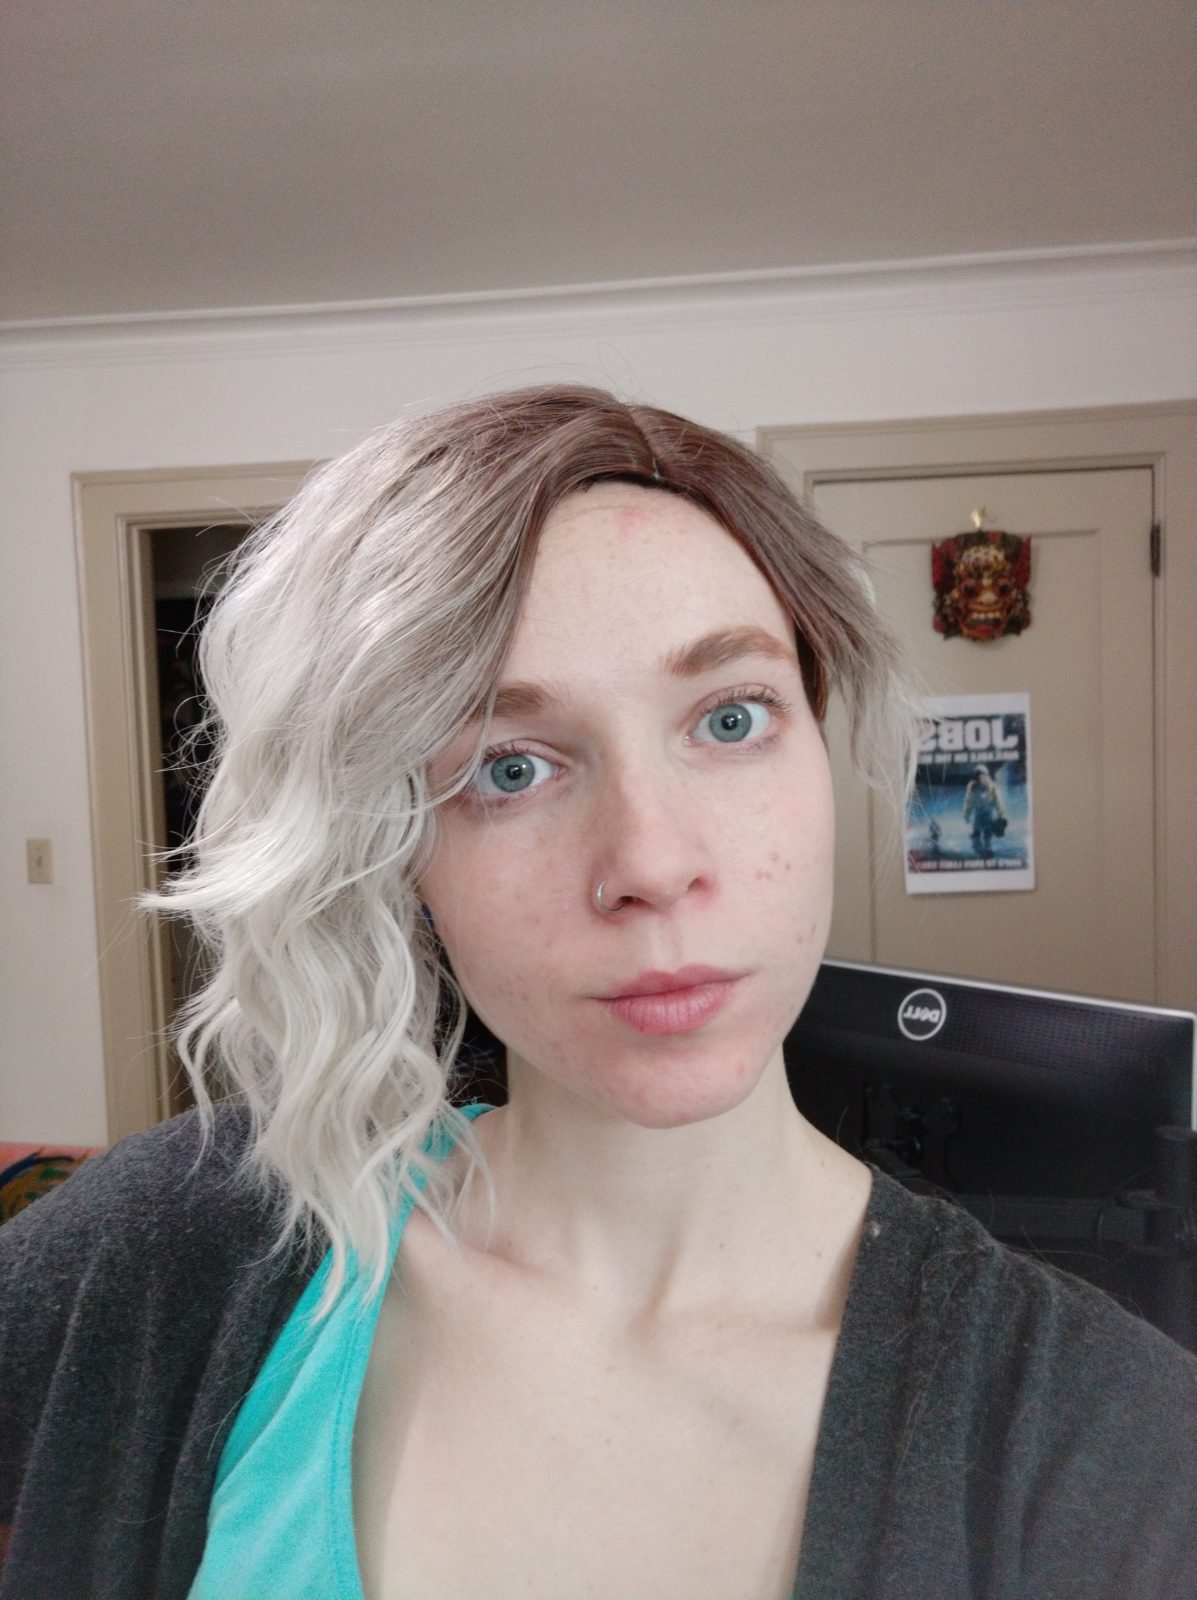
Wig
I also decided I wanted to have the no mask Spidergwen look. For the wig I used this wig as a base, the key part was the brownish red roots and the blonde, with a slight curl. I removed all but one row of wefts from the short side, and a good portion of the wefts from the other side too, the trick was really just taking them out and trimming them down until it ended up where I liked it. You can see more details of what it looks like in my video.
I used the short side of my own hair and use bobby pins, wig clips and a little bit of toupee tape to keep it all in place!