
I’ve made a few Assassin’s Creed cosplays, in fact now I have made four; this one in particular was no small challenge and I definitely I went through the many stages of cosplay feeeeelings… from “everything is awful” to “this is amazing”. As with most all Assassin’s Creed cosplays Kassandra’s is full of layers, belts that serve no function, and questionable physics; but if you too, like me, want to make your own Greek Assassin then this walk through should get you started!
This cosplay would not have been possible without the amazing support of my Patrons over on Patreon.

You can also check out final pictures of the cosplay, grab a pattern from my store or watch the visual walk-through:

Underdress
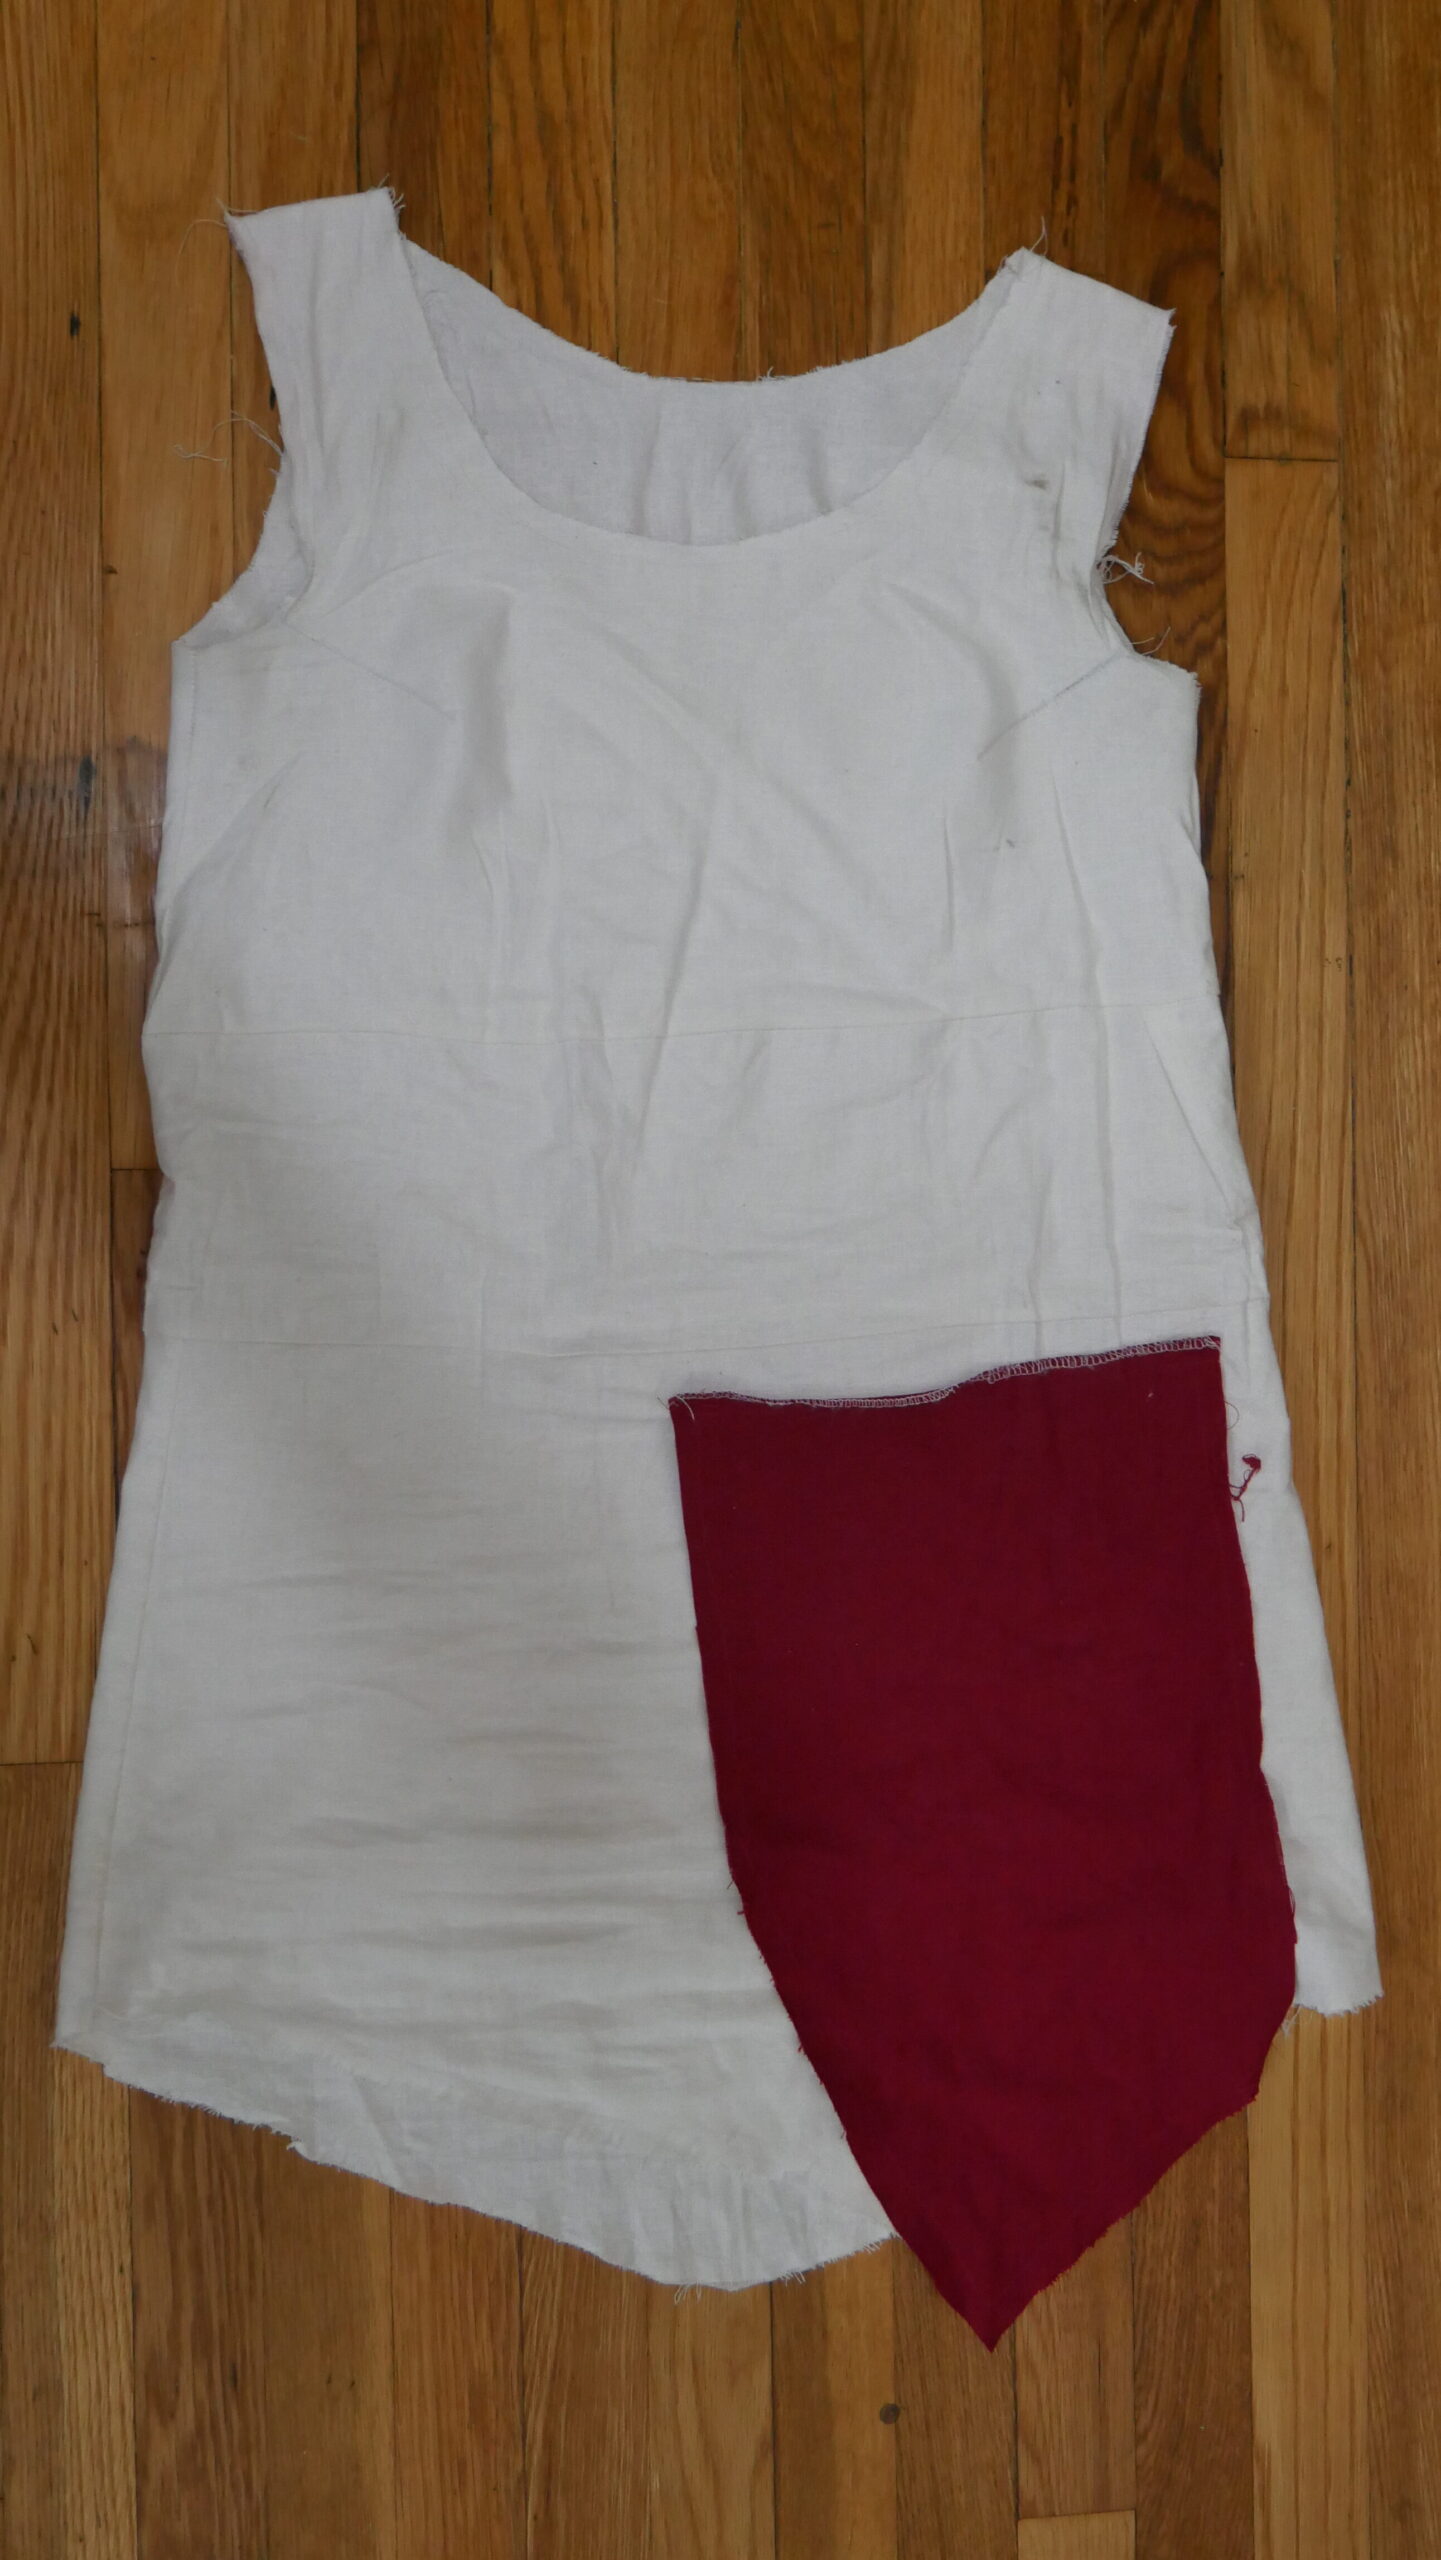
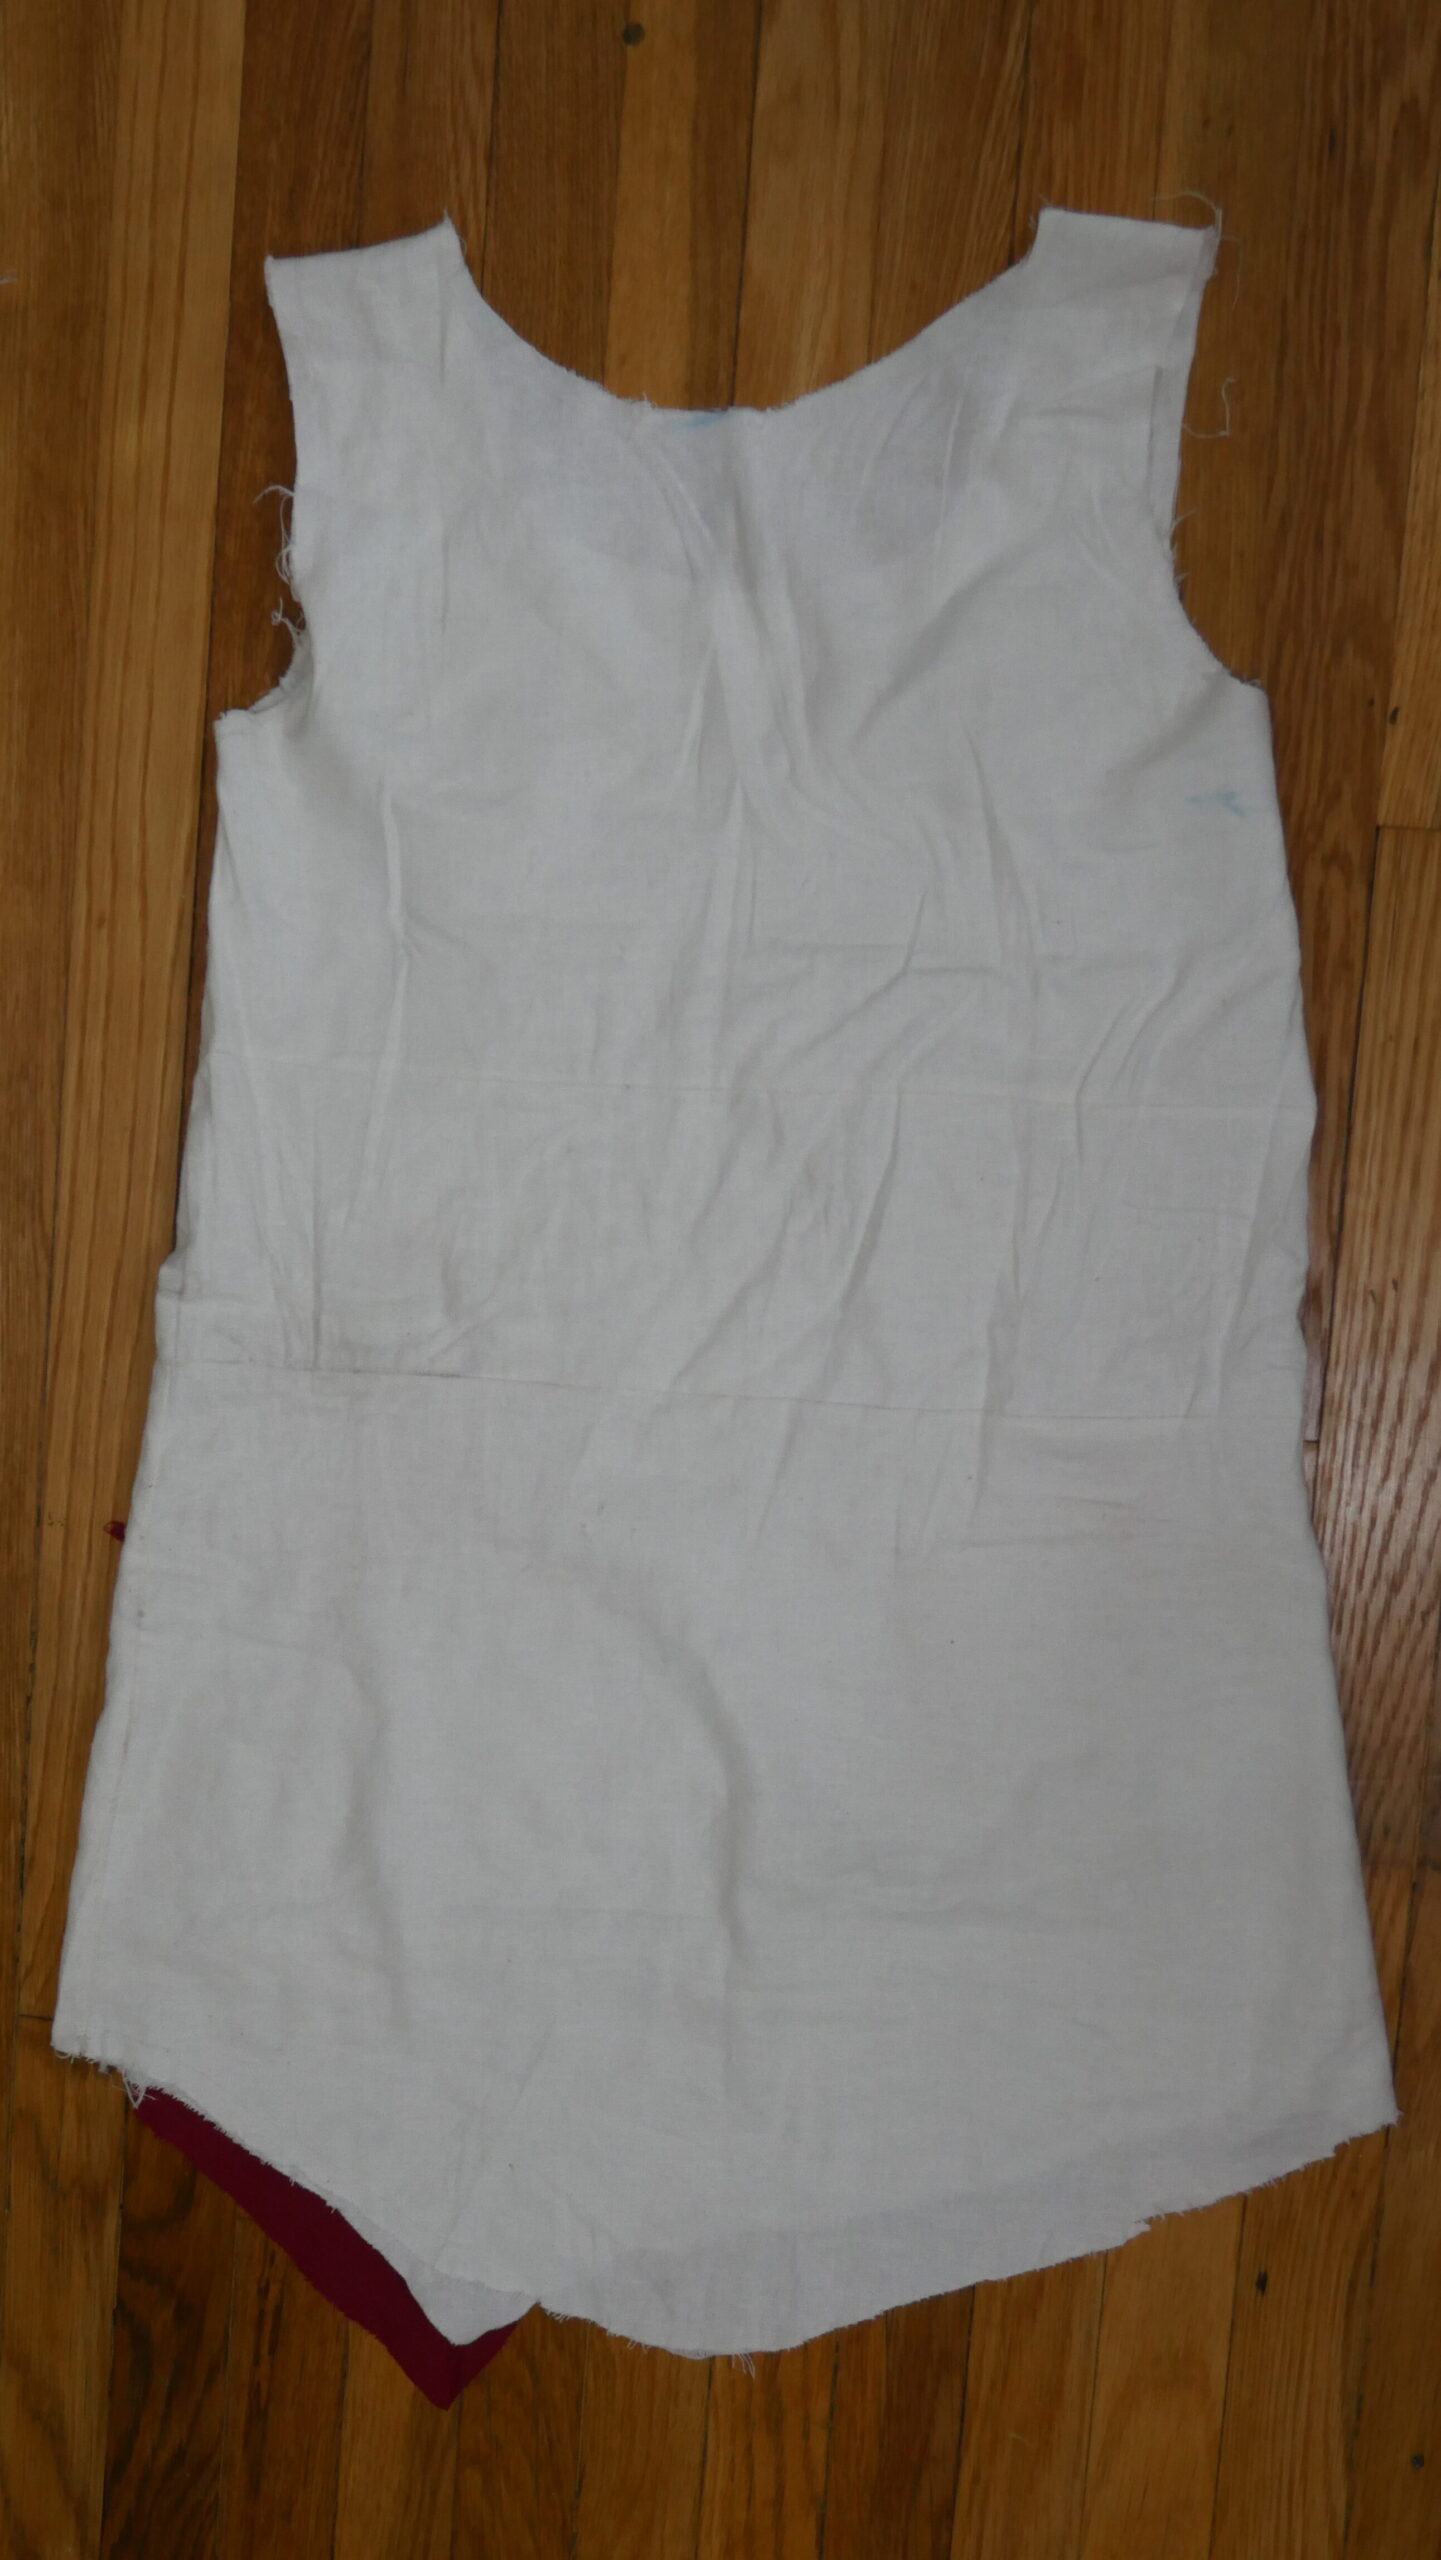
The base layer of this cosplay is a shift style underdress, which I made from a white rayon linen blend fabric – this gave the fabric a nice drape, while also having the rough texture that comes from most linen fabrics to make it more “old world” looking. In terms of structure, the dress is cut as an a-line wide enough to fit over the bust and the hips, and giving some wiggle room at the bottom hem, the only shaping are bust darts at the front to prevent too much gaping in the arm holes. All of the edges are left raw, and the bottom hem and neckline are cut to match up with the reference images. You’ll notice I ended up adding in extra material, which was only because I made my dress to short! The red section was made from a red linen blend, and simply cut to shape and then sewn directly to the front of the dress.
Breastplate
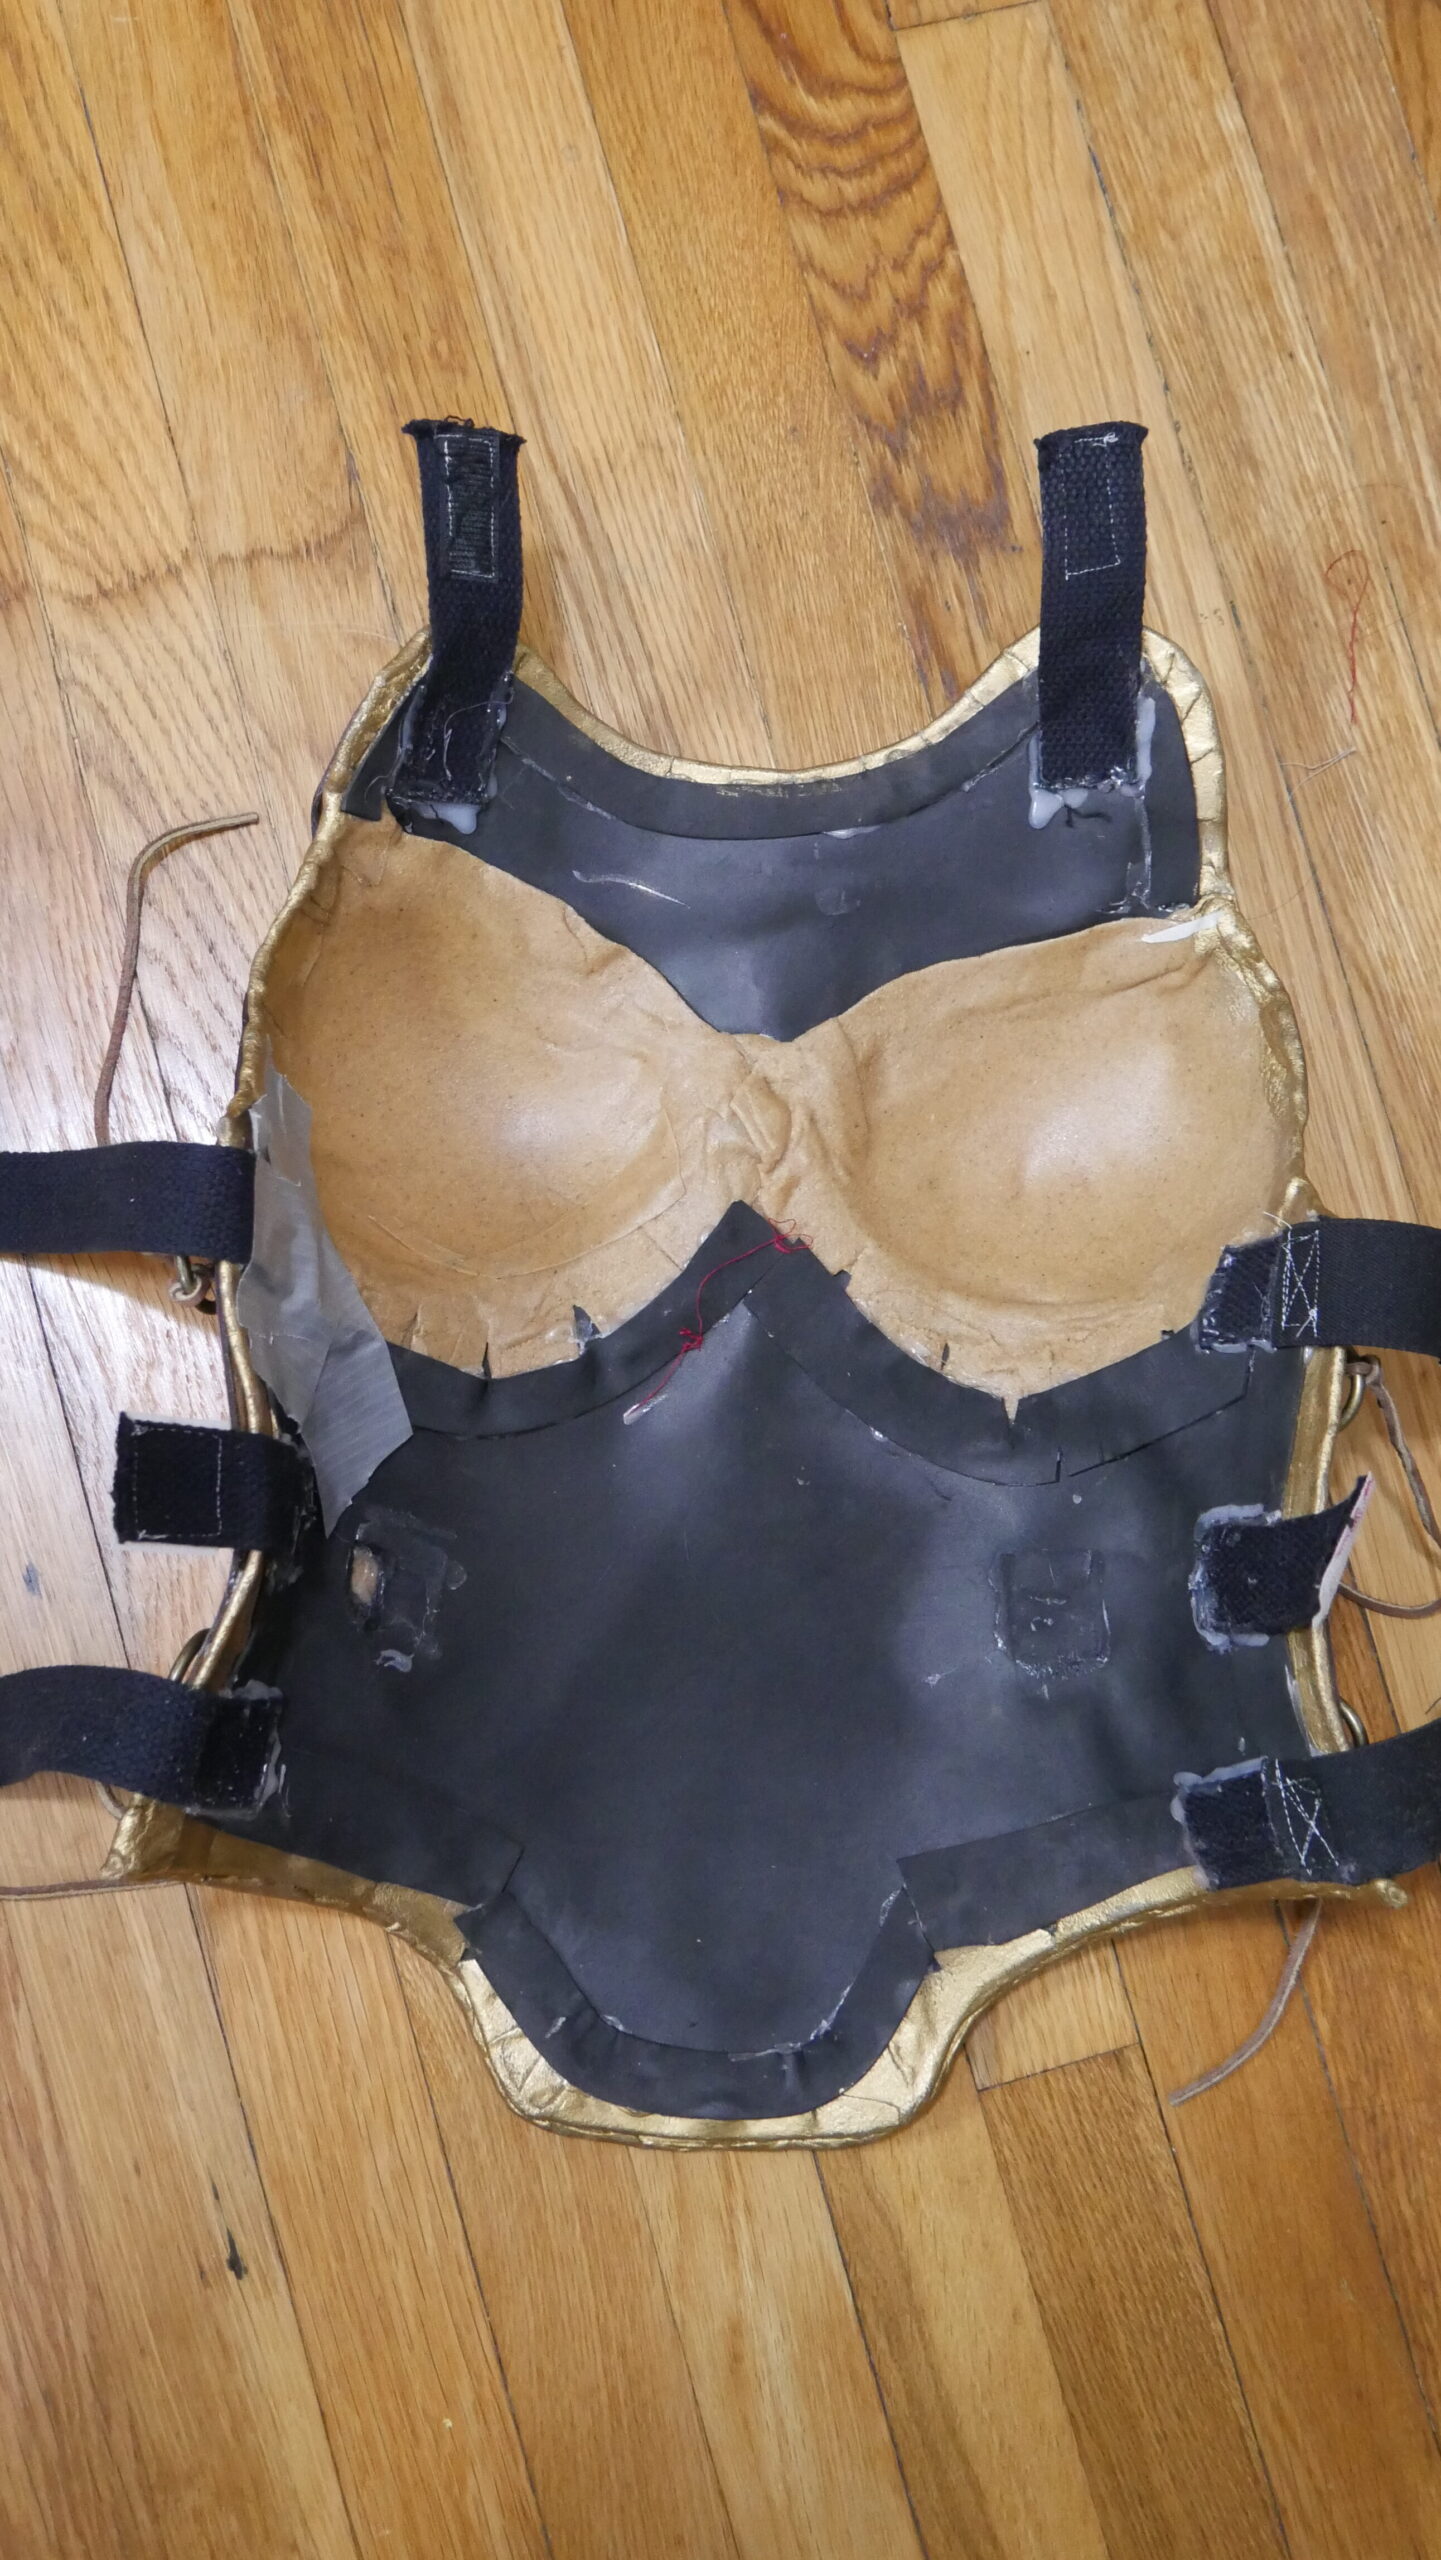
Making the breastplate was a bit of an ordeal and a learning process, I started by using the tried and true method for patterning – I had a buddy wrap me in cling film and then tape, we then drew on the pattern lines and cut me out. I suggest Kamui Cosplay’s books as a good guide to getting started with armor. The pieces were then cut so they would lie flat and this was used to give a rough size and shape for the armor pieces. The template available in my store will also give a rough shape, with some cutting guidelines (dotted lines) but you will need to adjust it to your form.
I started first by making the boob cups, these were made out of a double layer of worbla formed over in my case two cake tin spheres (you can use what ever will give you the right shape for your boobs). Kamui Cosplay has a great tutorial introduction on shaping boob cups out of worbla. Once I had the right amount of curve I trimmed the cups into shape at the top so they would slope smoothly towards the collarbone, Kassandra’s breastplate only has under boob definition, not a cleavage shelf.
I then created the stomach and chest sections. Both of these were made using the pattern from the body wrapping, with a base layer of 2mm EVA foam, which I then wrapped in worbla. These two sections were then adhered to the worbla boob cups using the adhesive properties of the worbla. The goal is to create some under-boob cleavage but leave the line from the boobs to the collarbone nice and smooth. On the plus side most of this exterior will be covered in leather, so it is forgiving of some lumps and bumps. I then secured and smoother the interior edges with some bits of EVA craft from to cover the worbla edges.
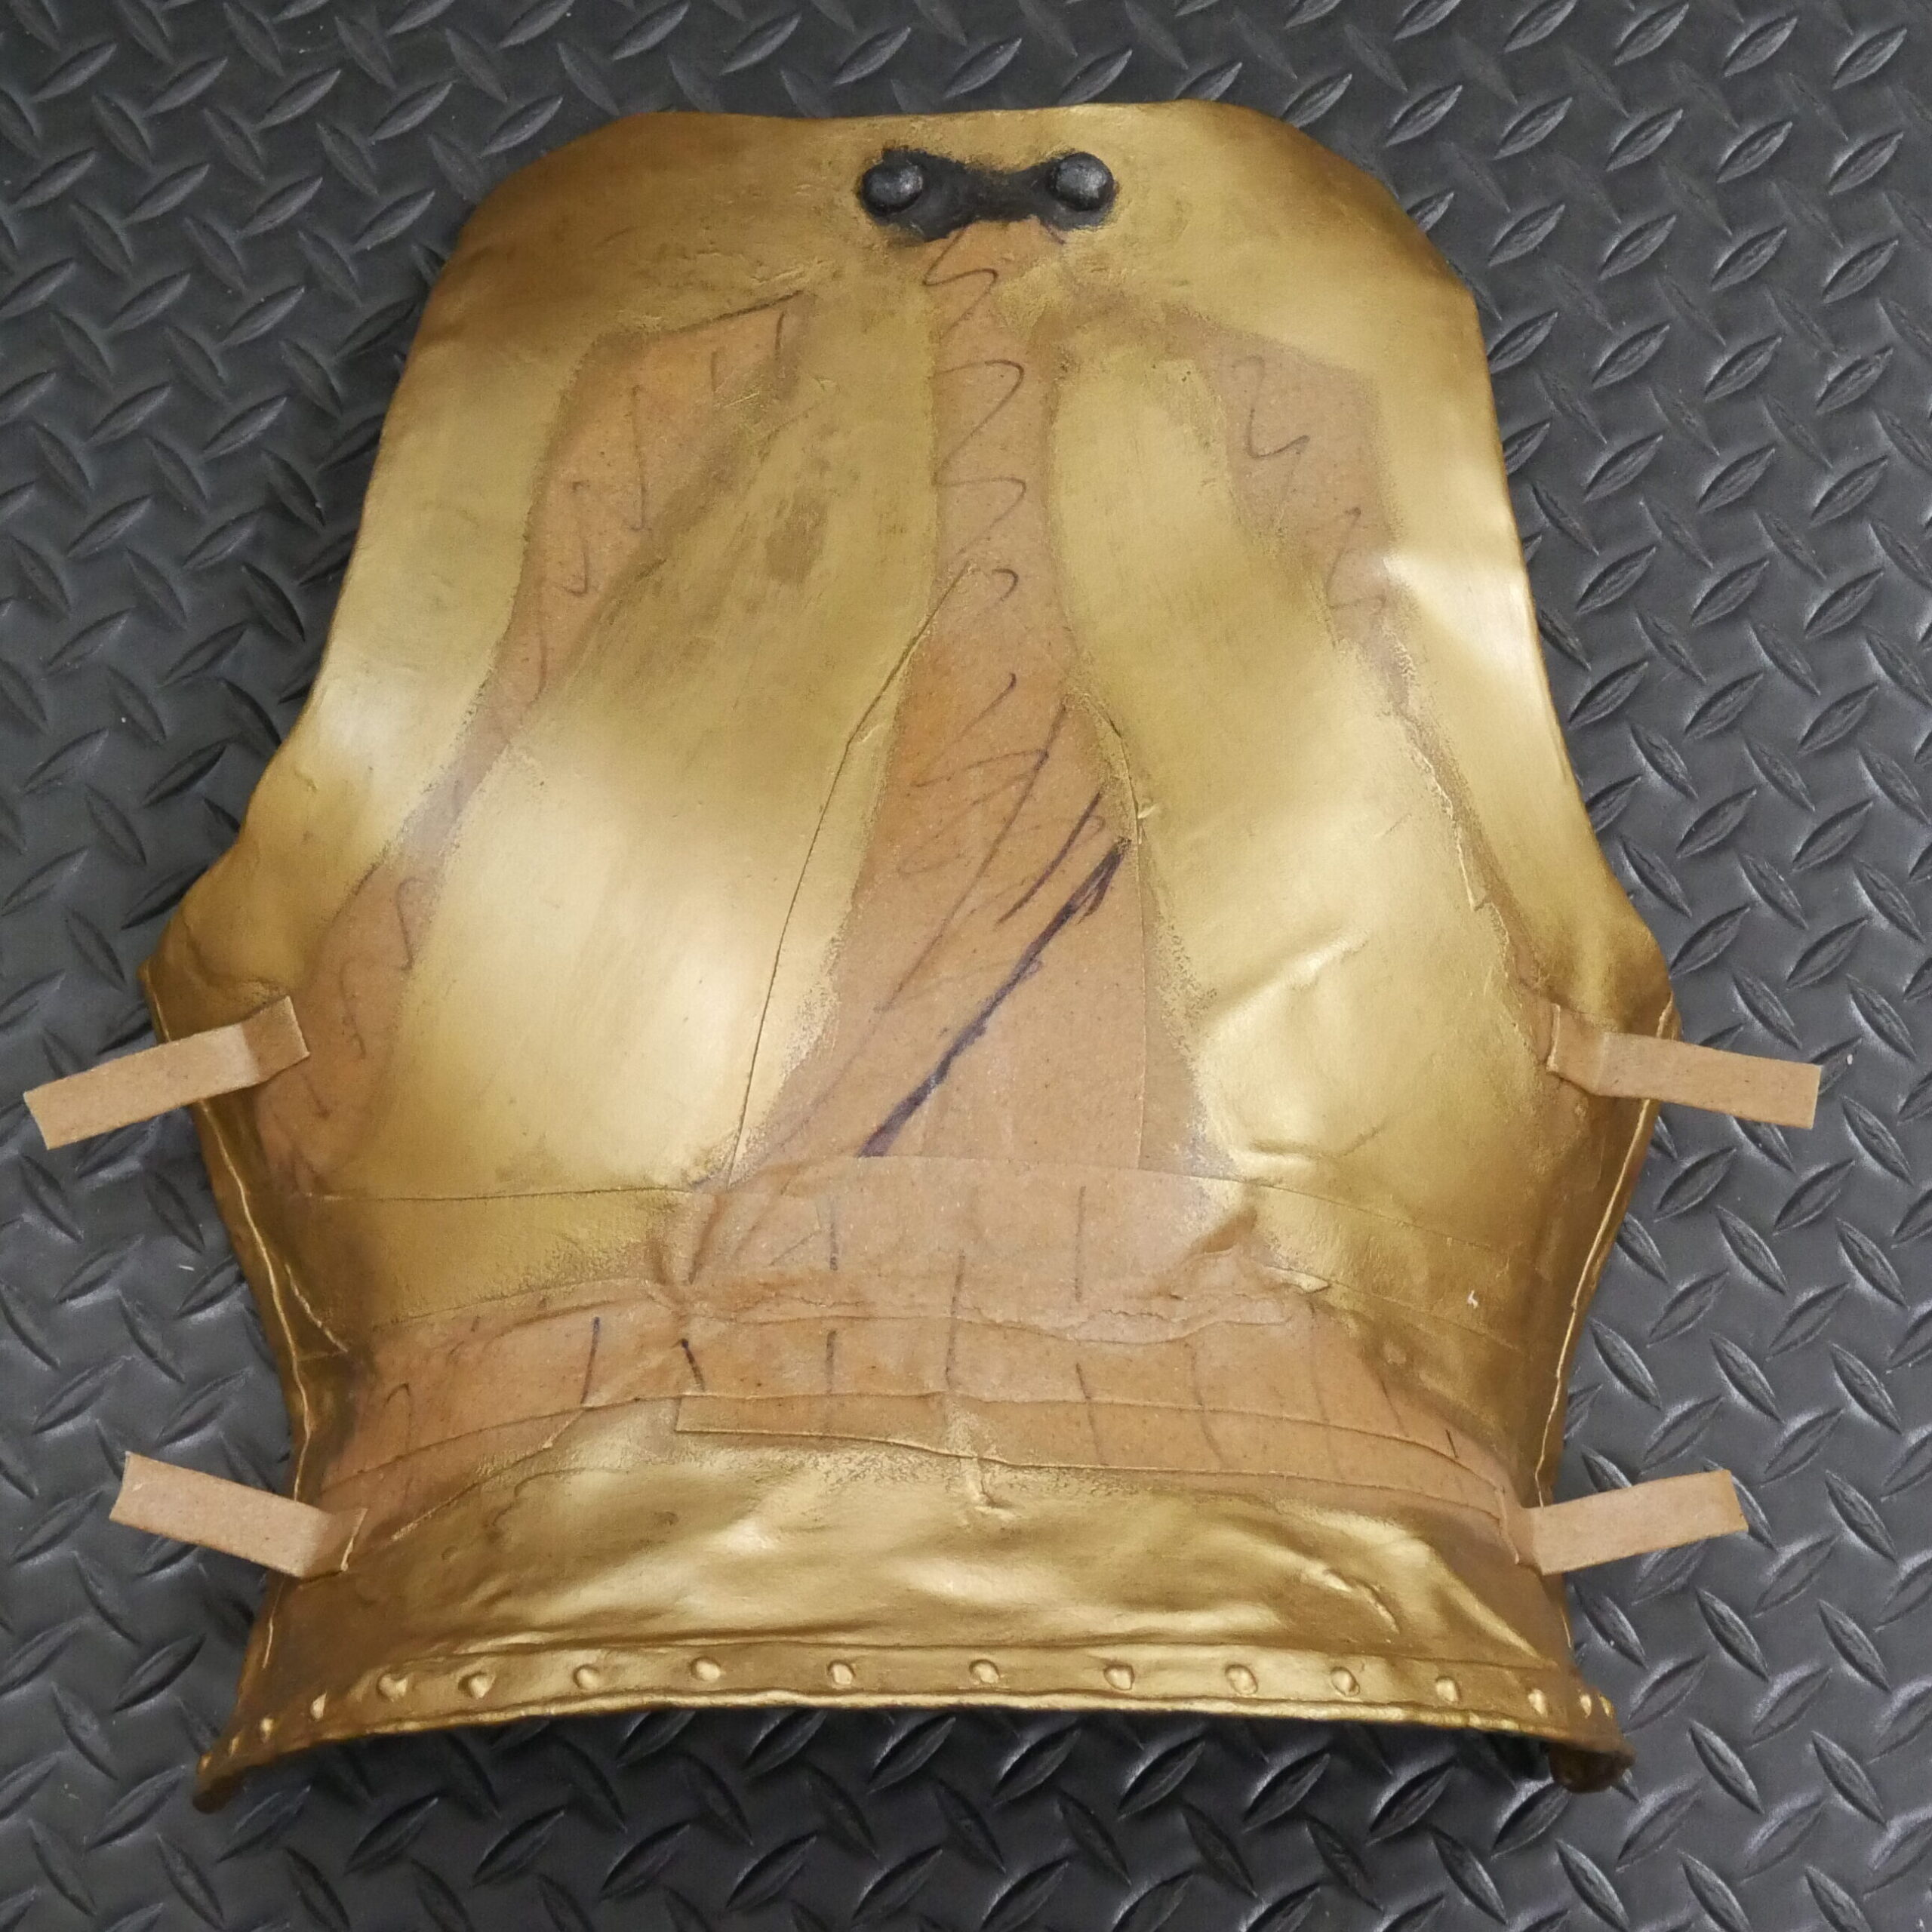
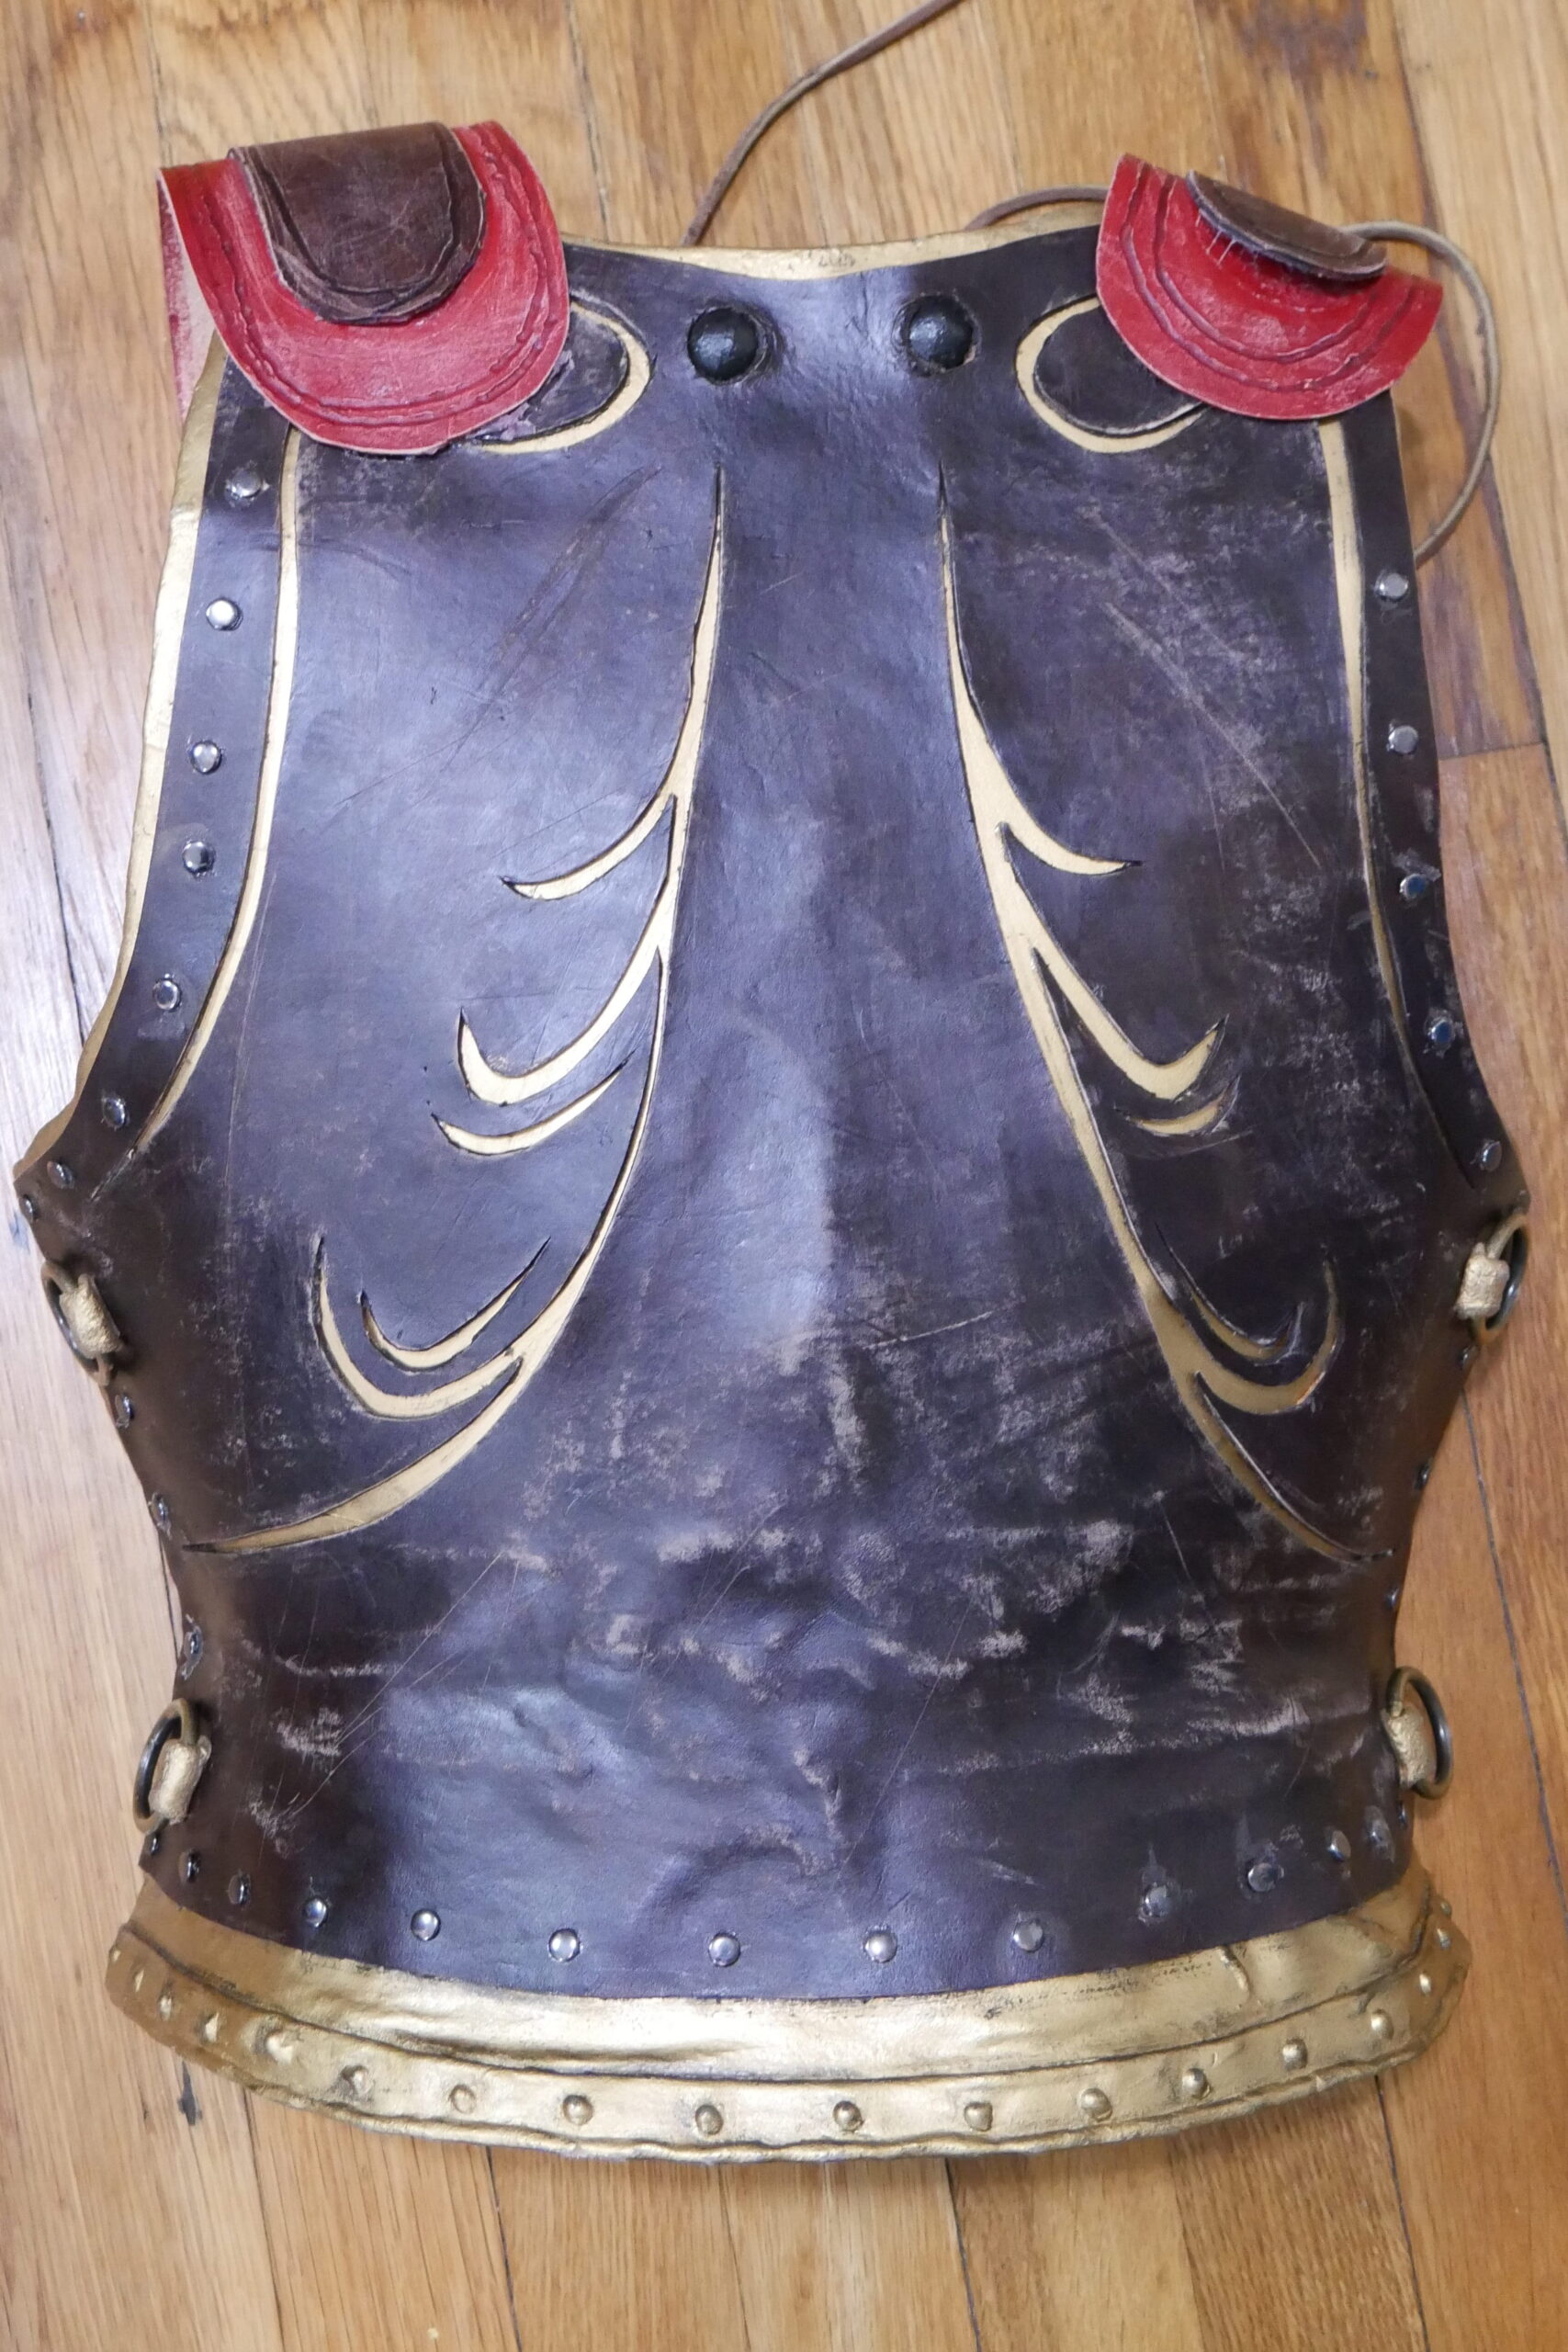
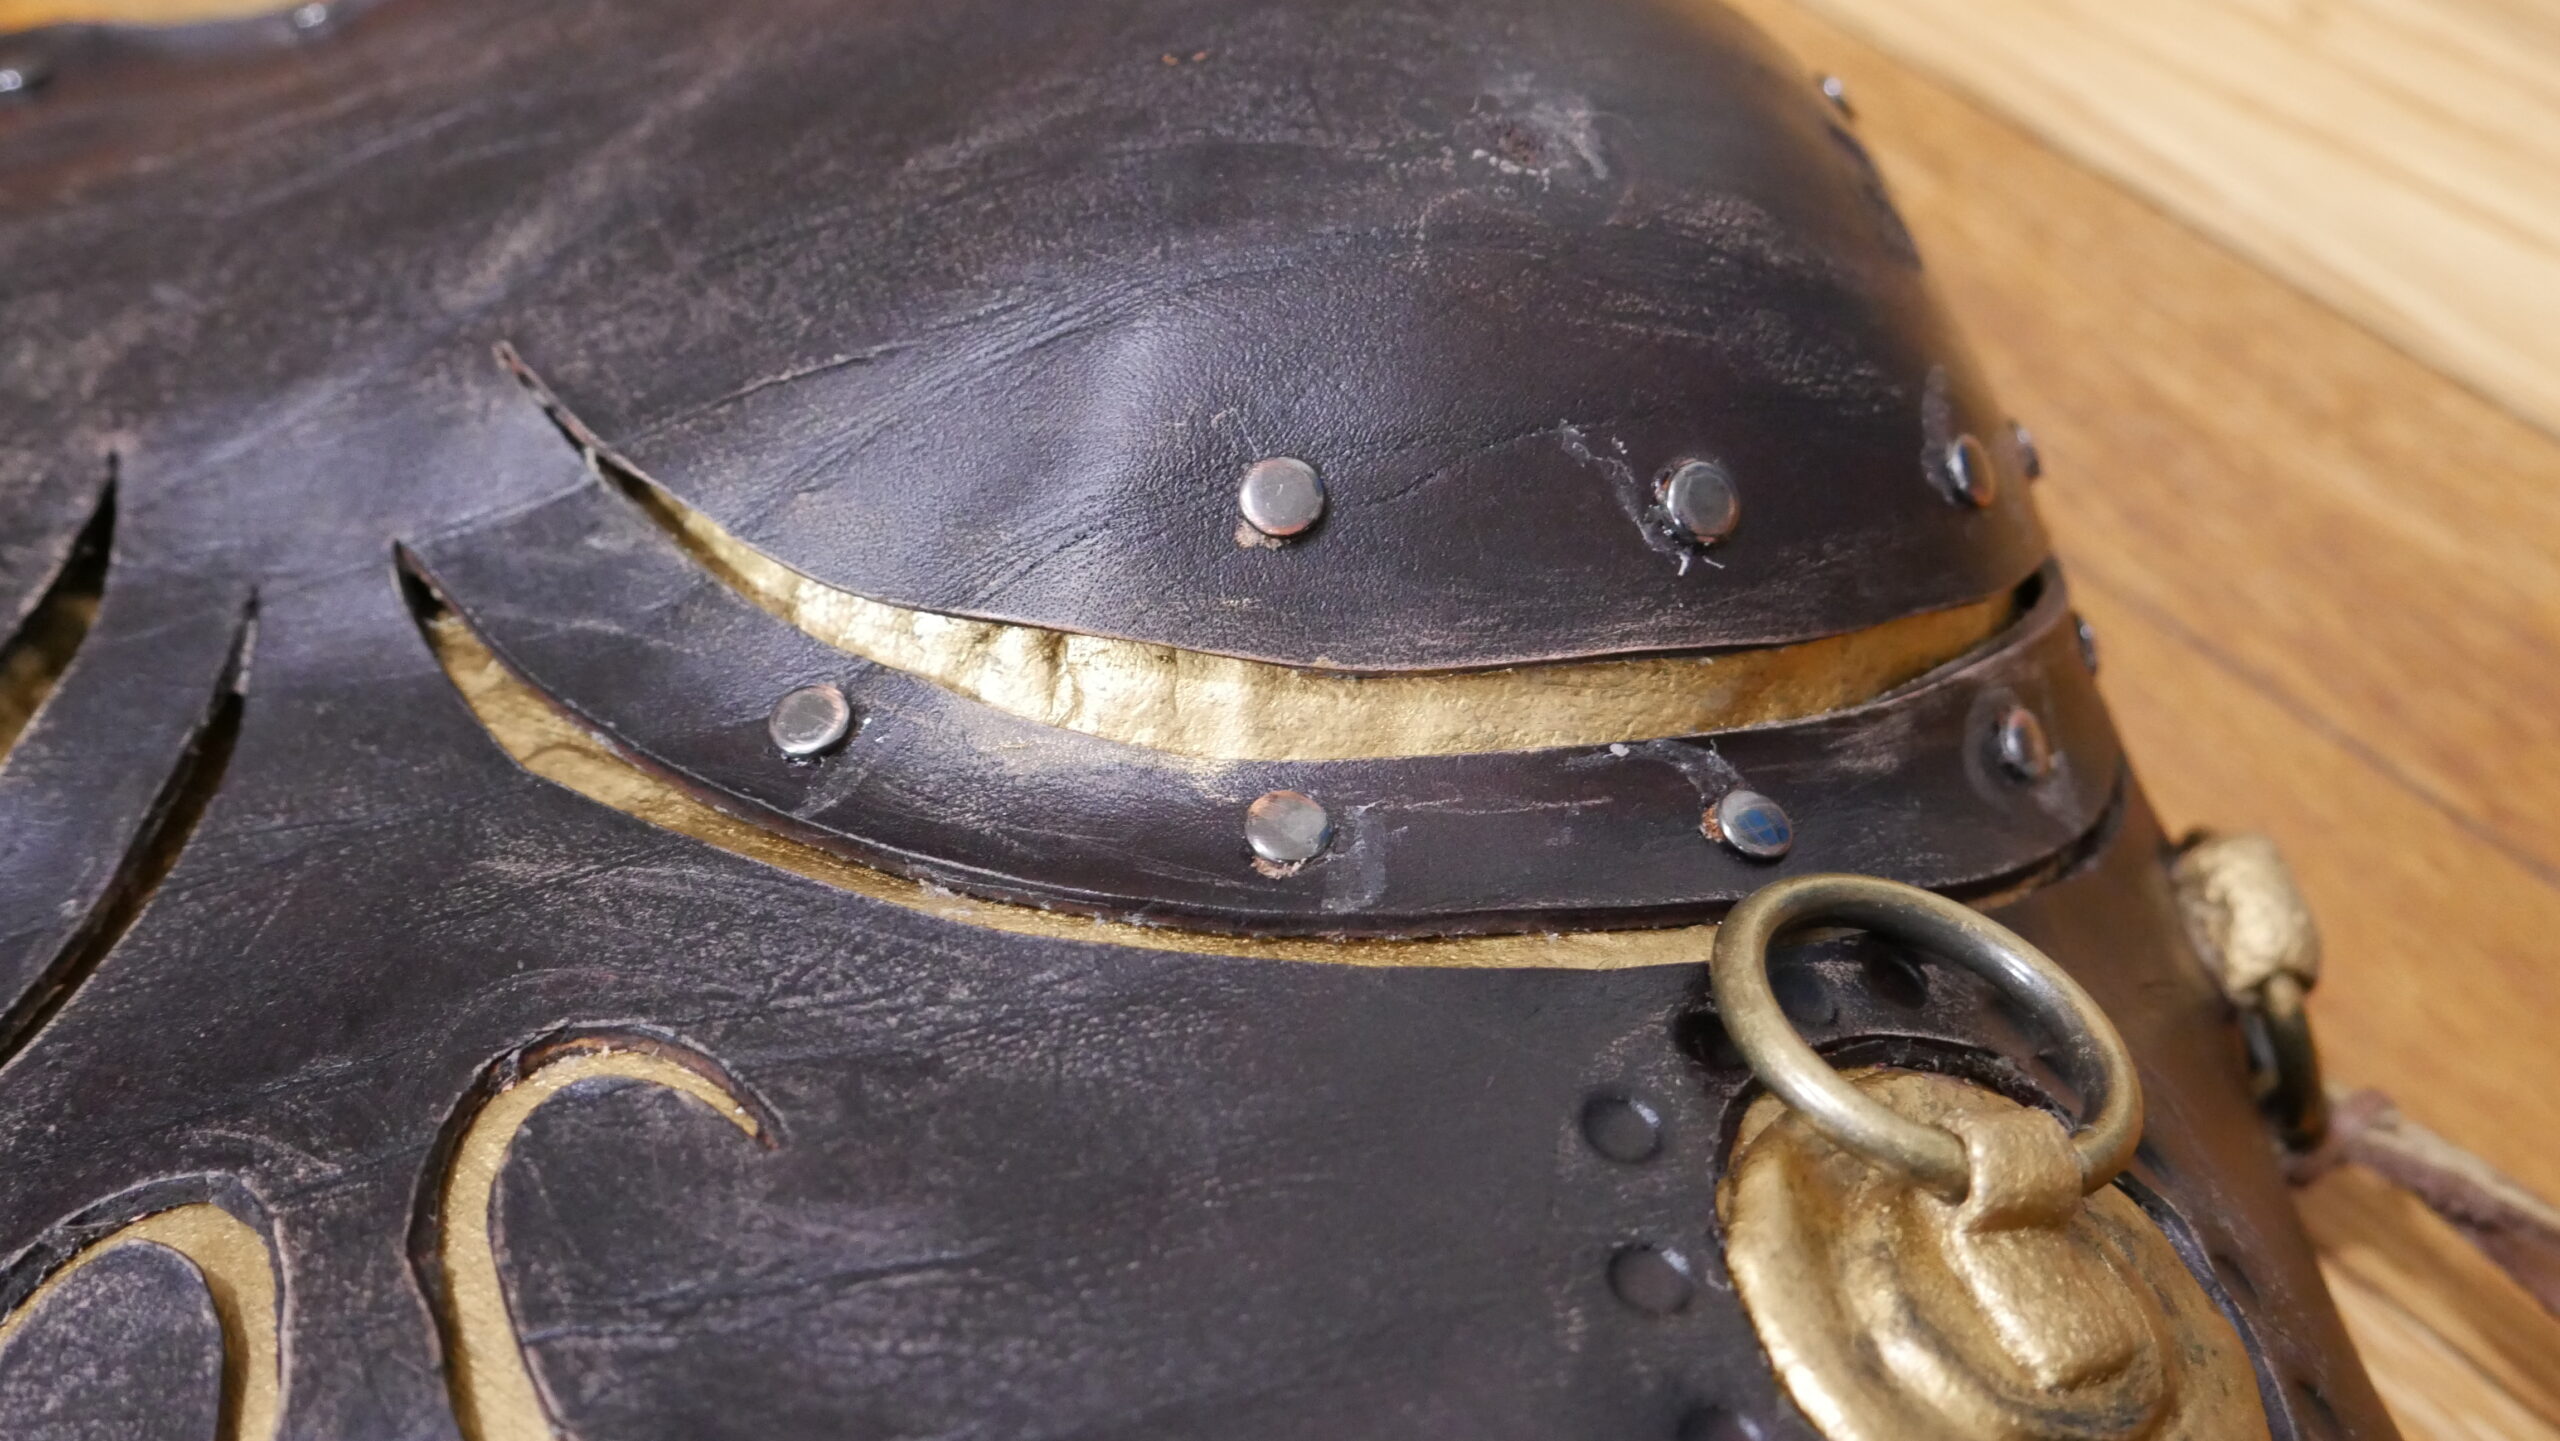
Next came the details and decorating. I added the bottom raised edge using layers of doubled worbla, and some dots of hot glue. The tabs on the side would be used to hold the o-rings on the side, and I wanted to attach them under the leather to they were stuck on first but not closed until later, so they would slide under the leather. The worbla was primed using Rosco Flexbond and then painted gold with rub and buff, I only bothered to paint the edges and the areas under the leather that would actually show.
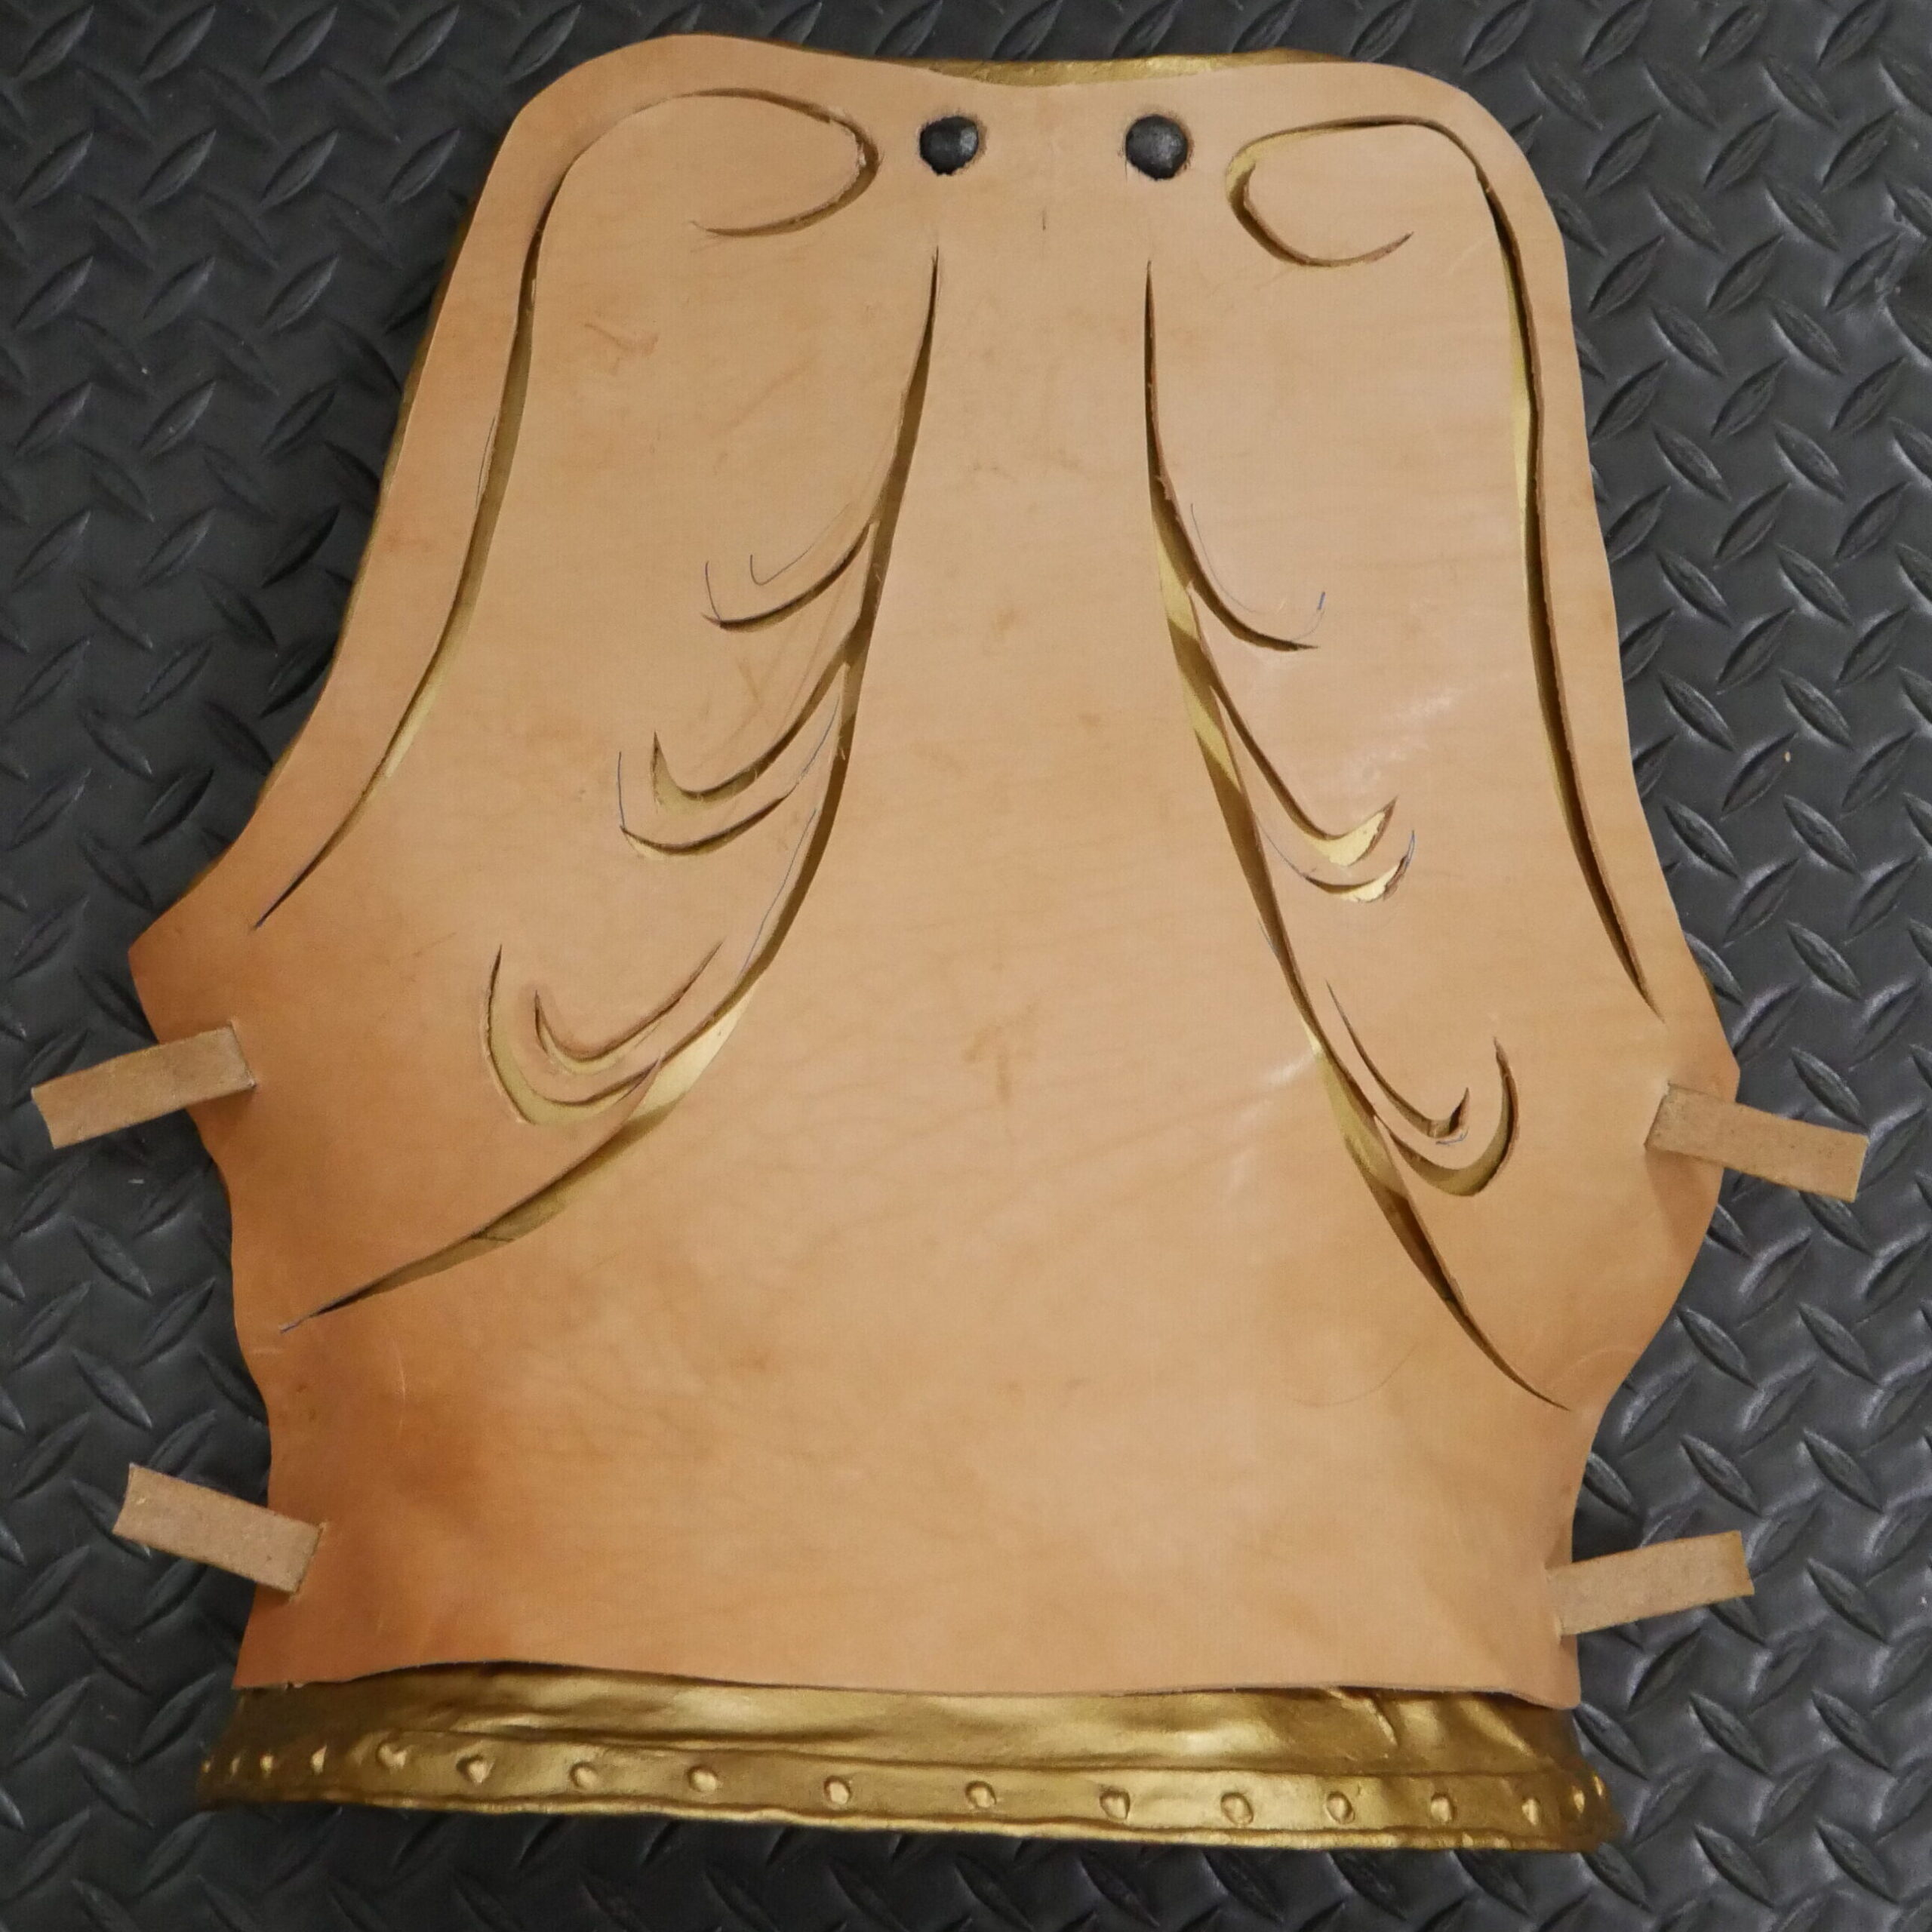
The leather covering was made from a 4-6oz veg-tanned leather, these were wet formed to stretch the piece into the correct shape, and then trimmed to the exact shape after forming. There are a lot of great guides and resources for wet forming online, I looked at a few different ones). Essentially it involved soaking the leather in warm water (really I found just running it under a tap for a minute or two was enough and then stretching it over a form or with your hands to the right shape. The main trick is then having it dry over some sort of mold so it retains the shape, and the leather takes a long time to fully dry!
After cutting and shaping the leather I dyed it using water based EcoFlo dye in Dark Brown, this guide gave some very helpful information on dyeing leather. I primed it using olive oil and then used a rag to apply several layers (around 3 or 4) of the dye till it was a nice dark color. I sealed the leather using EcoFlo Satin Sheen and then used sand paper to rough the surface a weather the leather. On the front section I also hammered the circle indents just using a metal post that was the right sort of size. Lastly after it was shaped, cut and dyed I glued the leather directly to the worbla pieces using barge contact cement.
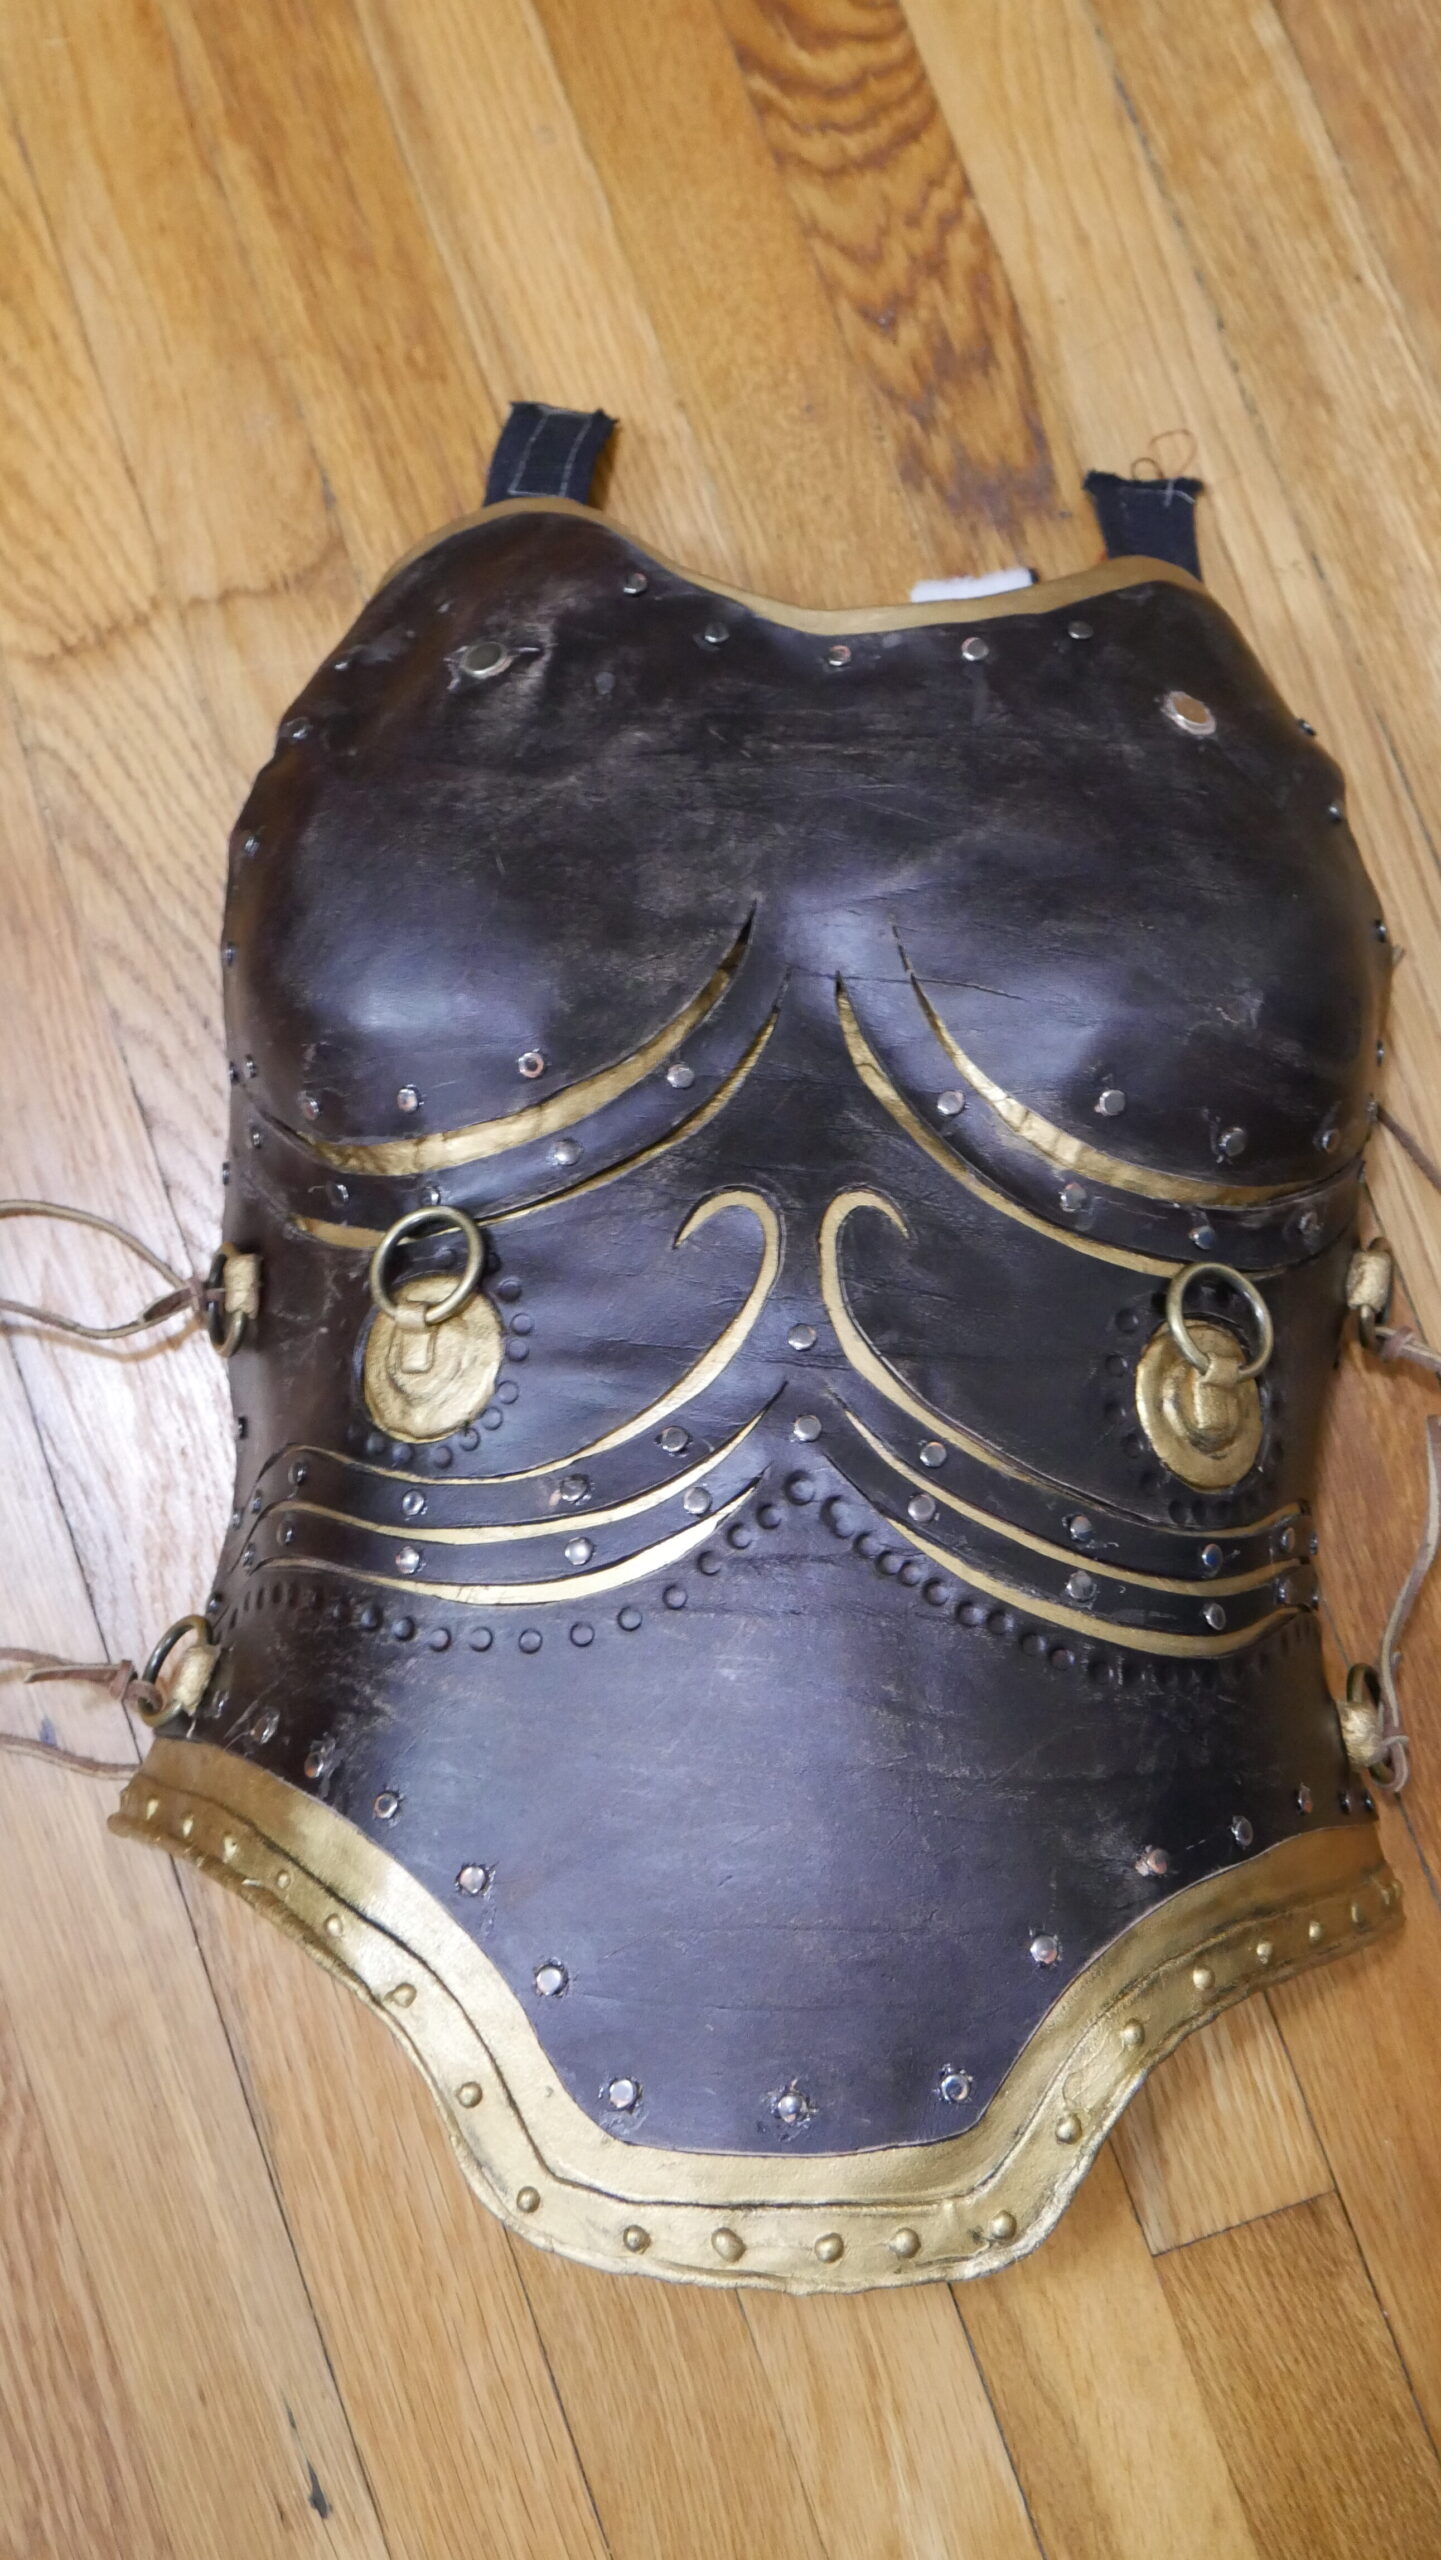
After the leather was glued in place it was time to add the detailing. I closed the side tabs around the o-rings and trimmed them to size then seal and painted the gold. I then glued on the heads of a large number of gun-metal silver rivets (suggestion by double headed rivets as it will give you twice as many to work with), with E6000. I needed to cut some indents as I was working as I couldn’t get the rivets to always be completely flat. I then did some additional weathering with sand paper and some dark brown acrylic paint.
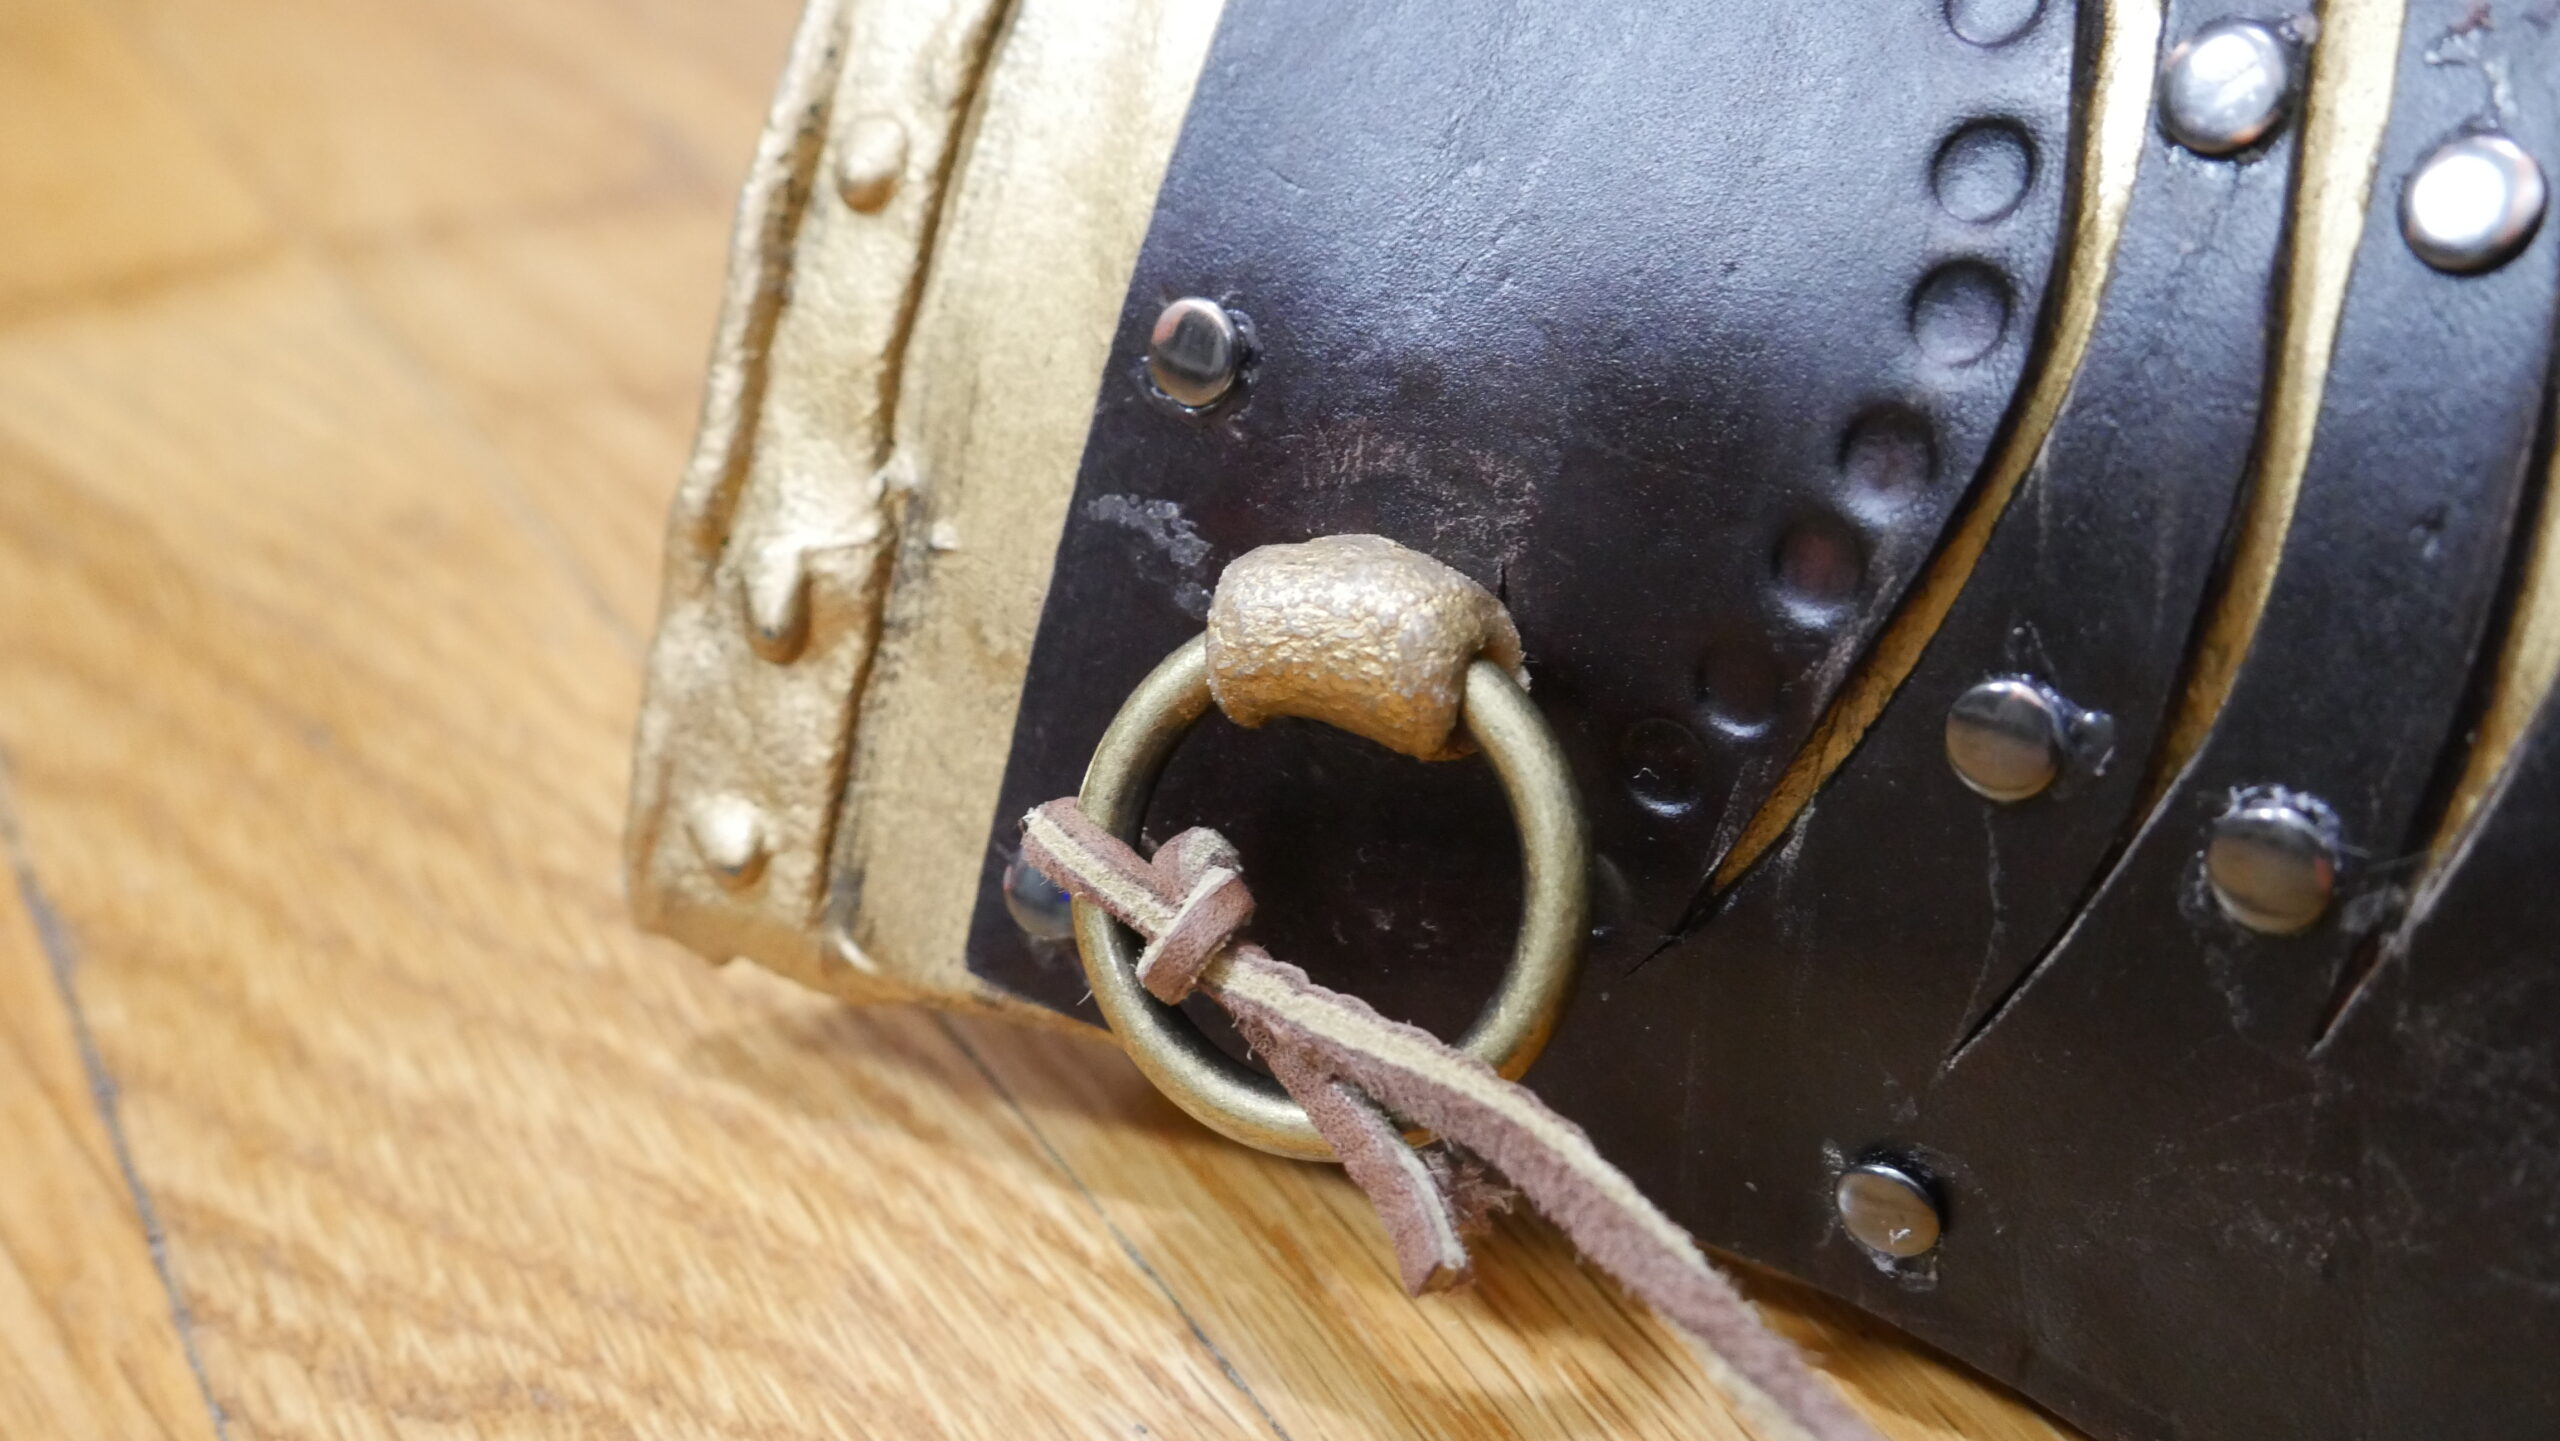
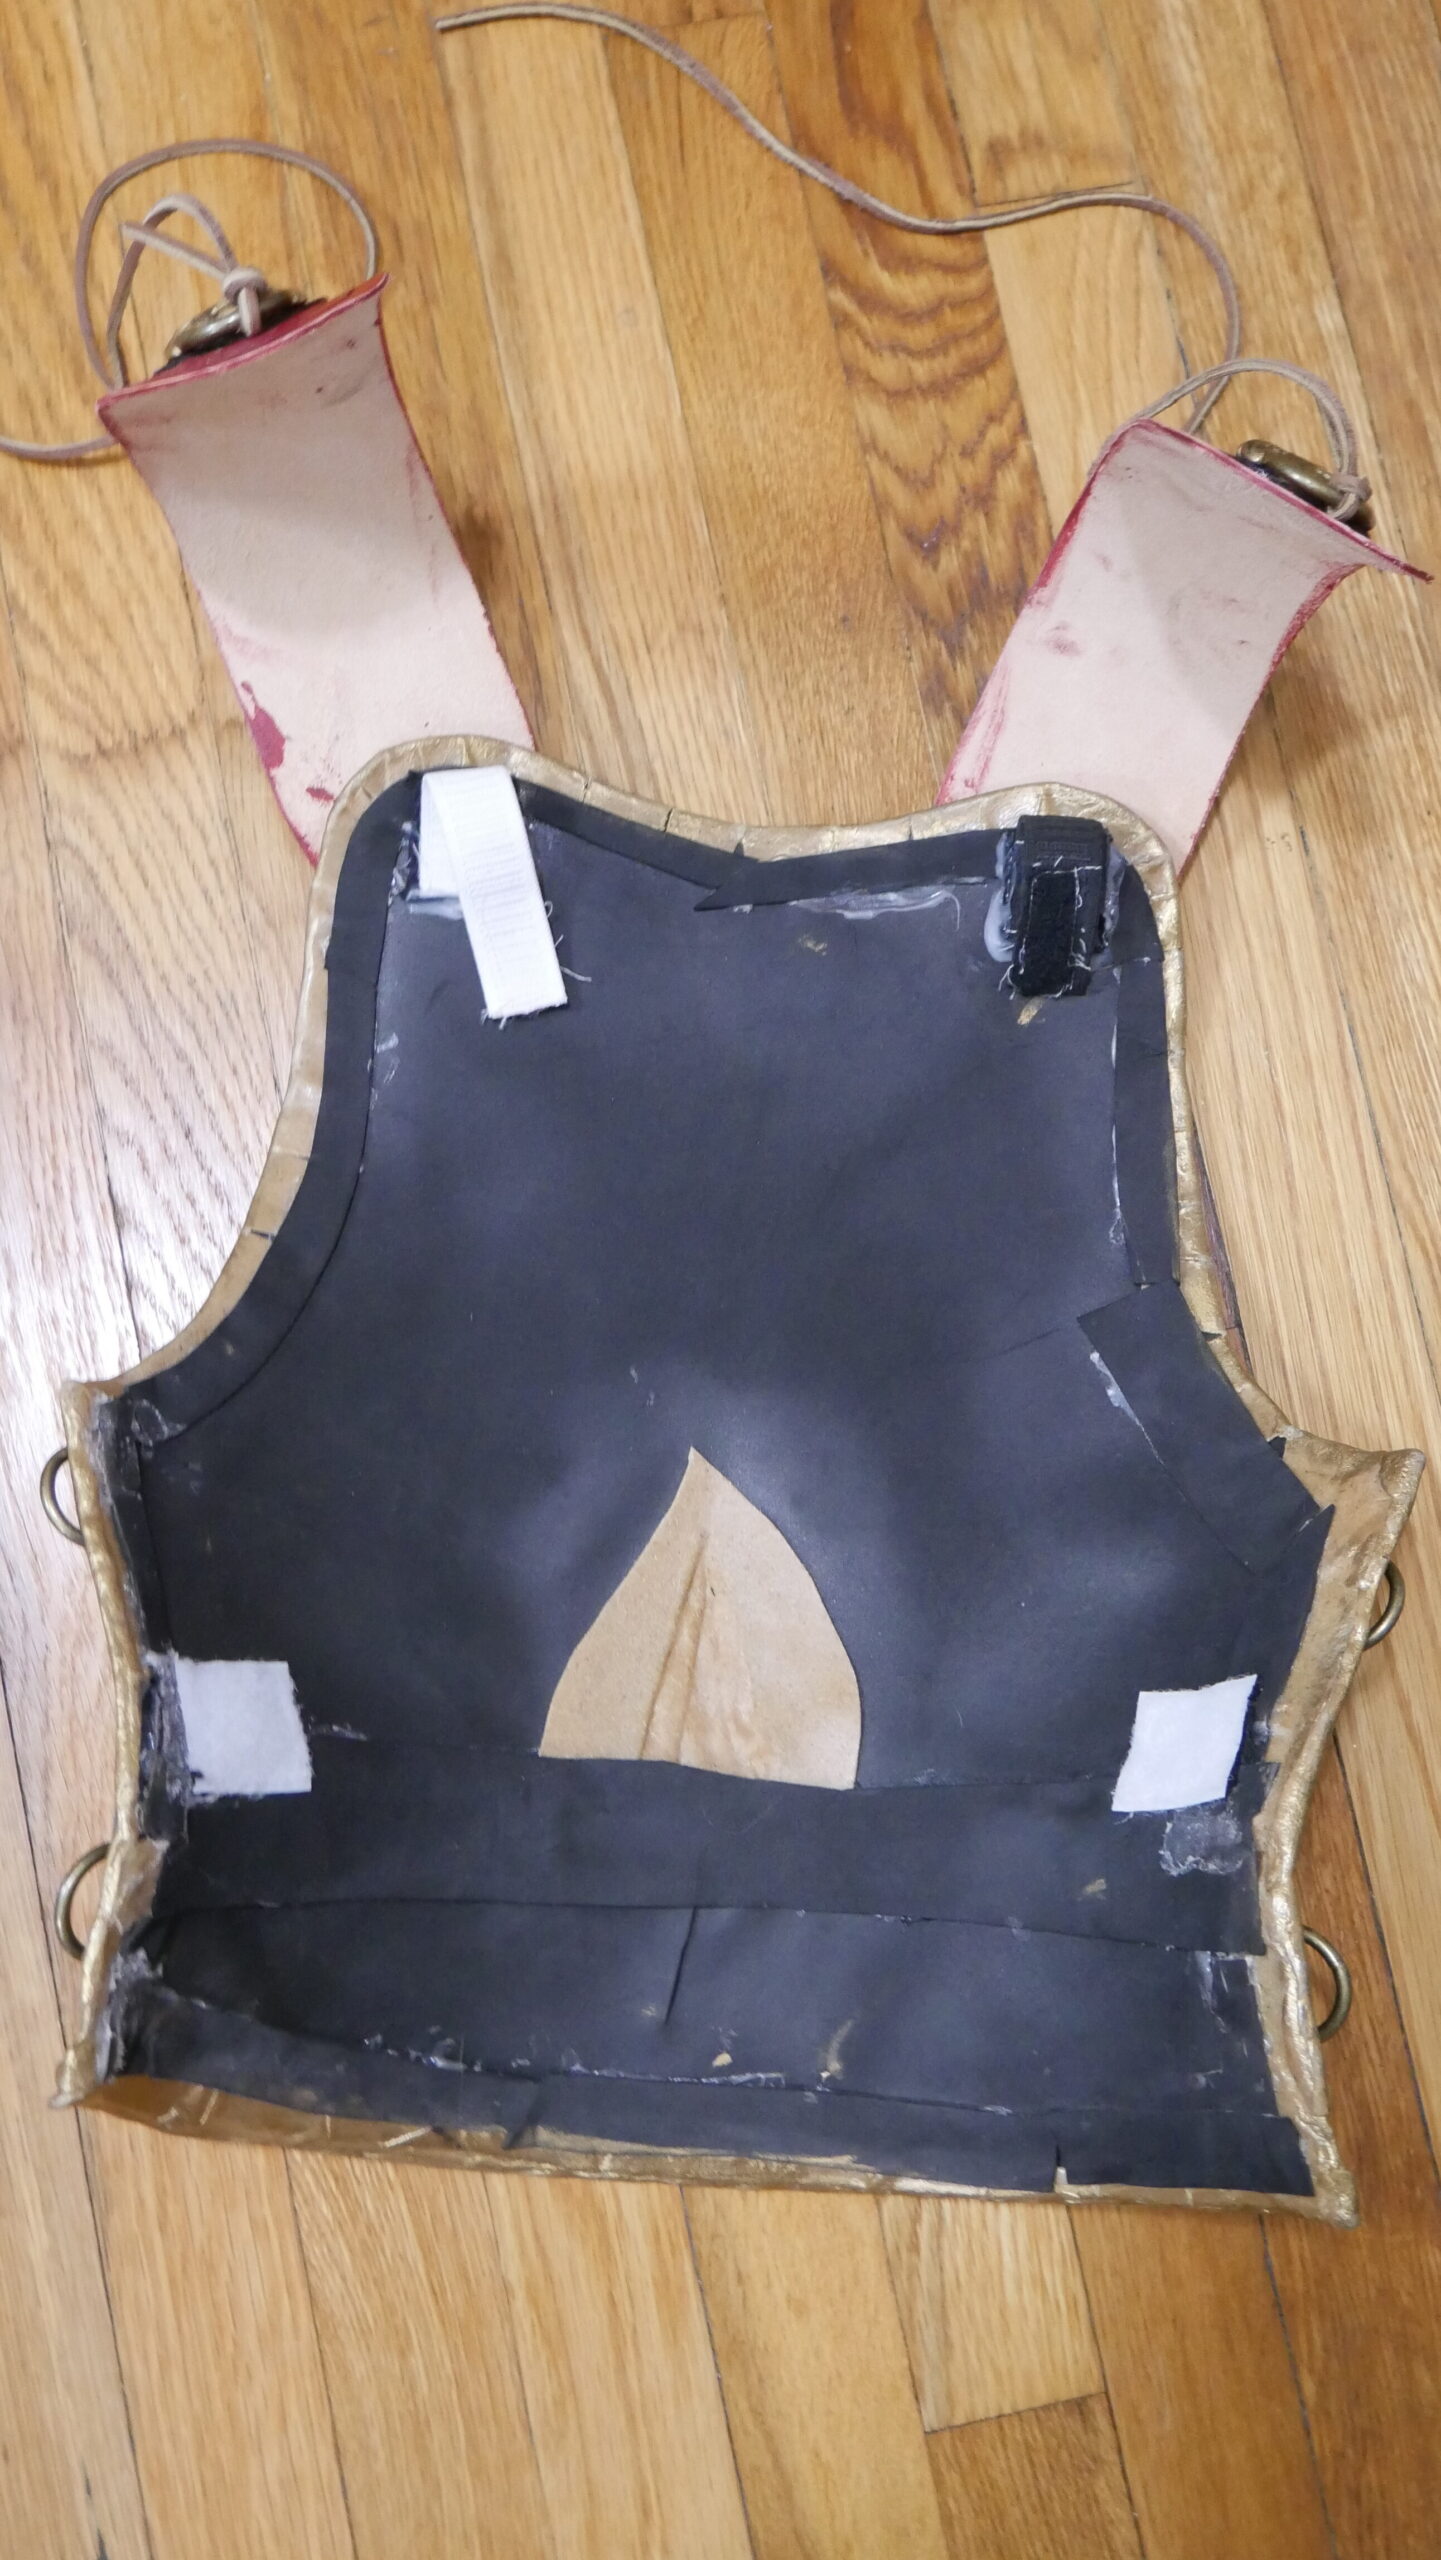
Next I made some internal strapping out of webbing, elastic and Velcro, the straps hold the front of the breast-plate to my torso, and then there are smaller tabs to line up the back of the breast-plate, the two sides are kept together with the leather cord through the o-rings to really get a sung fit. There are also two elastic and Velcro straps on the shoulders to help keep it together and reduce tension on the leather shoulder straps.
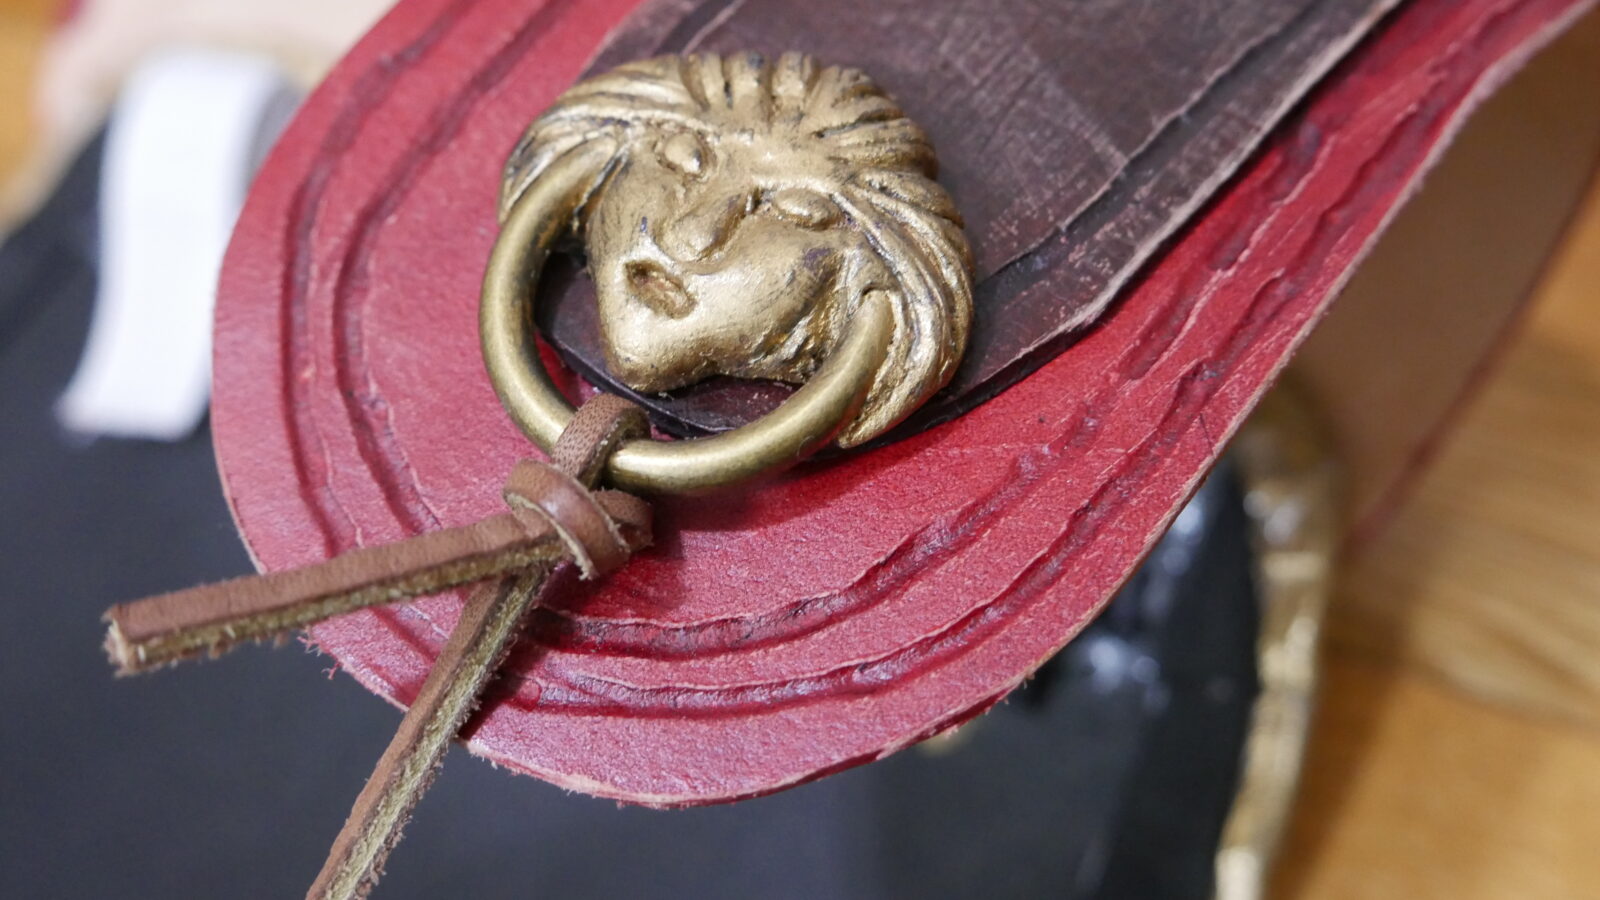
The last portion of the breastplate is the shoulder straps. These were made using the same veg-tan leather, in two layers and wet formed to hold the shoulder curve. I dremled in the grooves on the edges and then dyed the under layer with Red EcoFlo and the top layer with Dark Brown EcoFlo. The medusa faces were made by molding sculpey around the o-rings and then painting them gold and gluing the directly to the surface with E6000. I also added magnets in the straps the correspond to magnets in the breast-plate to help keep the shoulder straps in the right position.
Skirt
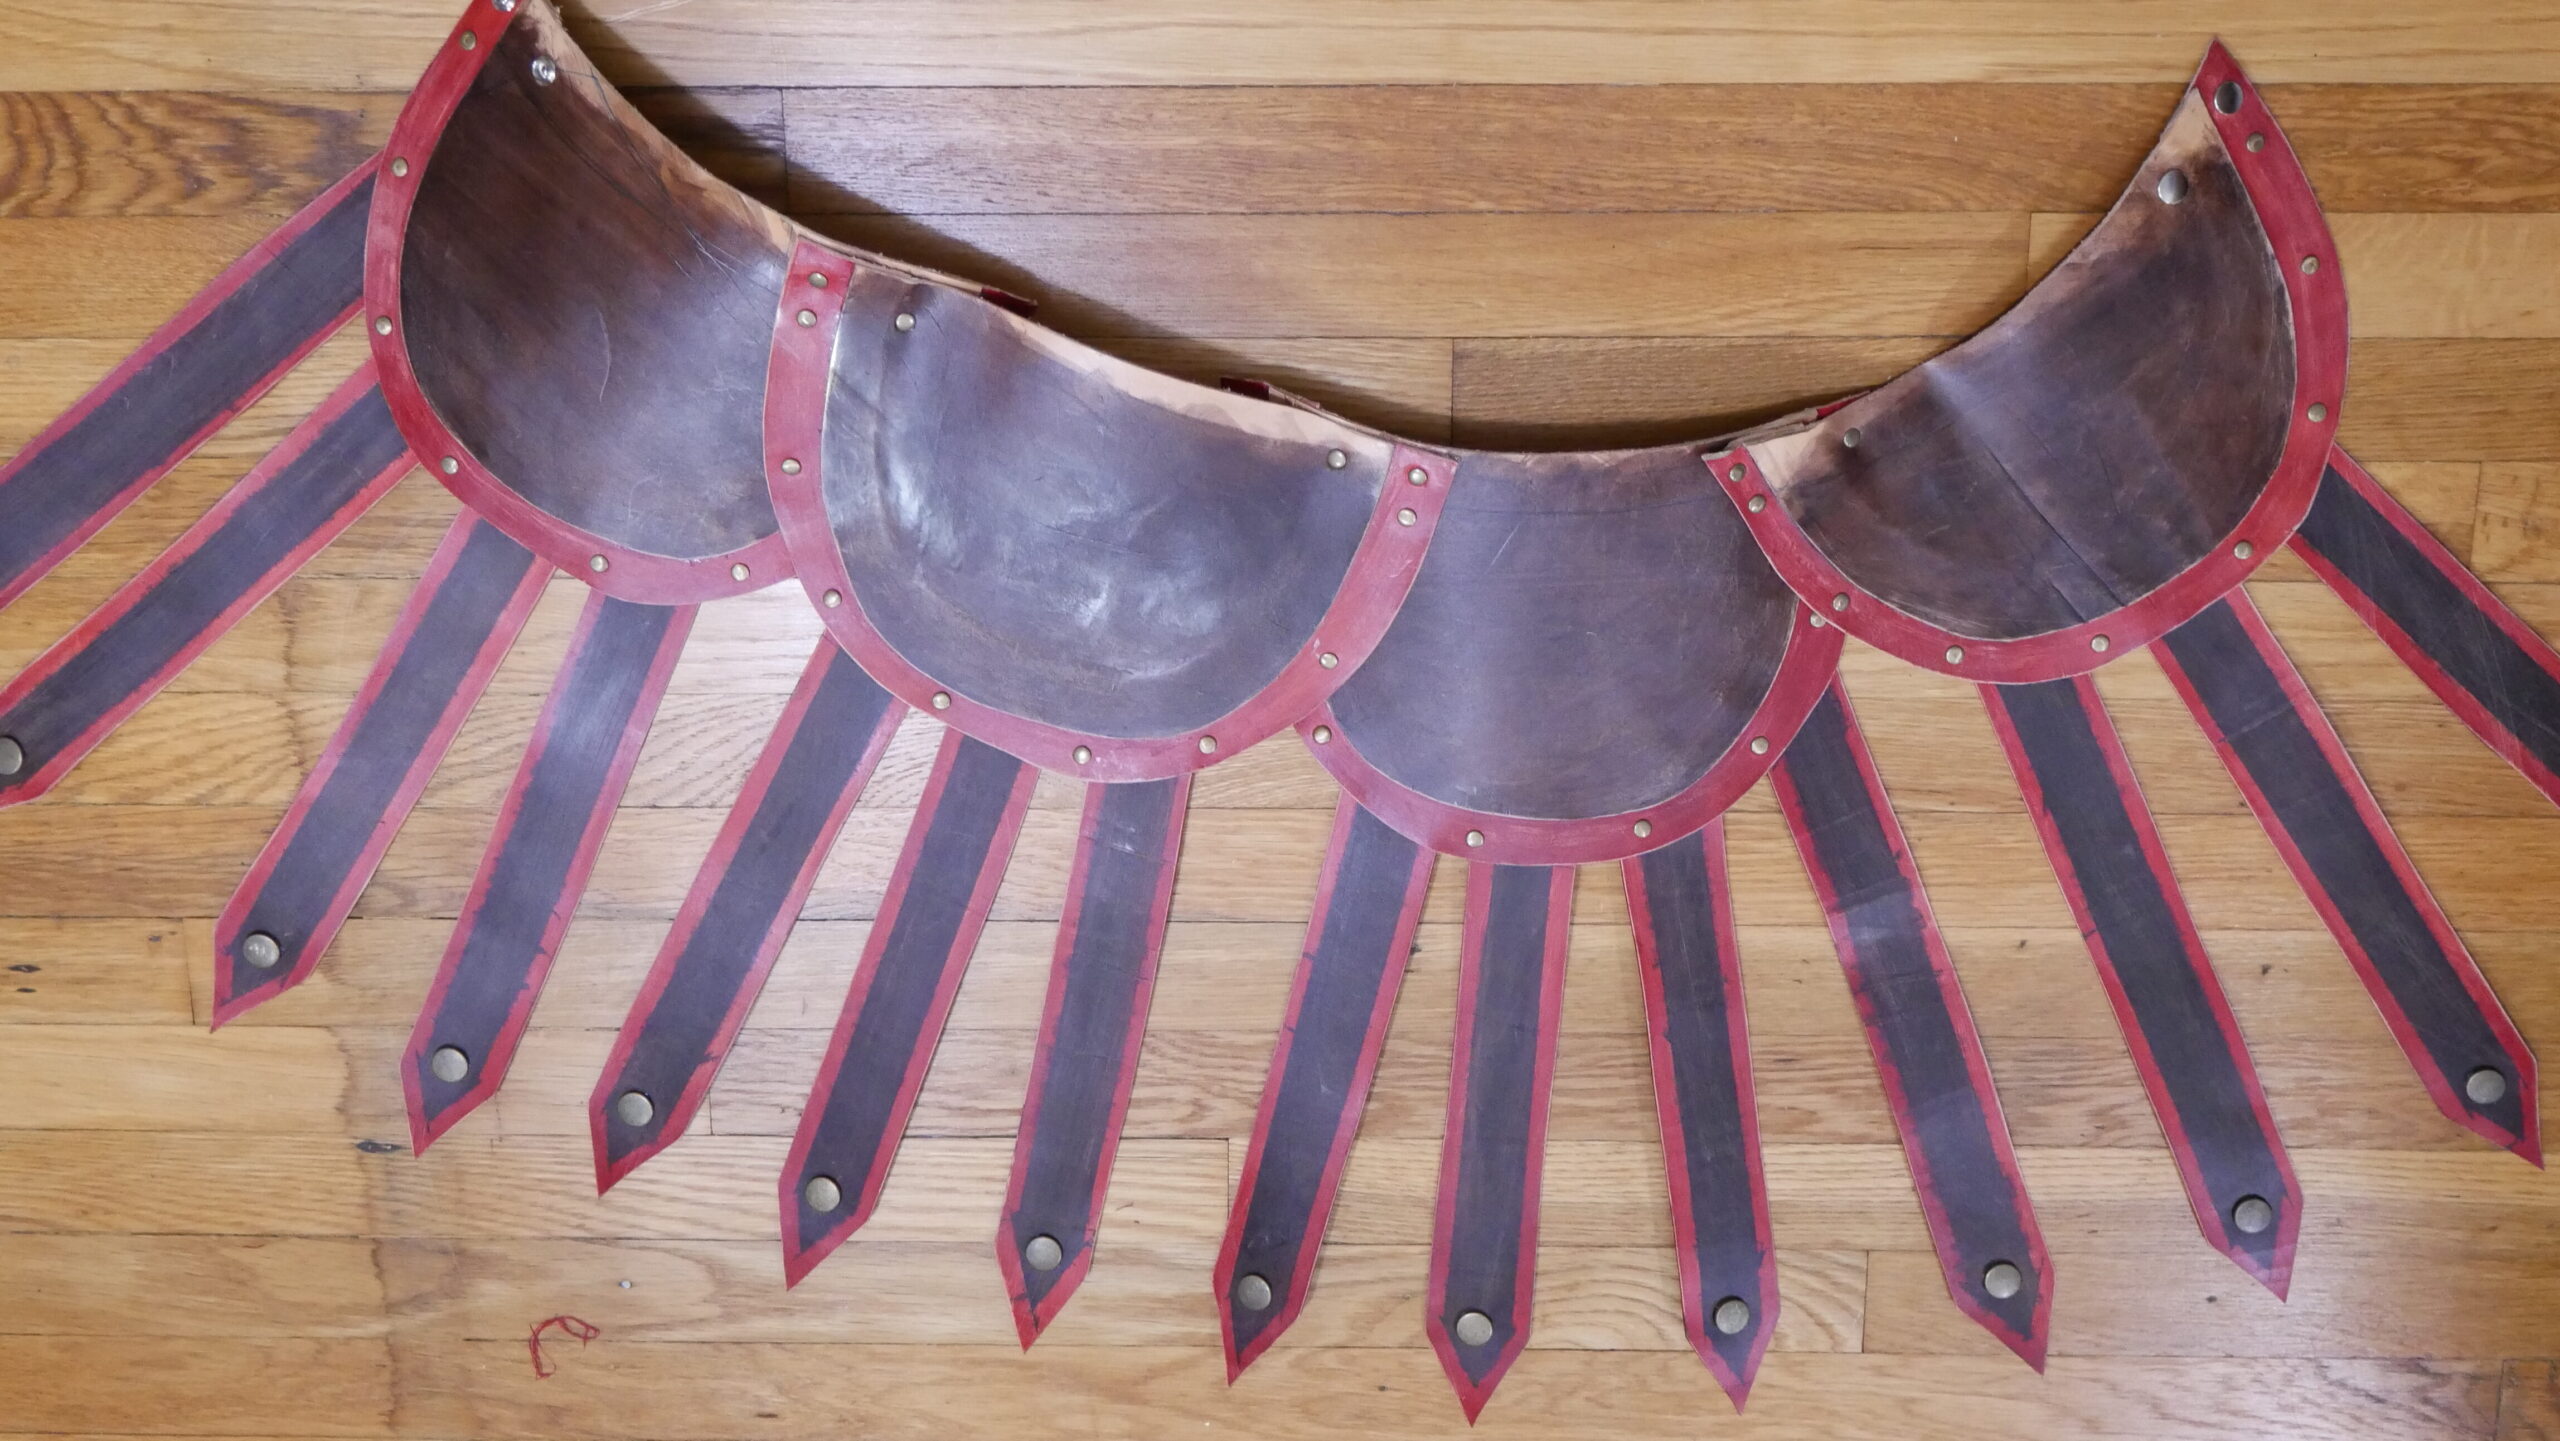
For want of a better word the skirt was made out of the veg-tan leather. It is comprised of four roughly semi circular sections that sit over the hips, each had two layers and dyed red out edging which is a separate u-shaped piece glued (with barge contact cement) to the back of the dyed dark brown semi-circle. The red section had gold rivets spaces about and inch and a half apart that appear to sever only aesthetic purposes. The four sections were then riveted together in the top corners, the front and back sections sitting on top of the side sections.
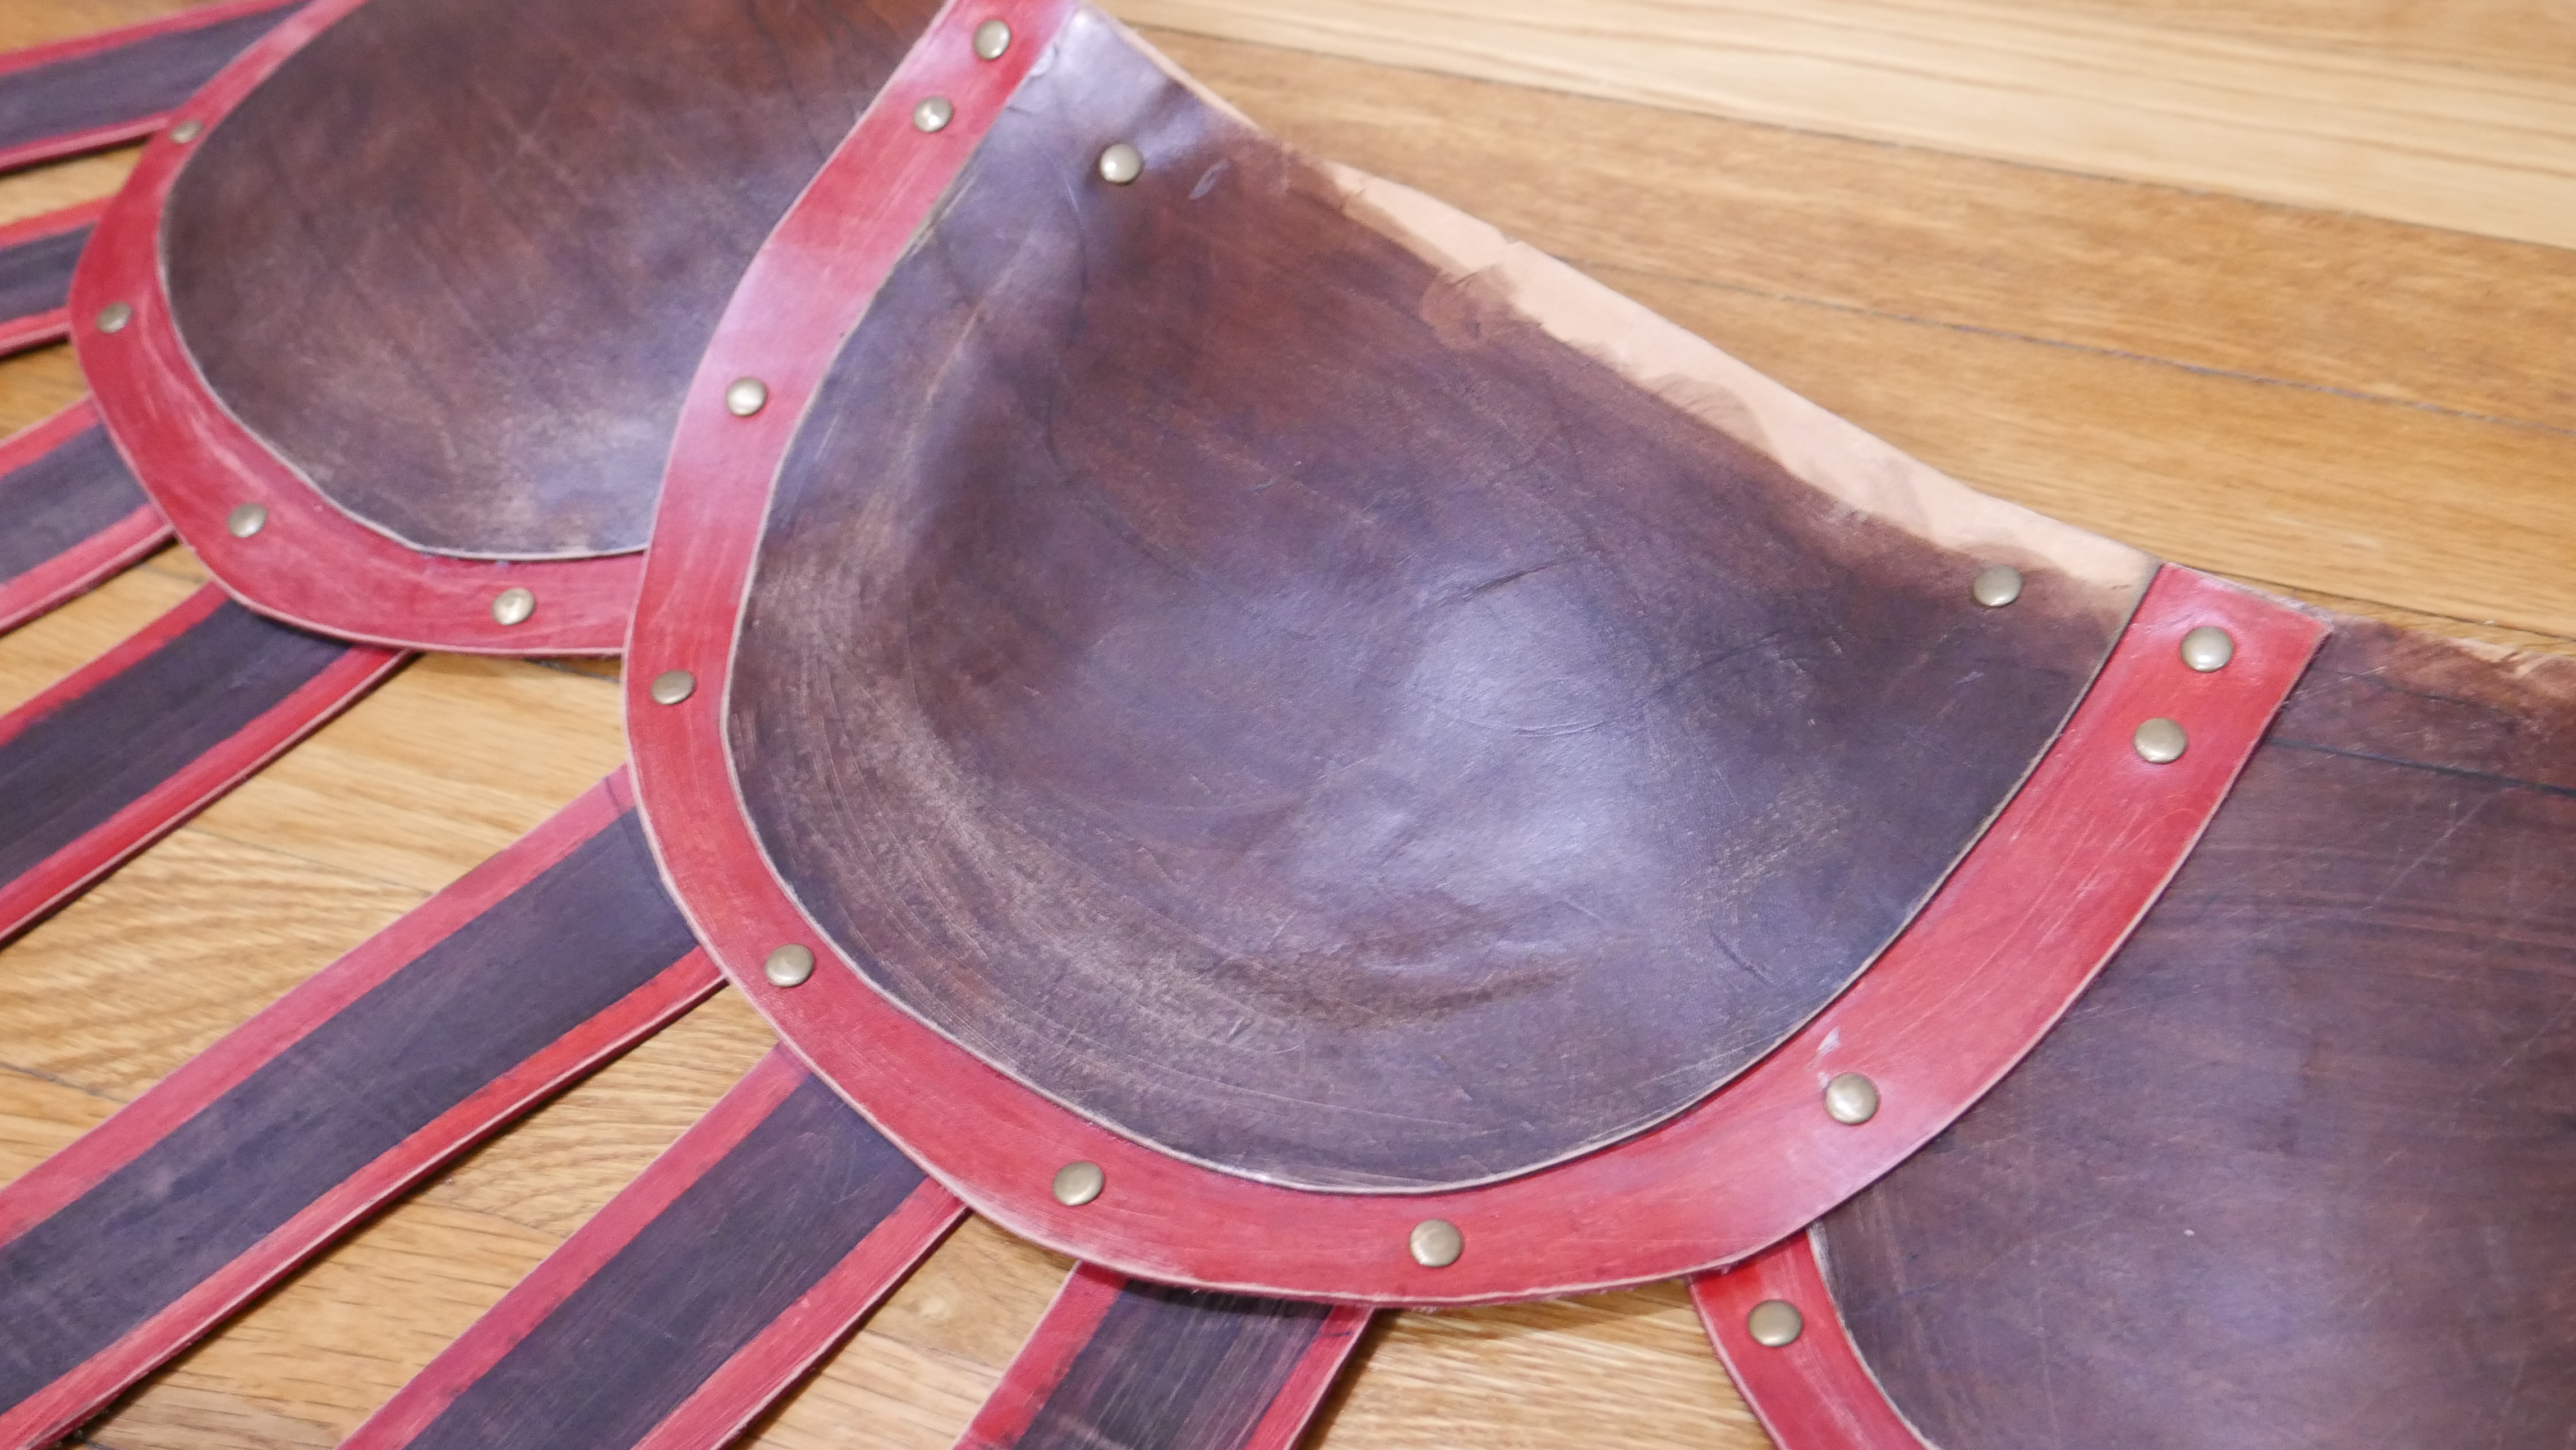
The hanging tabs were made out of 2 inch wide strips of the leather, cut to sit just above the knee. These are only composed of one layer, so I dyed the sections red, then taped off the edges and dyed the center over the top in brown. At the base I used a gold button for the decoration, and I did dye the inside as well so that it wouldn’t be so obvious when I moved or if the interior was visible. The strips were then glued directly to the upper section on the inside, they are all glued at a slight angle, somewhat matching the curve of the circles. The whole thing then snaps together at the side back using two heavy-duty snaps.
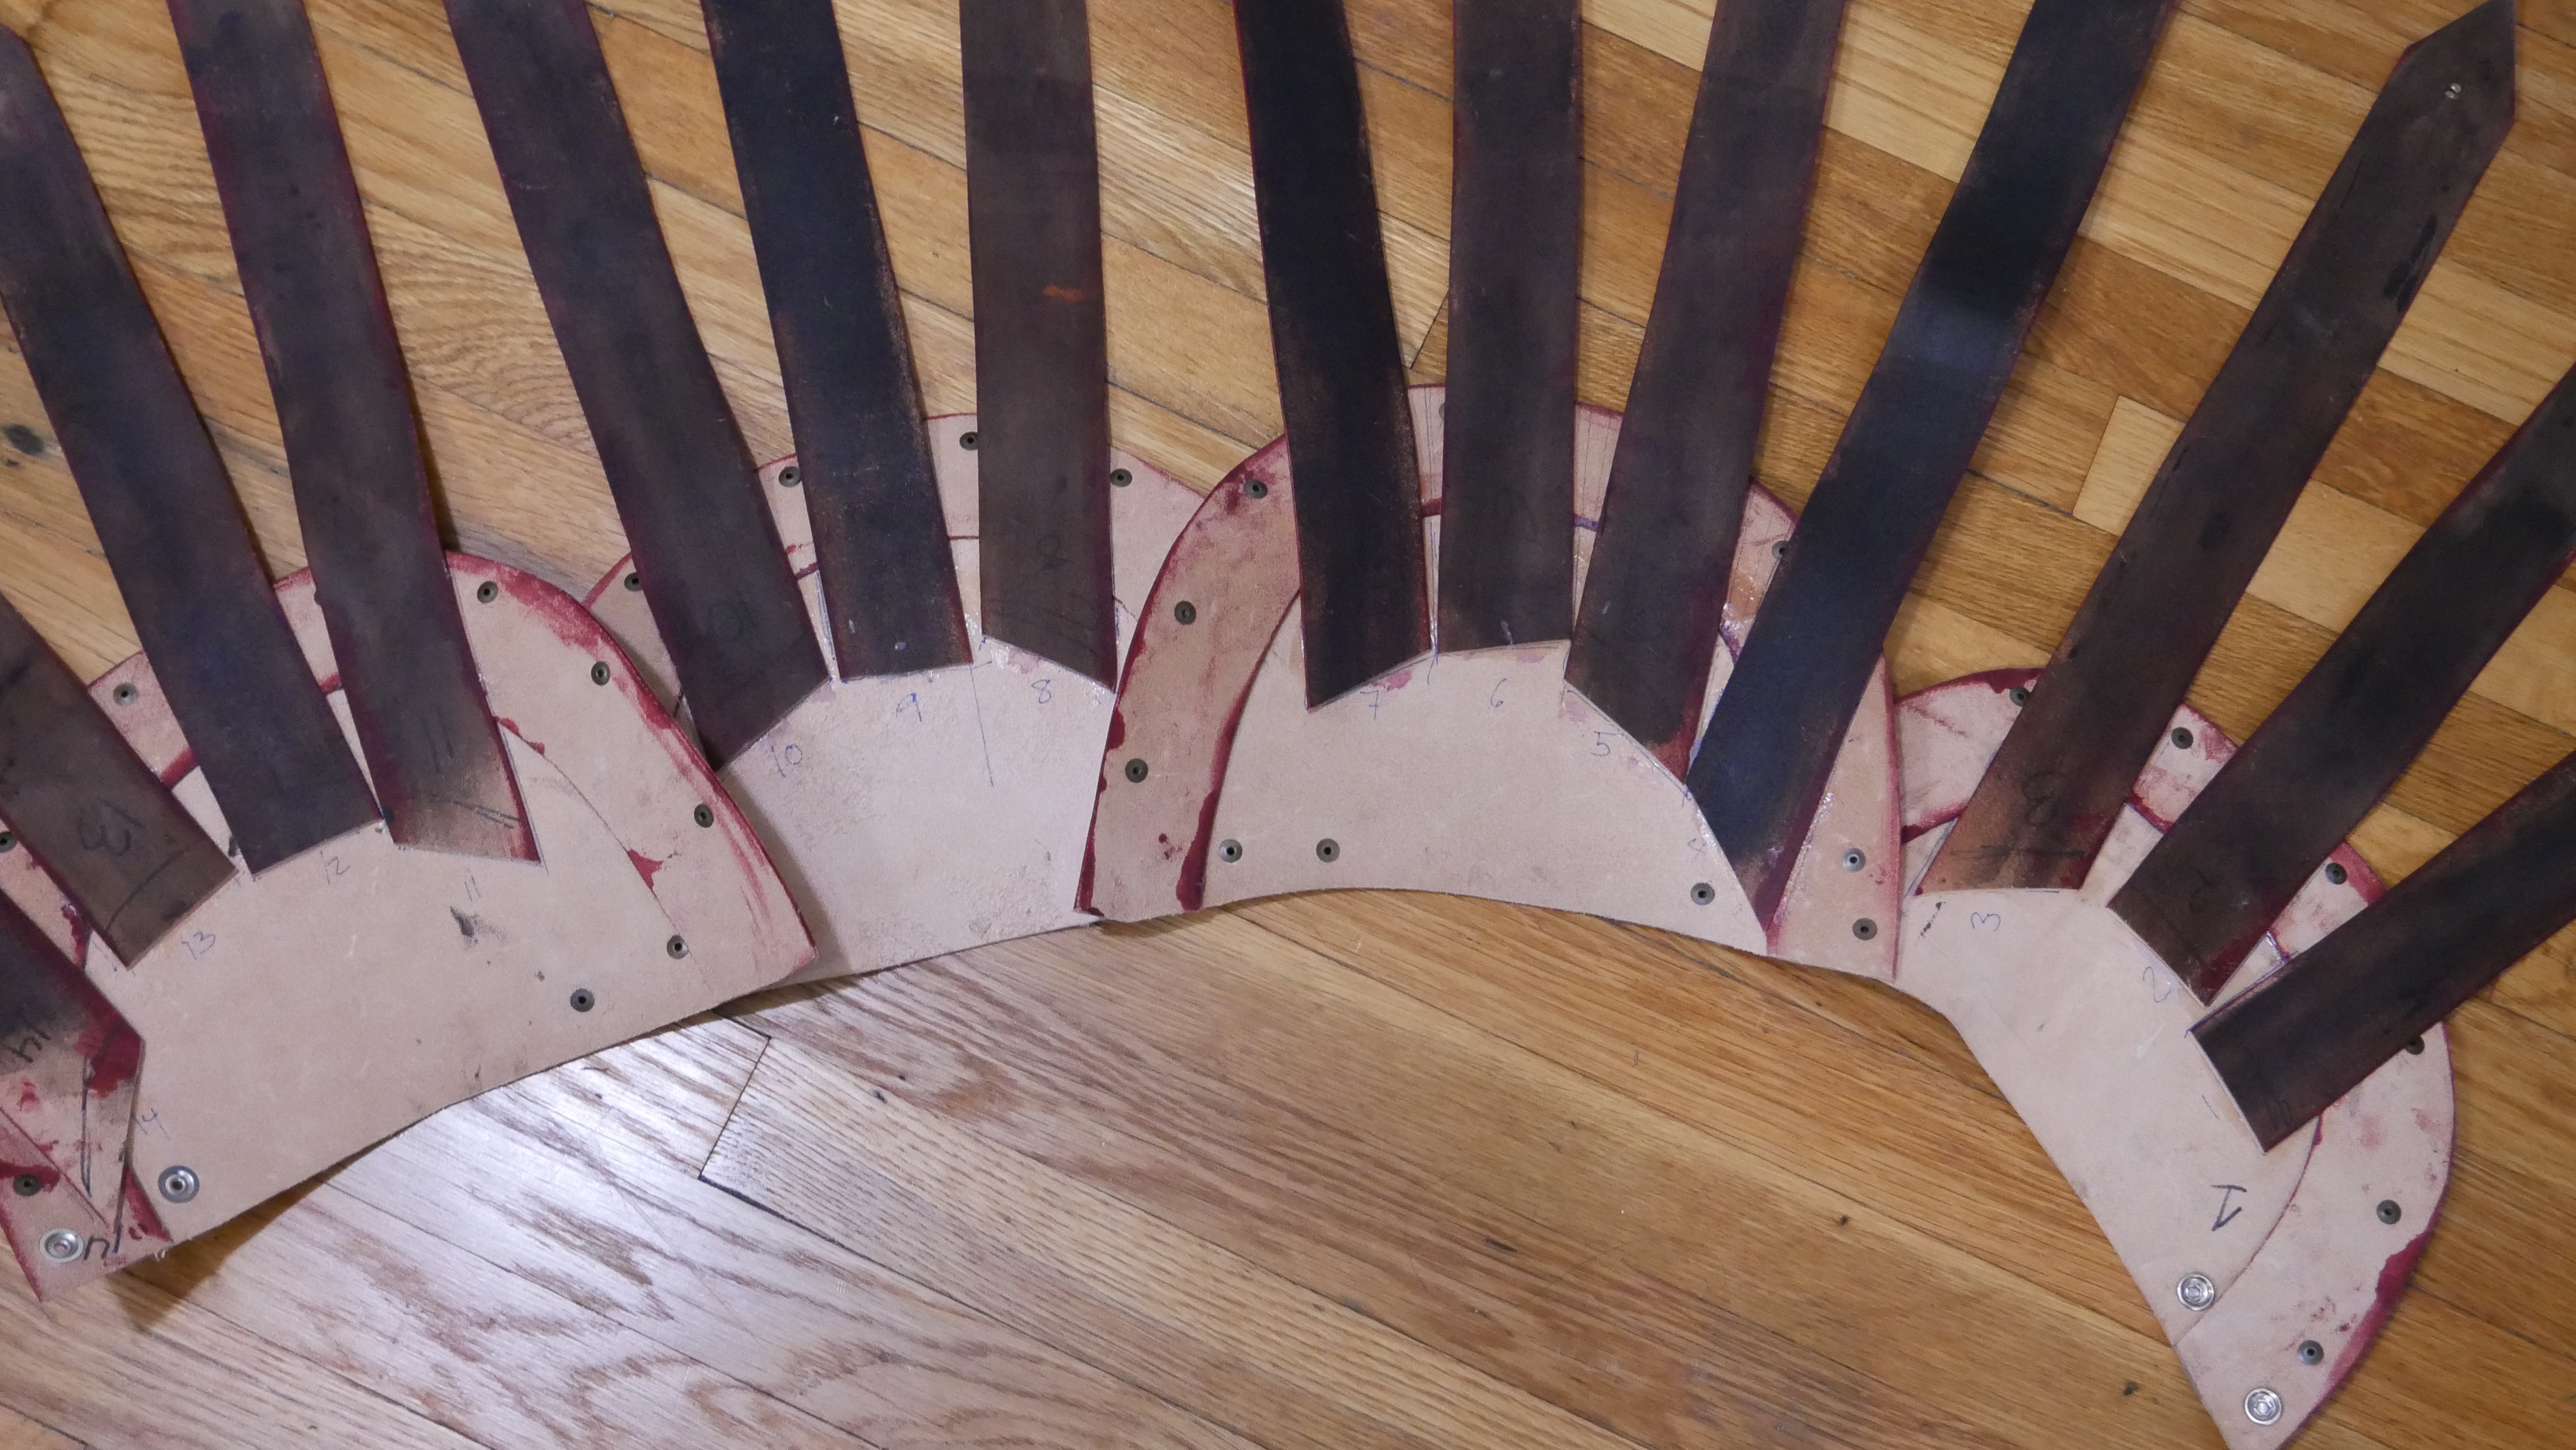
A few things to note, as the top edge sits under the armor you want to minimize material, and you don’t need to be super precise on the top edge. But you will want to make sure to put this part on before putting on the breastplate.
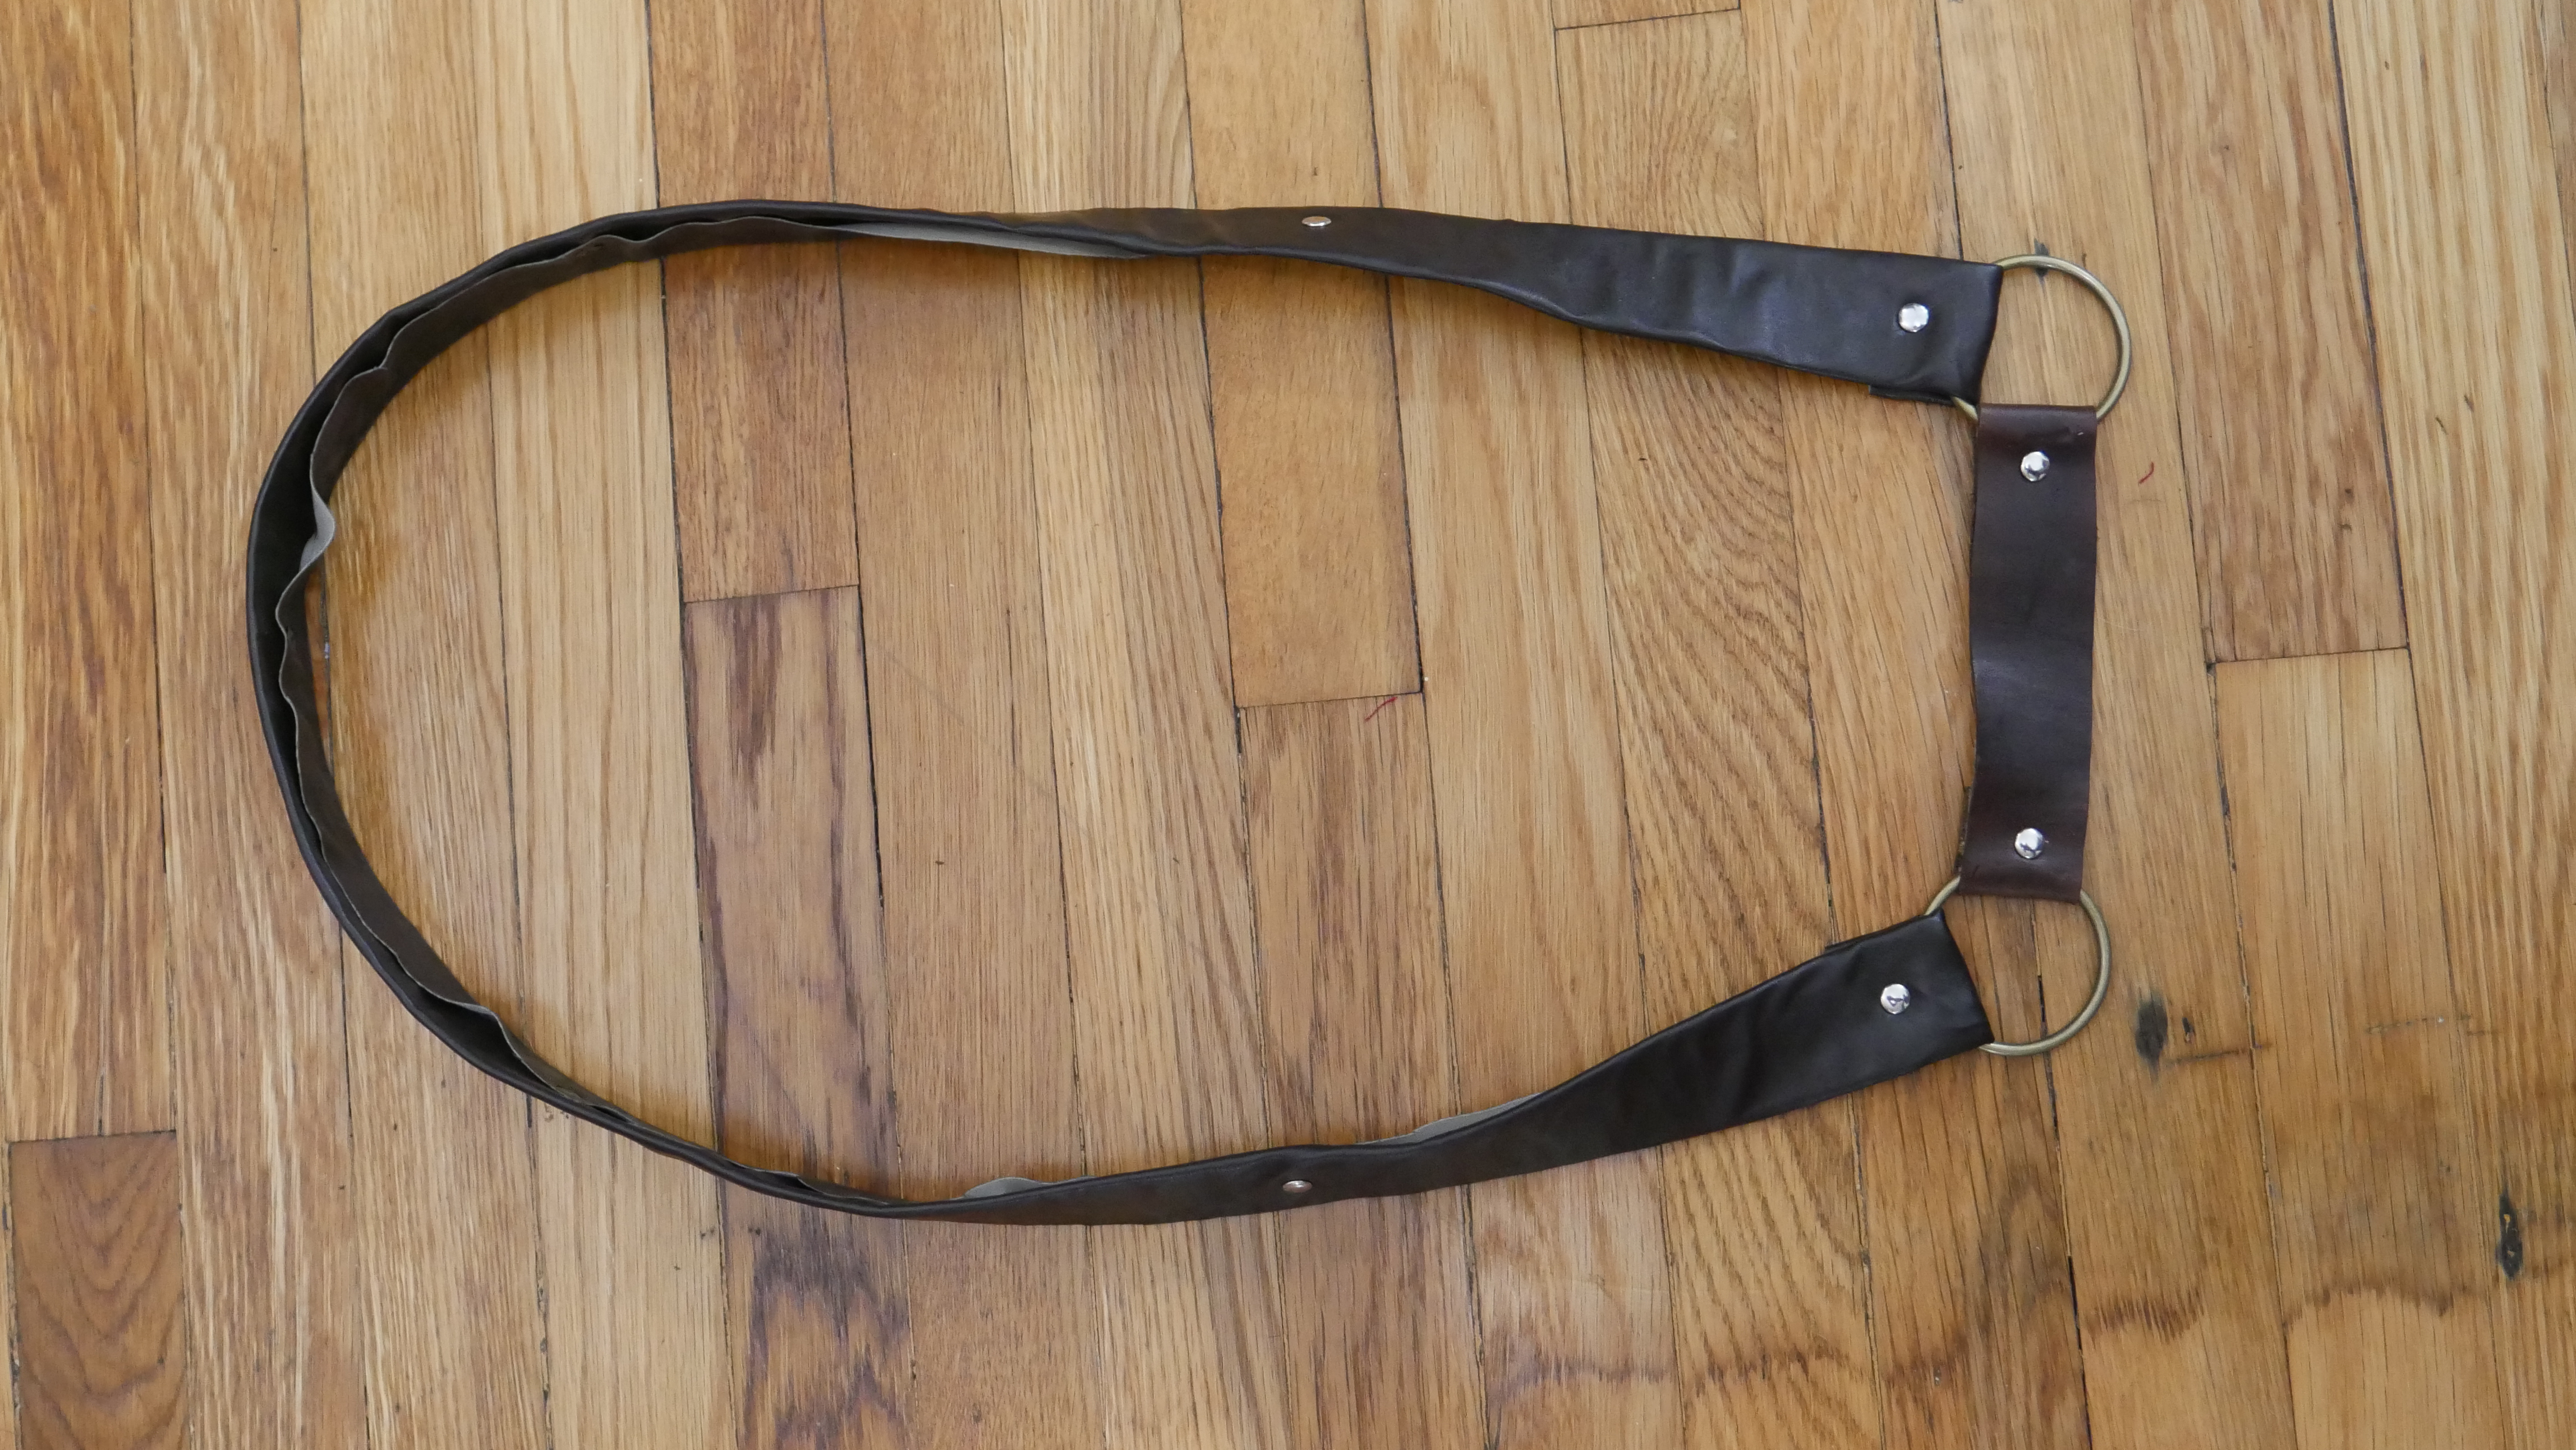
Belts
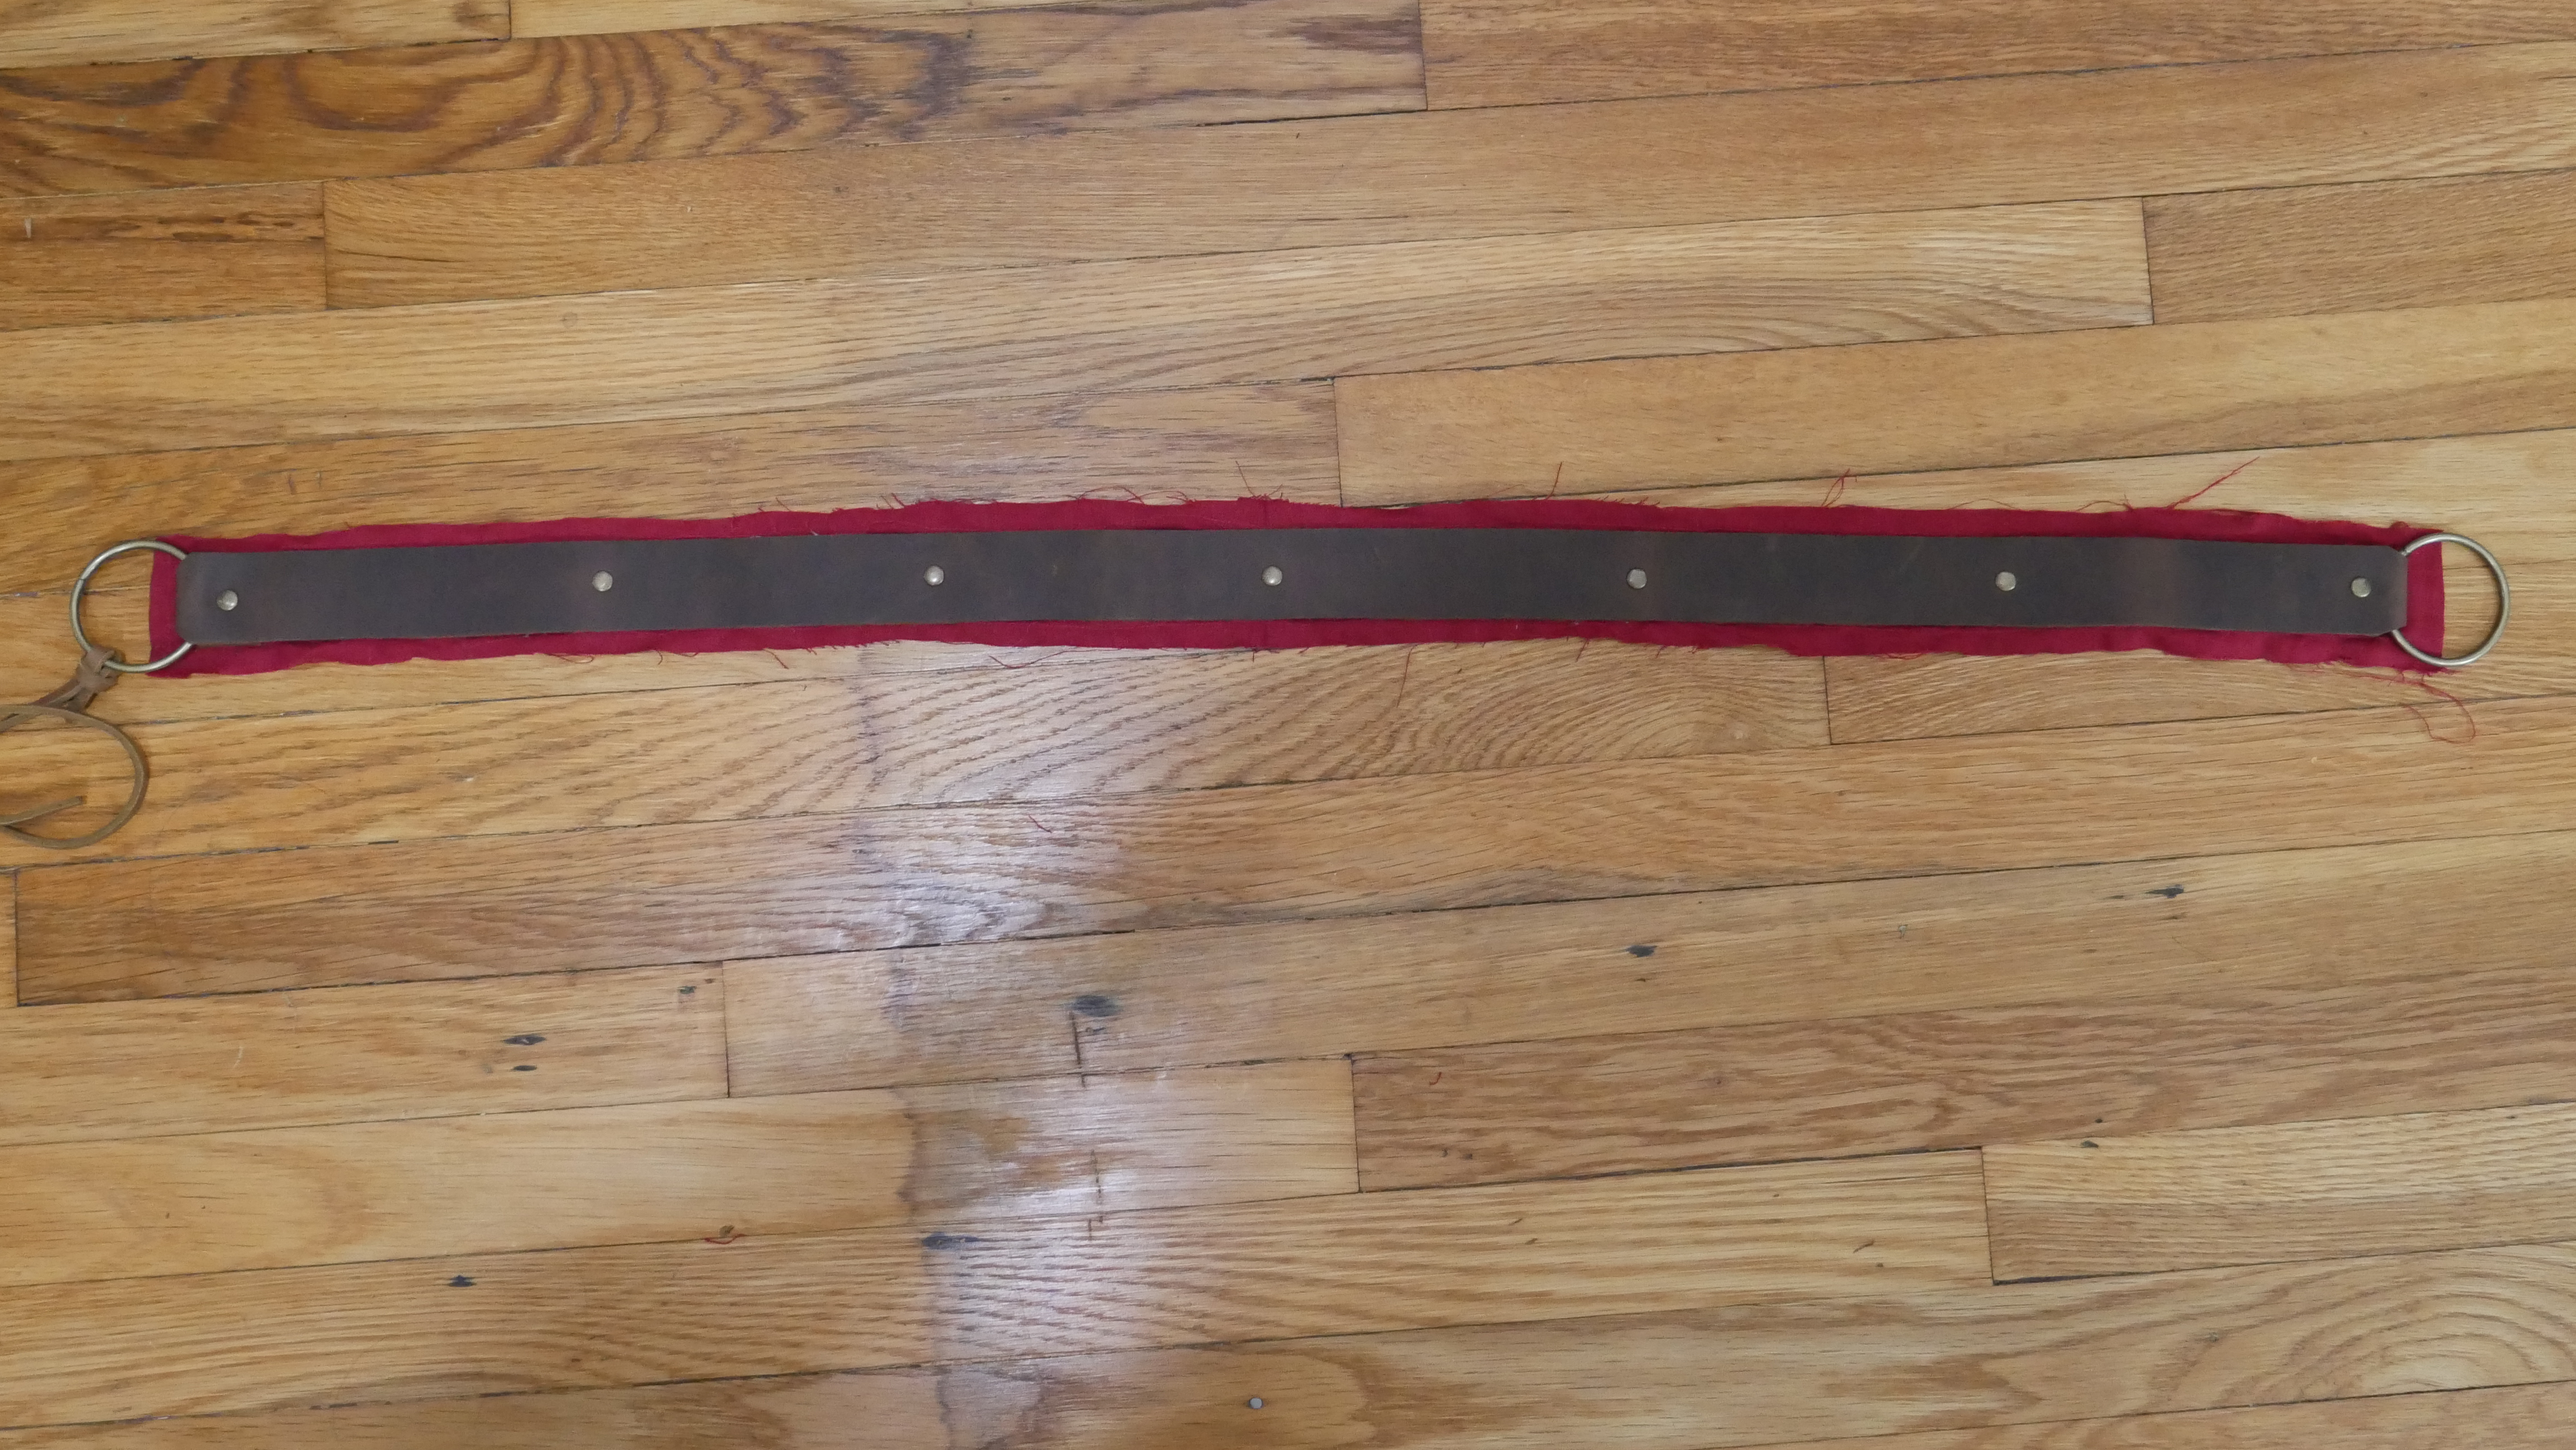
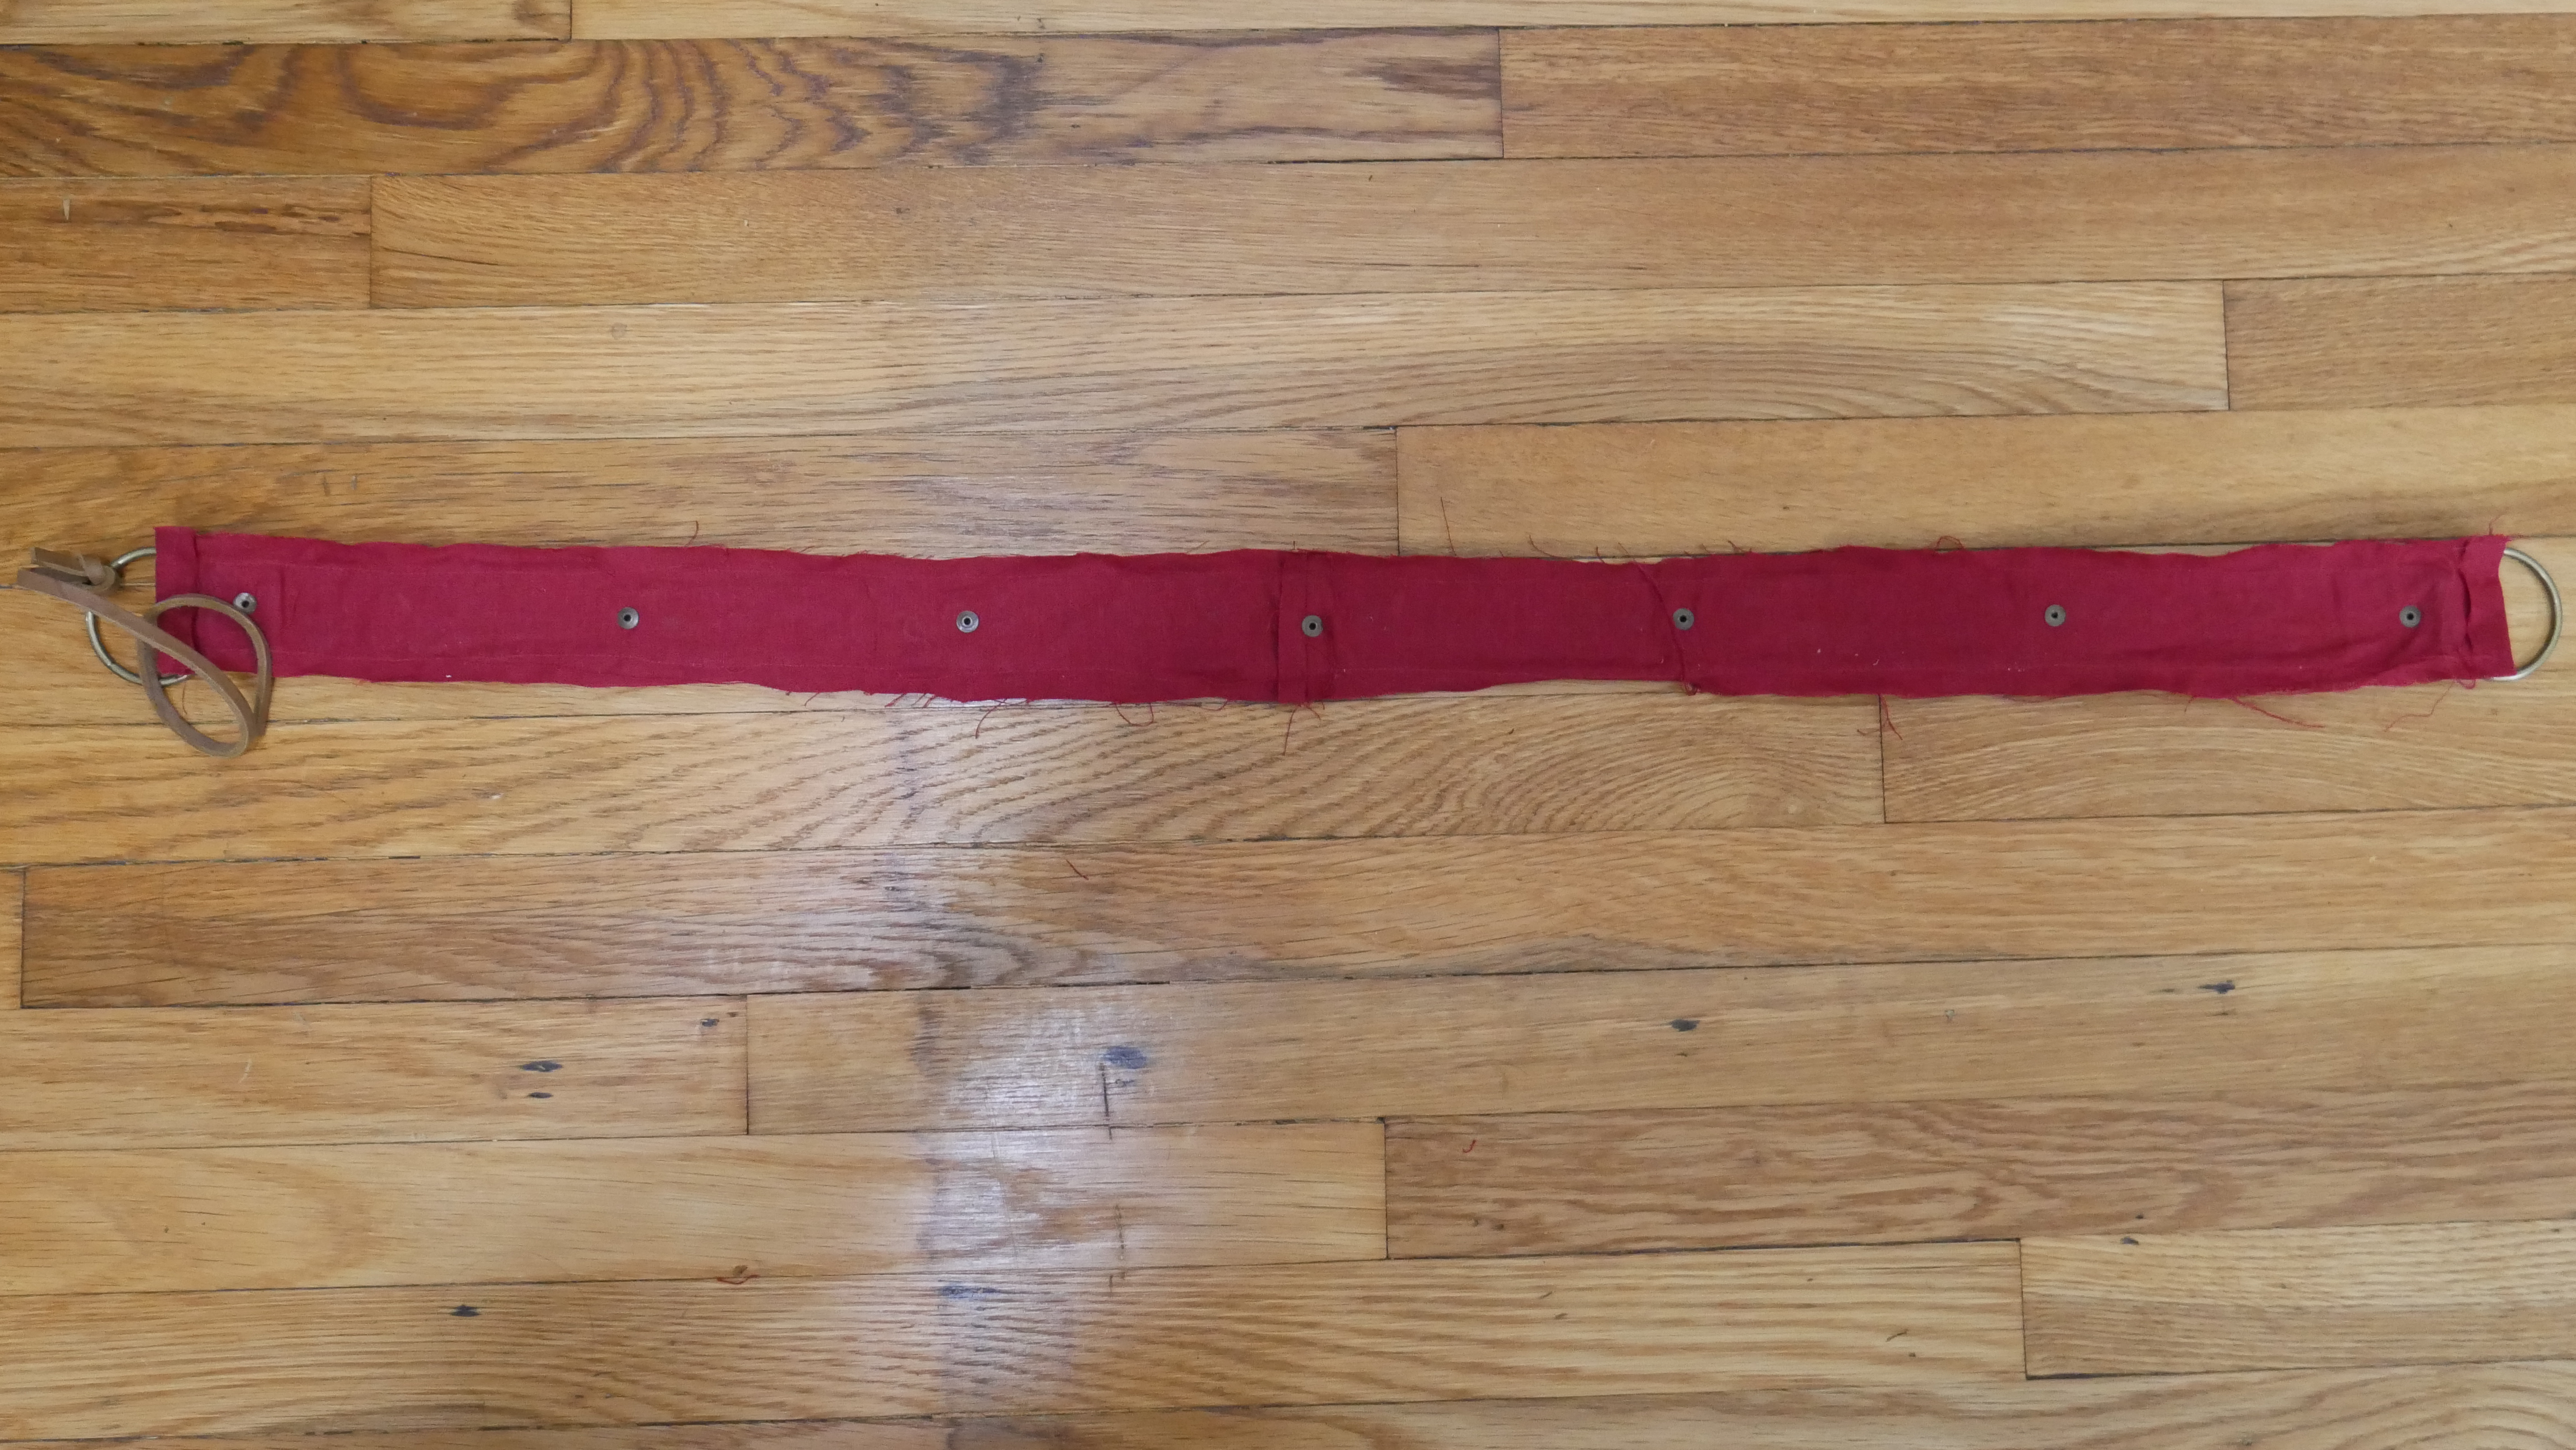
Like all good assassins there are many belts to this costume. The main belt serves no real purpose and sits just below the waist, so size it after assembling the breast-plate a skirt. It is constructed out of a 1.5 in wide strip of brown leather, with a backing of the red linen blend fabric, which was glued using hot glue to stop it sliding around and then riveted in place using small gold rivets. The loops at the end are two gold-colored 2 in wide o-rings, and they tie together using a strip of leather cord.
The other belt I made from felt wrapped in brown pleather, partly because I ran out of leather strapping, and partly because it was hard to find the right length in leather strapping. They both then have silver rivets down the length, and use more 2 in gold o-rings at the end.
The first section goes over the shoulder and the two o-rings join at the hip where the sword frog is. I however only made a strip of brown leather as a spacer as my sword would have been way to heavy to fit on the straps, and I was running short on time. This is also the strap that should hold the quiver, which is to say if you want it to be functional I would recommend making it out of actual leather!
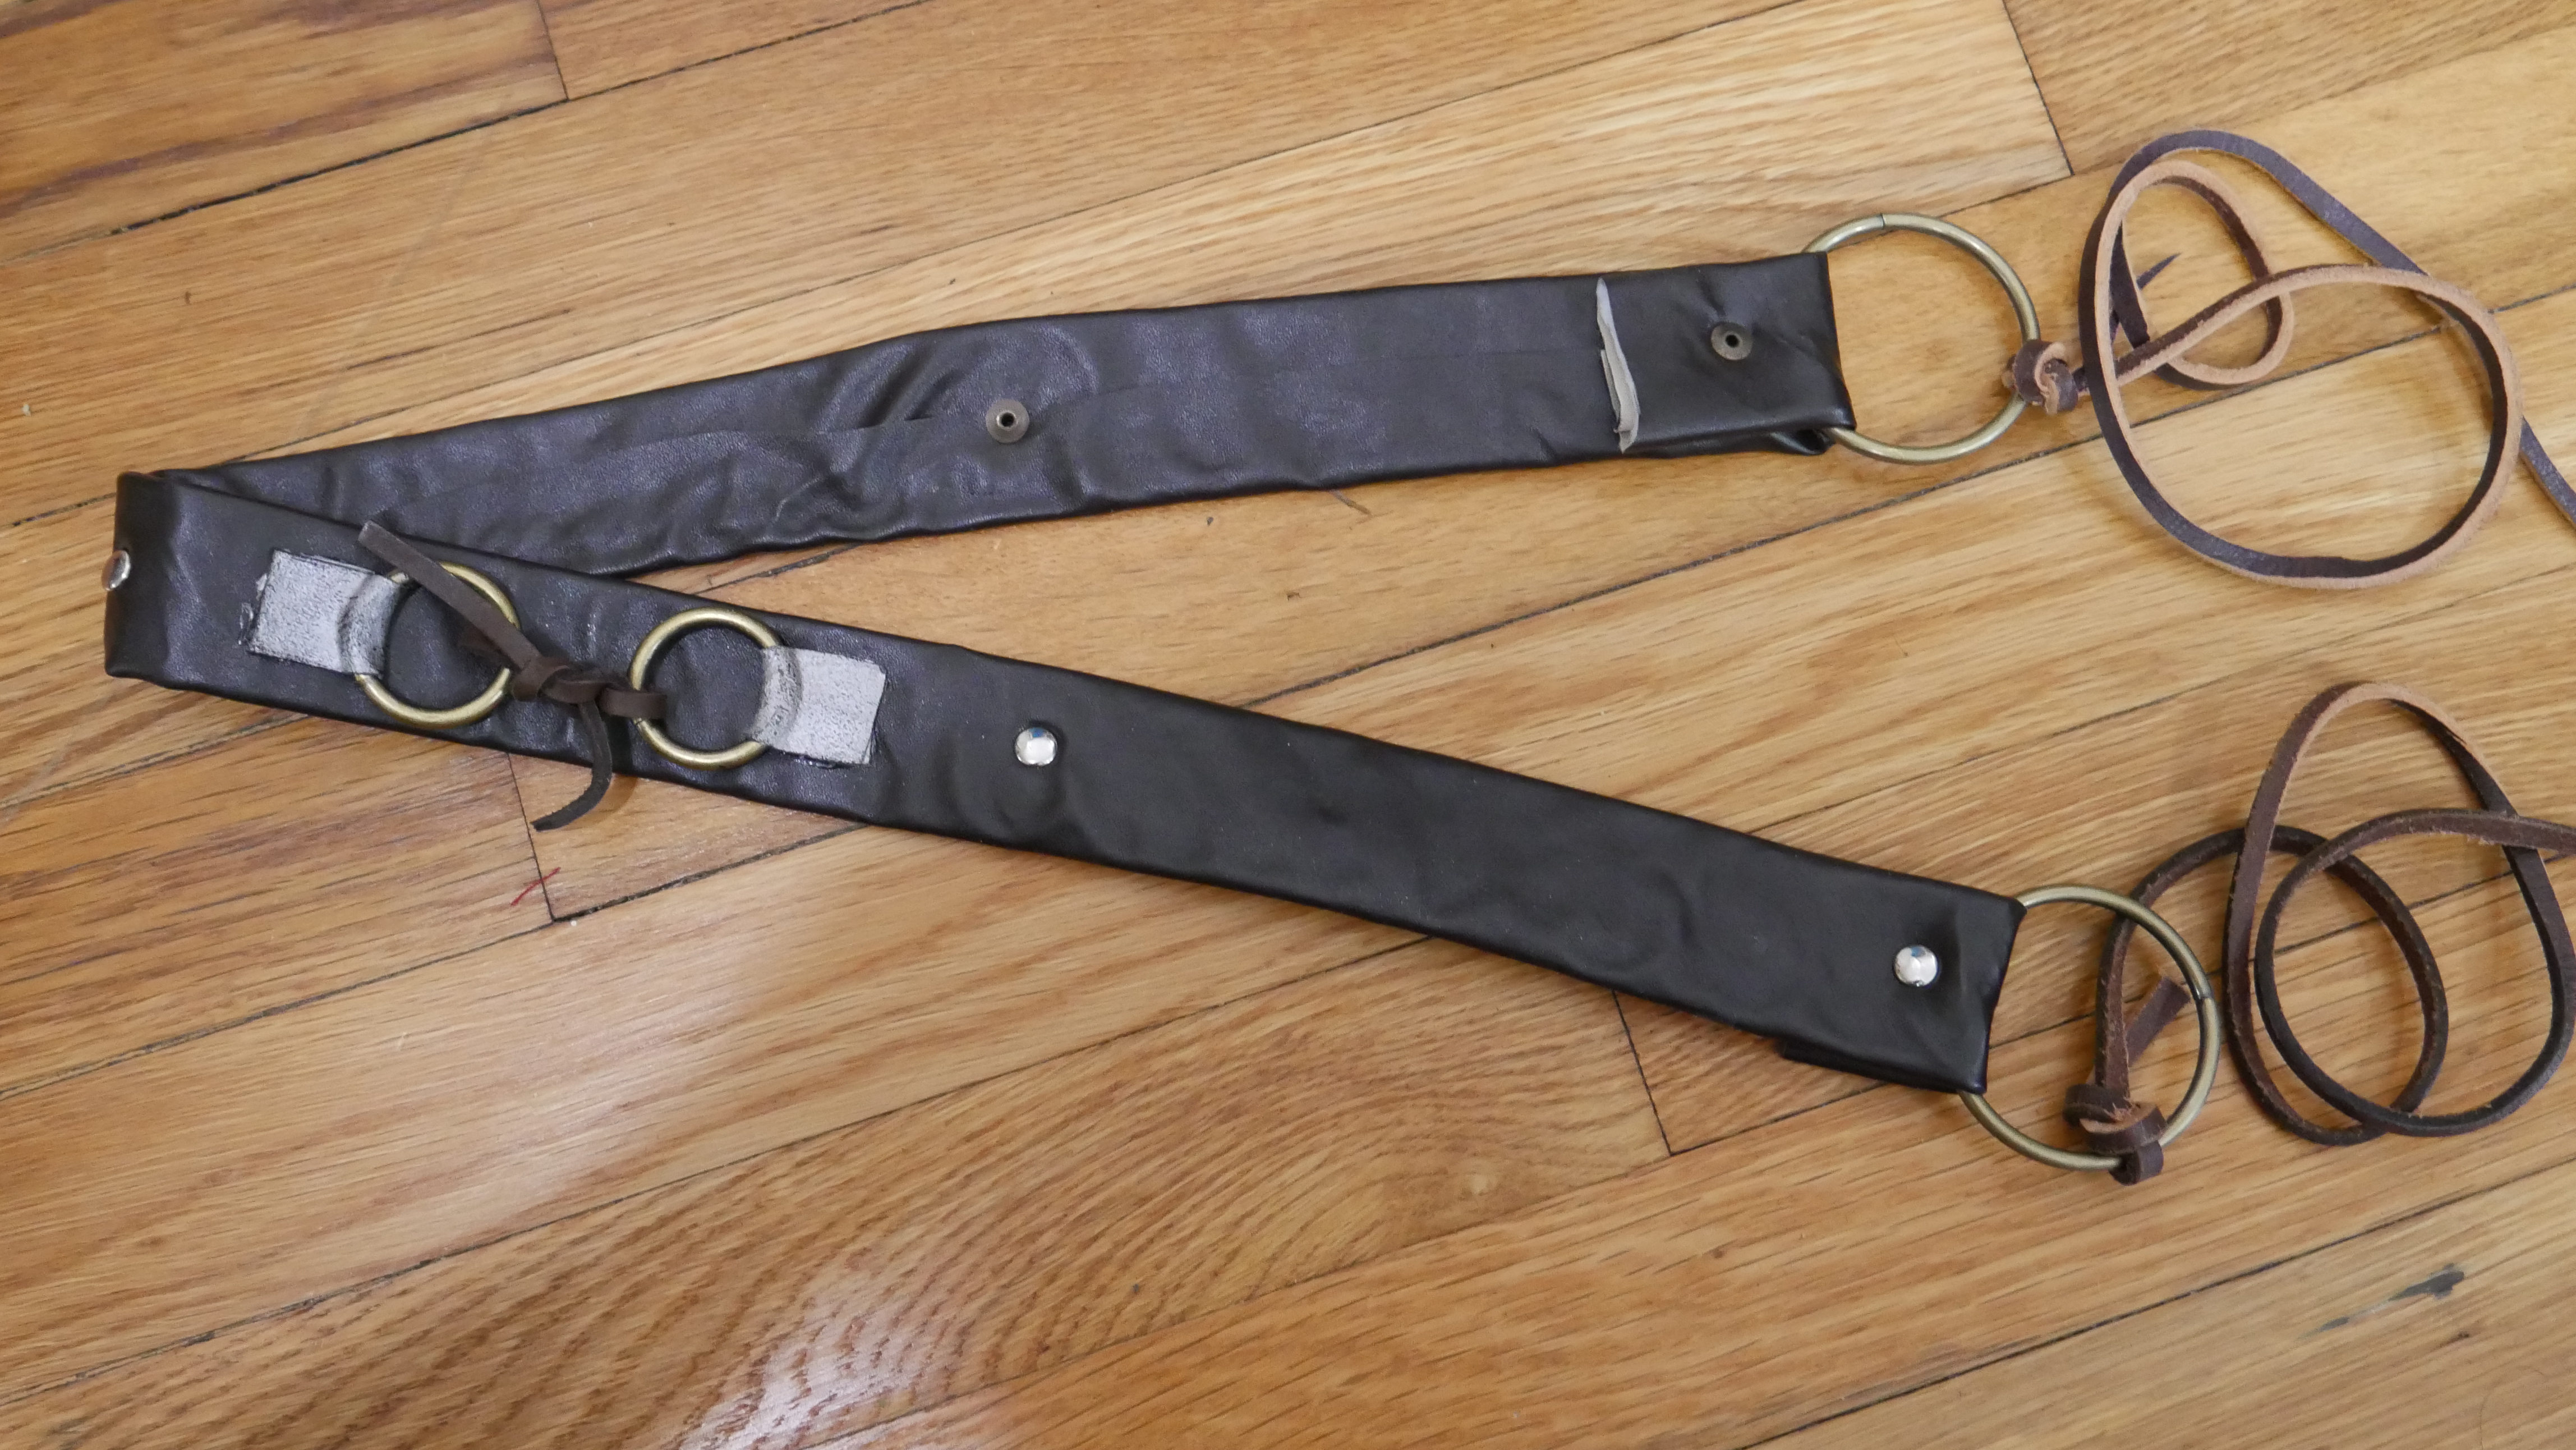
The second section wraps around the torso and ties on to the shoulder strap using the leather ties. There is also a mysterious metal tab and o-ring section that was maybe intended to hold the spear? Either way I made the part out of worbla, which I painted silver and glued to the belt. Where this strap meets the other it does appear to defy gravity, so to get it to stay in place I used tape on the back side.
Bracers
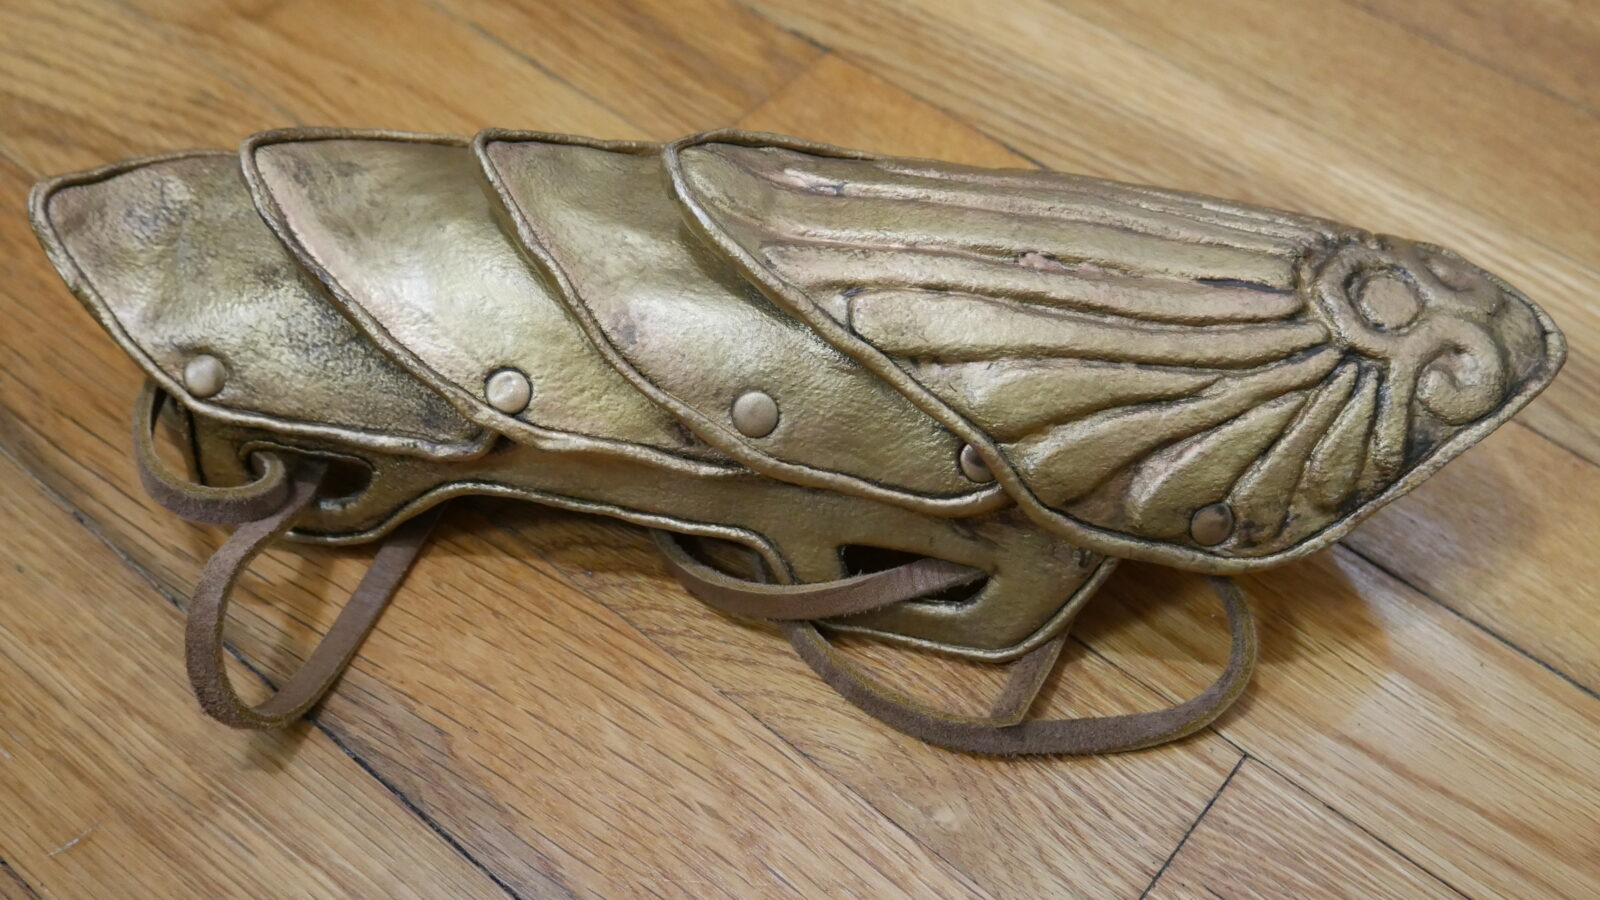
Kassandra has two mis-match bracers, good in that you don’t have to try to duplicate your work exactly, bad in that you can’t reuse any patterning work. Under both the bracers are arm wraps, both are made out of 2 in wide strips of fabric, one is the red linen and the other is a brown fake suede that looks little like leather but it much more comfortable and easier to wrap than leather would have been.
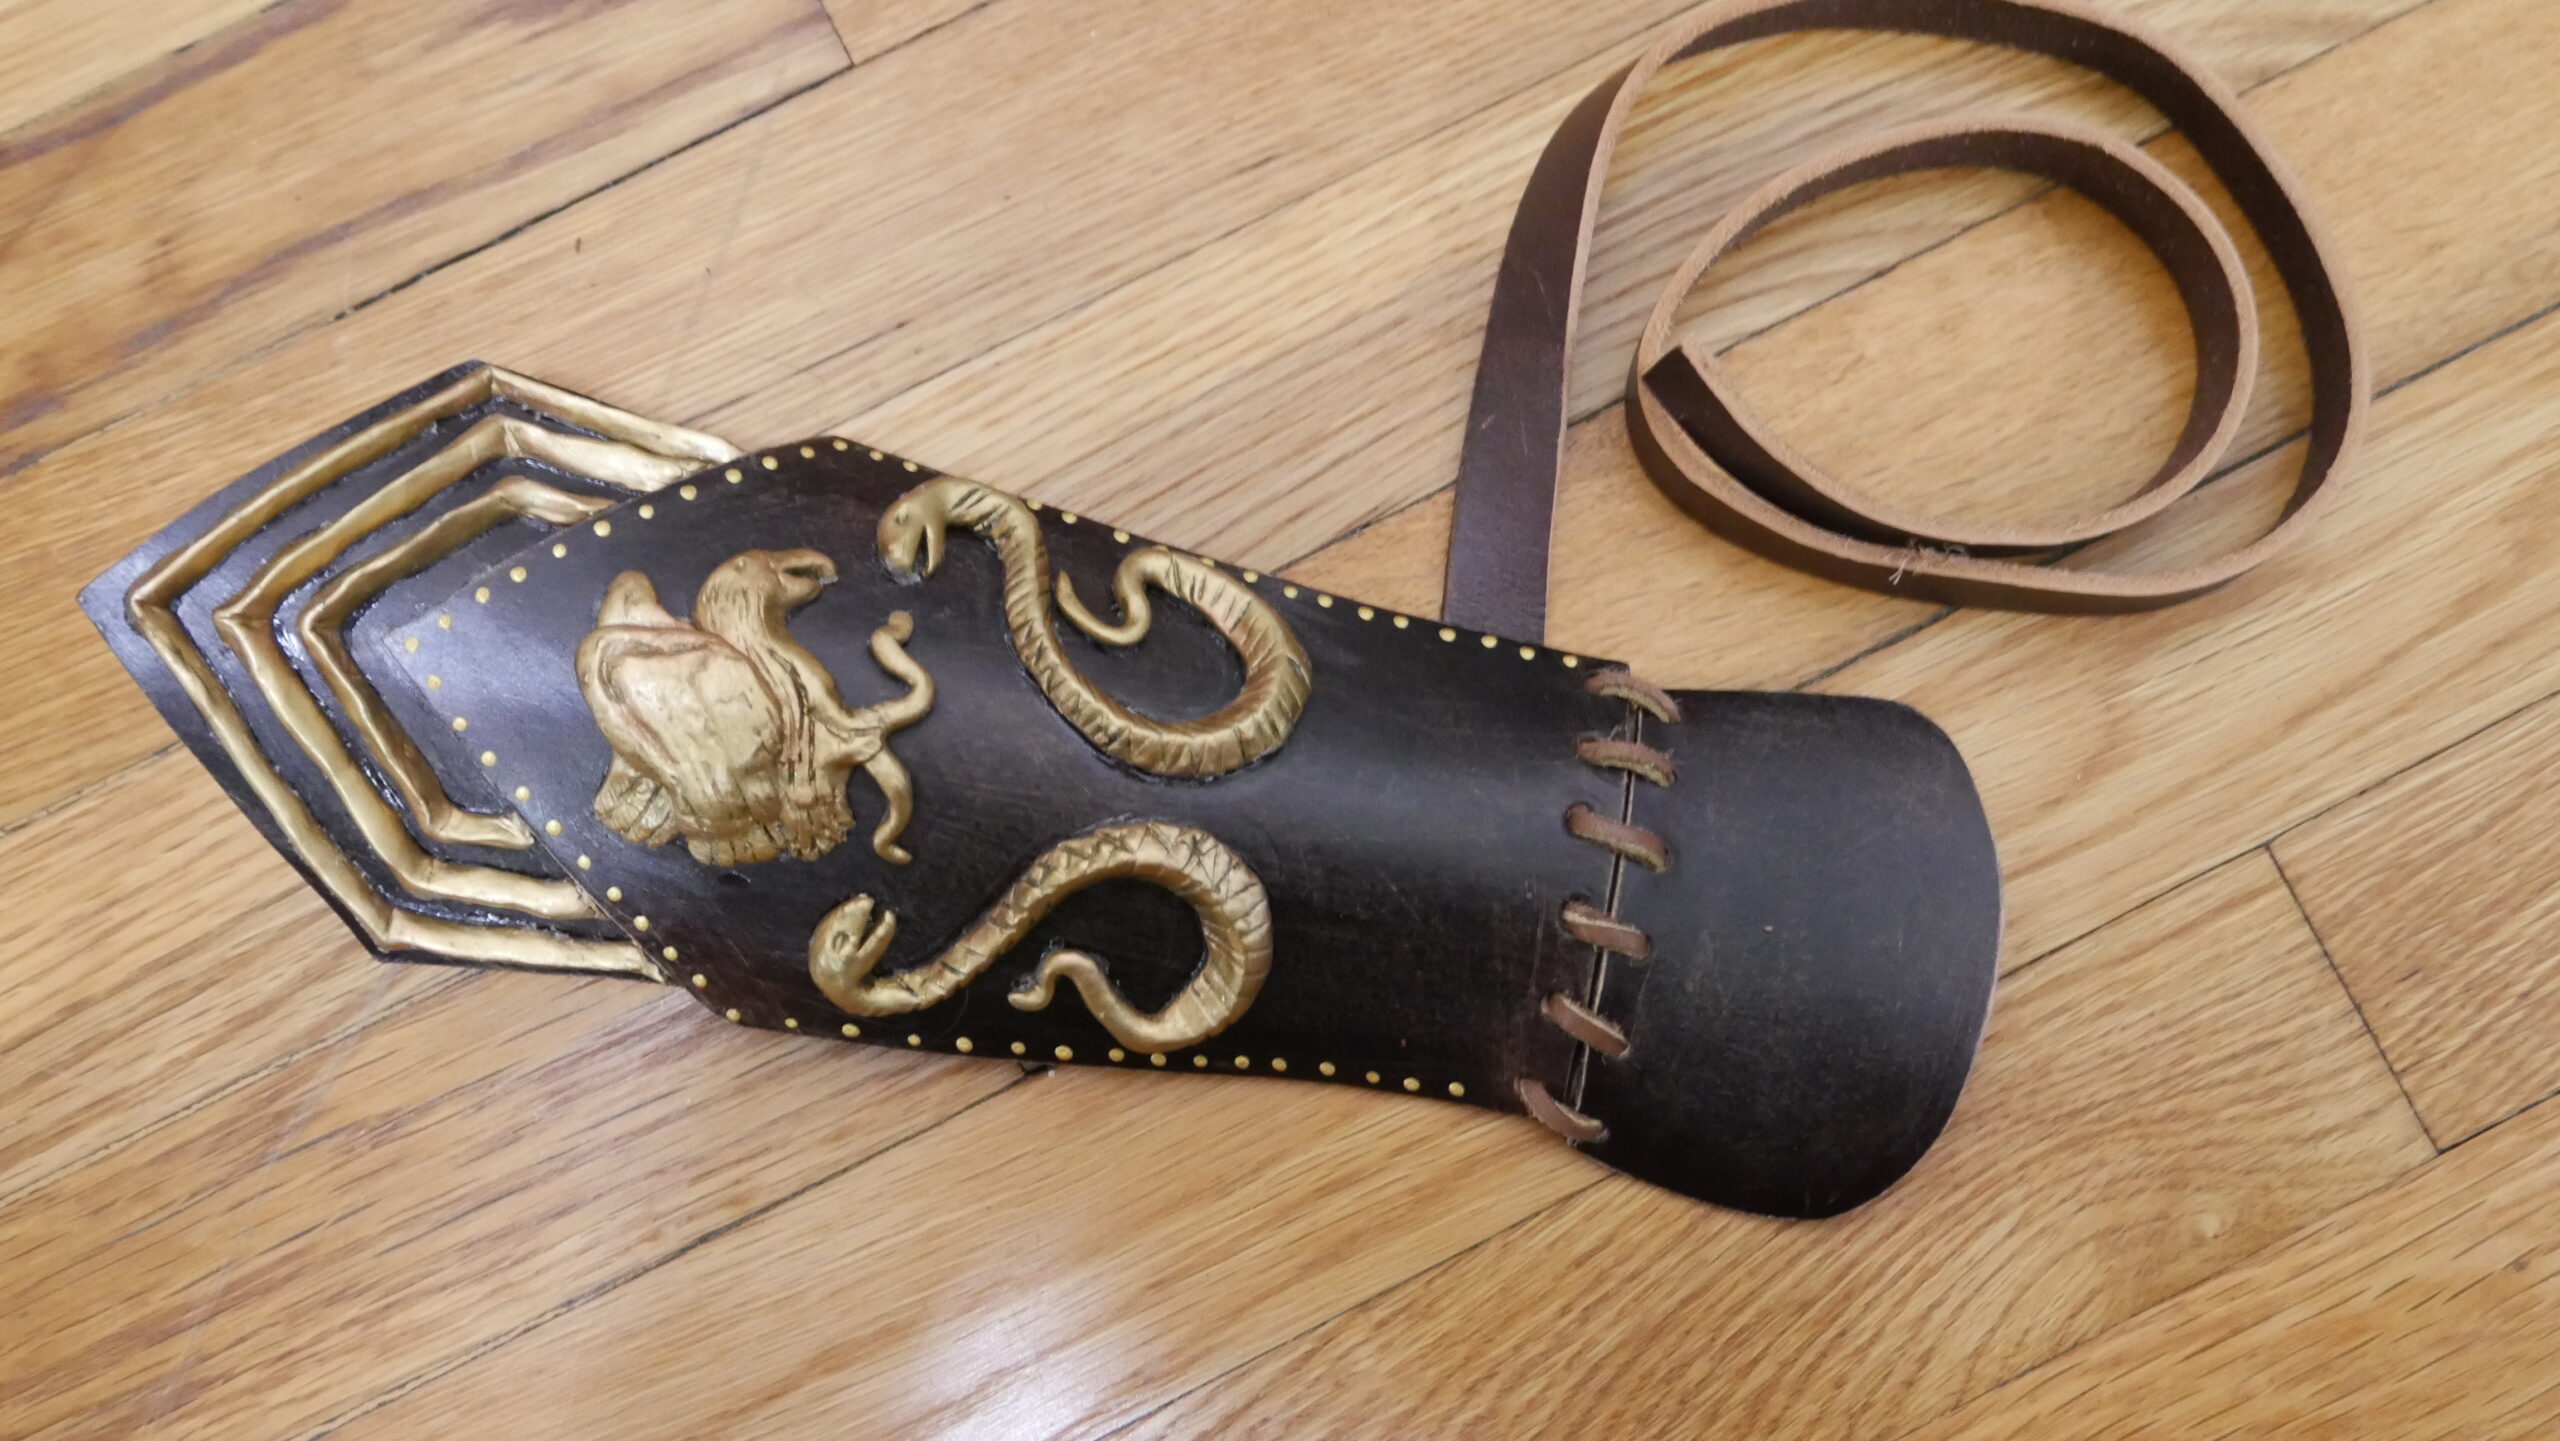
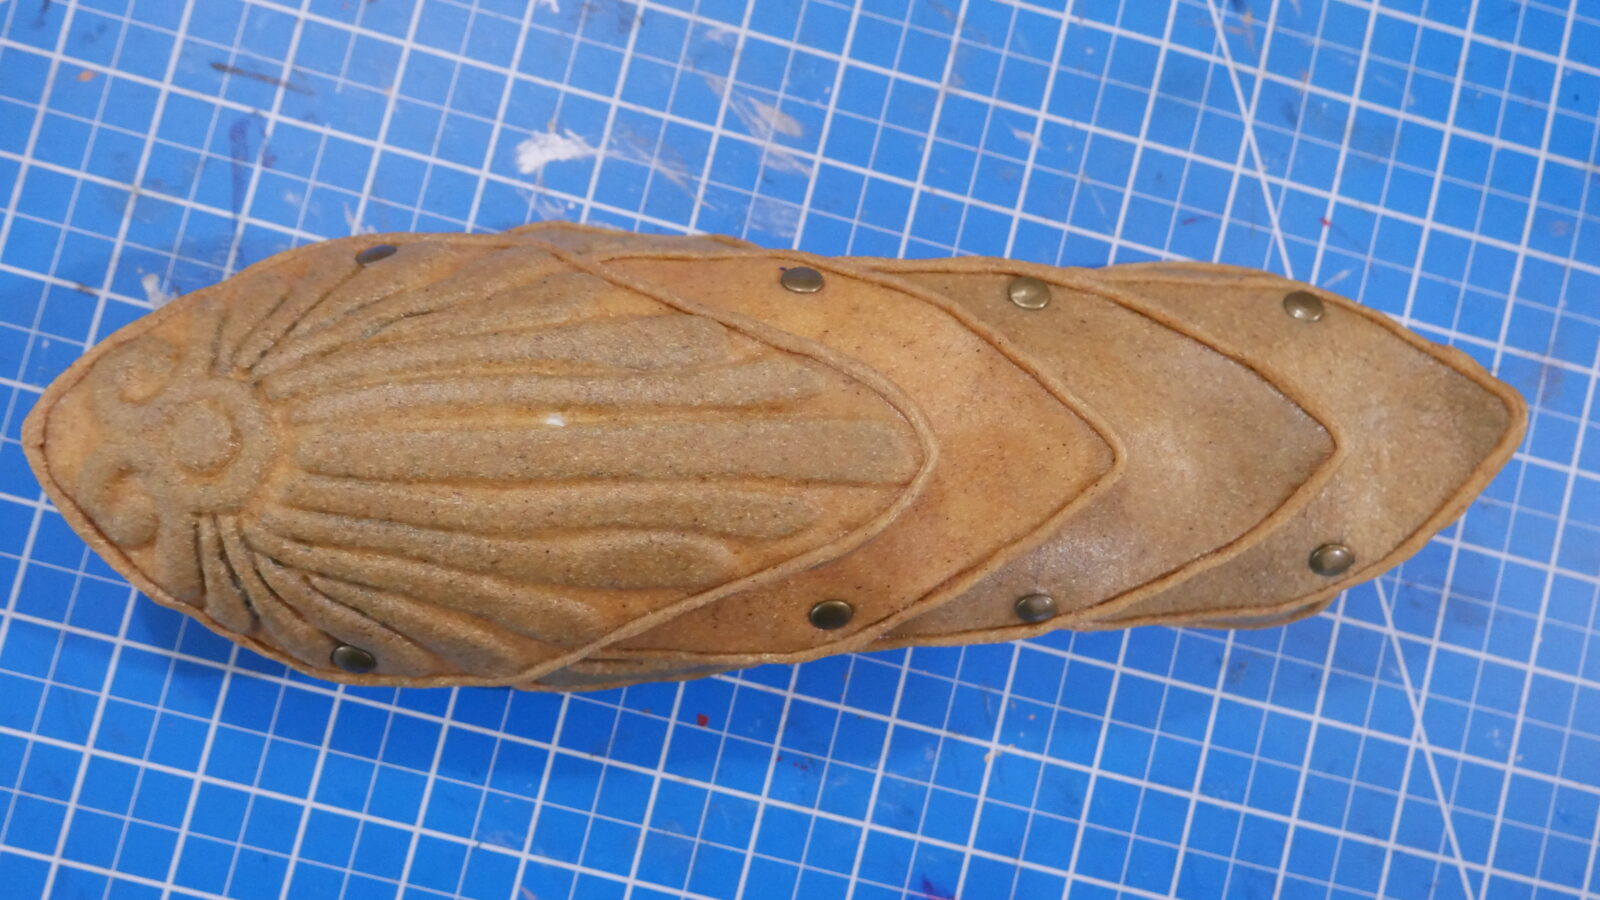
The right bracer is made out of a few layers of the veg-tan leather dyed dark brown. The two layers of the leather were glued together using contact cement, note you want to rivet the elastic in place before you glue them together (don’t be like me and have to pry them apart later), then I punched holes int he leather and used cord to sew the hand covering portion of the bracer, I also used some E6000 to keep the leather tie secure.
The decorations were then added after the leather was shaped and dyed so that I could match the curve or the bracer. The eagle and snake are made out of Sculpey and the ridges were done using insta-morph plastic, both were the painted gold, sealed and glued directly to the surface of the leather. The gold dots were added last using 3D gold paint. Finally the strap the goes around the wrist was glued to the inside using E6000 and just wraps and tucks under itself to stay in place, the elastic strap is just wrapped in some red linen to hide it.
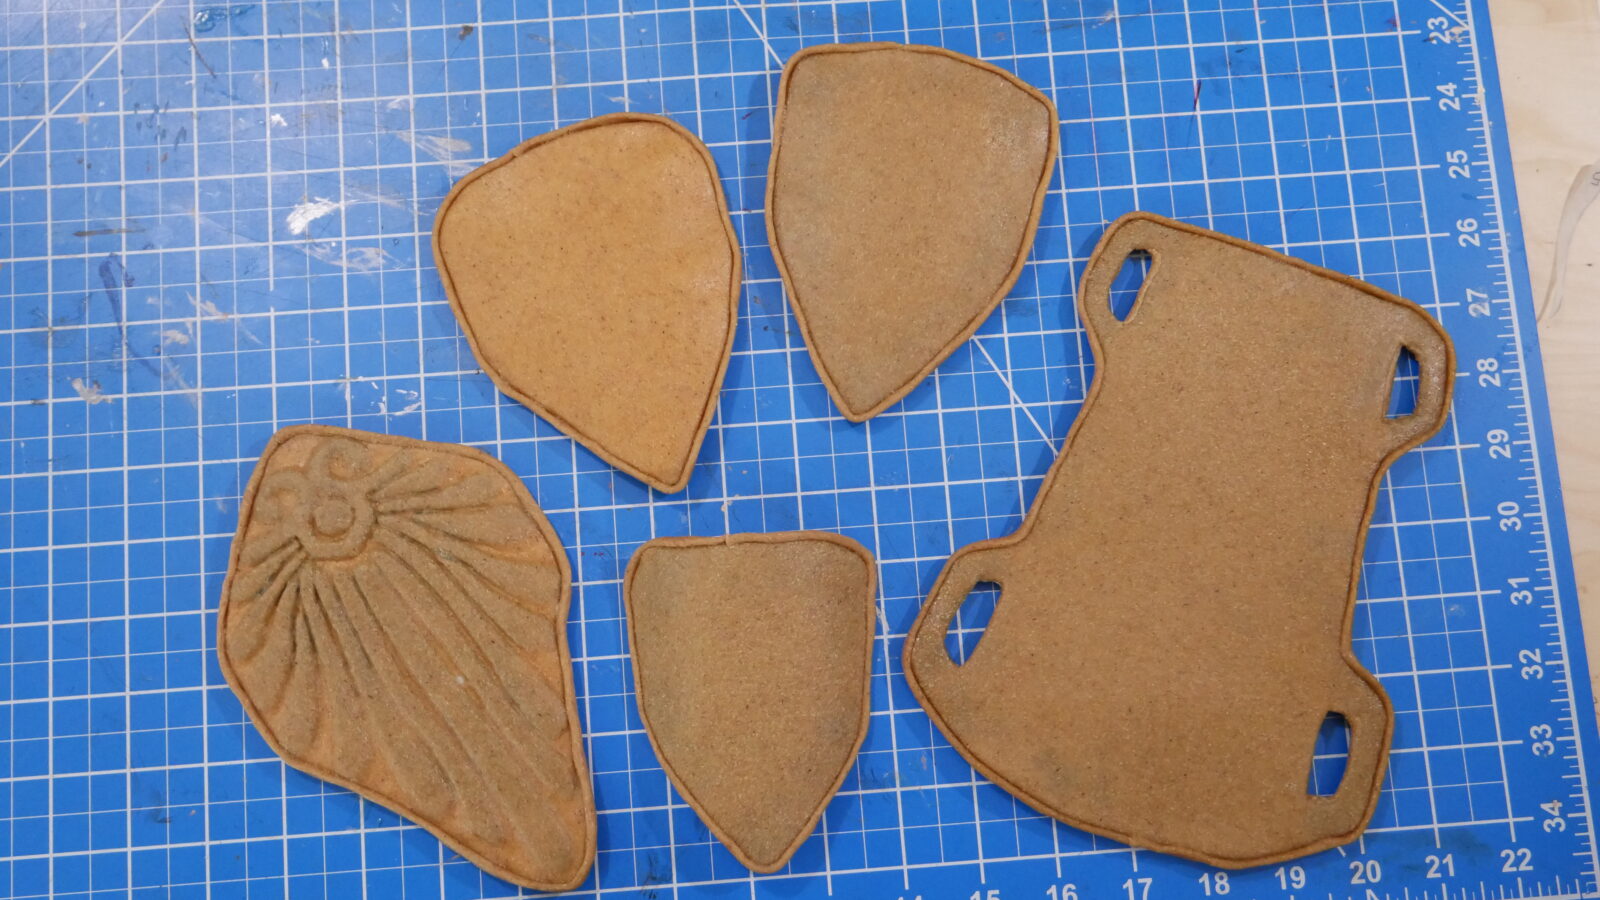
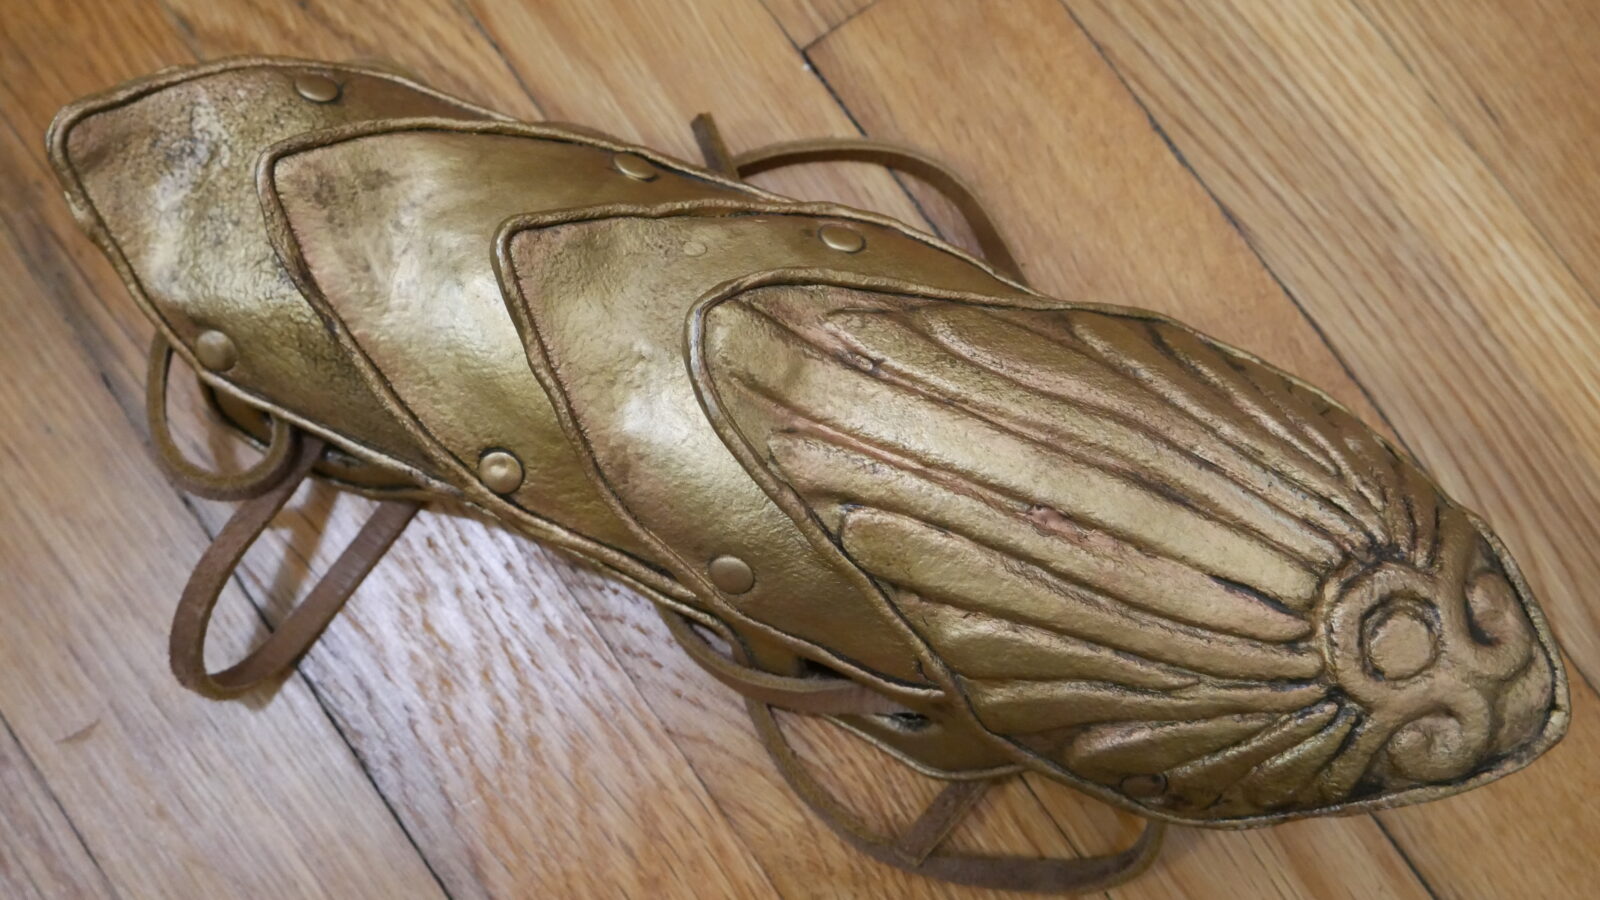
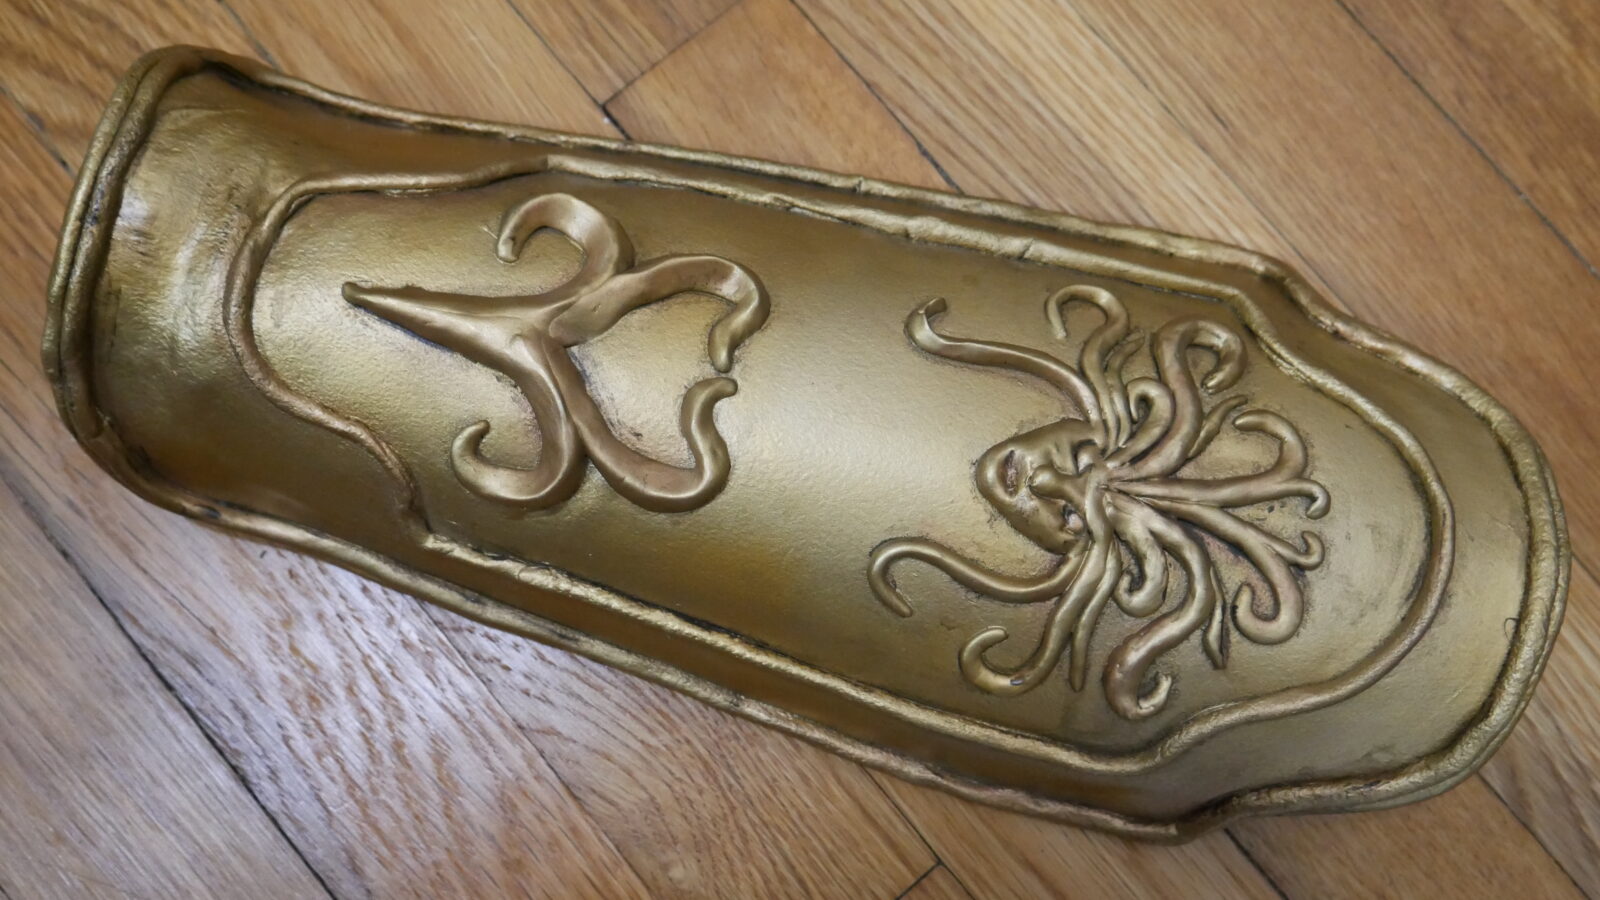
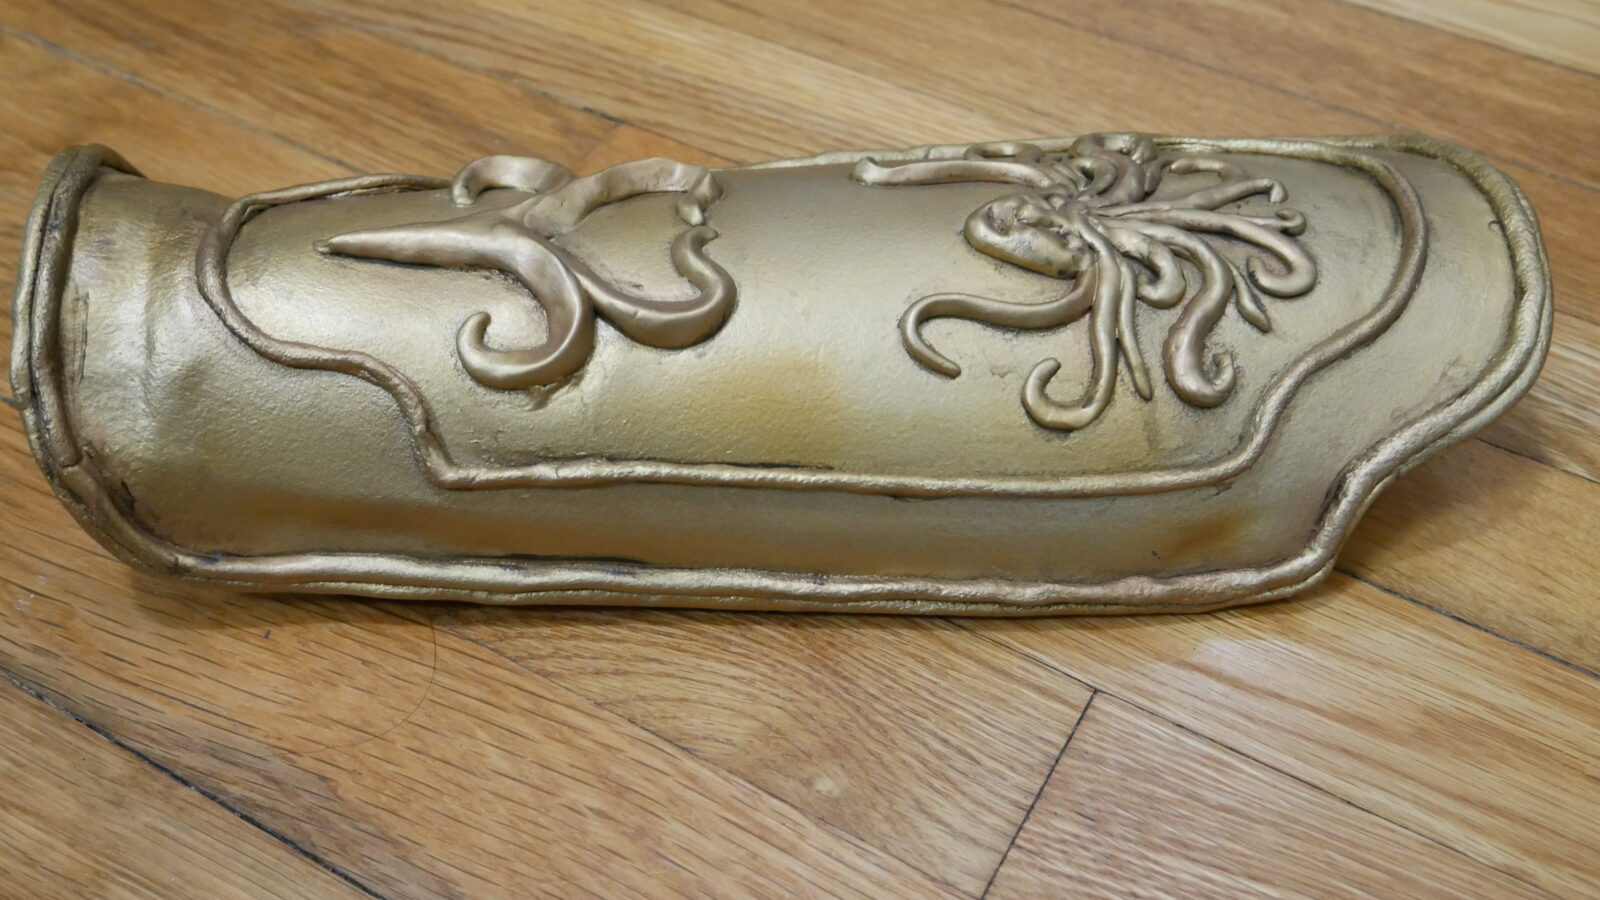
The left bracer is made out of worbla and EVA foam. I pattered the pieces using tracing paper and then cut those pieces out of 2mm EVA foam which I then wrapped in worbla. The very top section had detailing added using EVA foam hot glued to the base EVA, and then the worbla applied over the top and pressed into the grooves. Each piece also had a raised edge of worbla, made from a double layered strip, wrapped around it. I then added rivets to the sections at the corners based on the reference images.
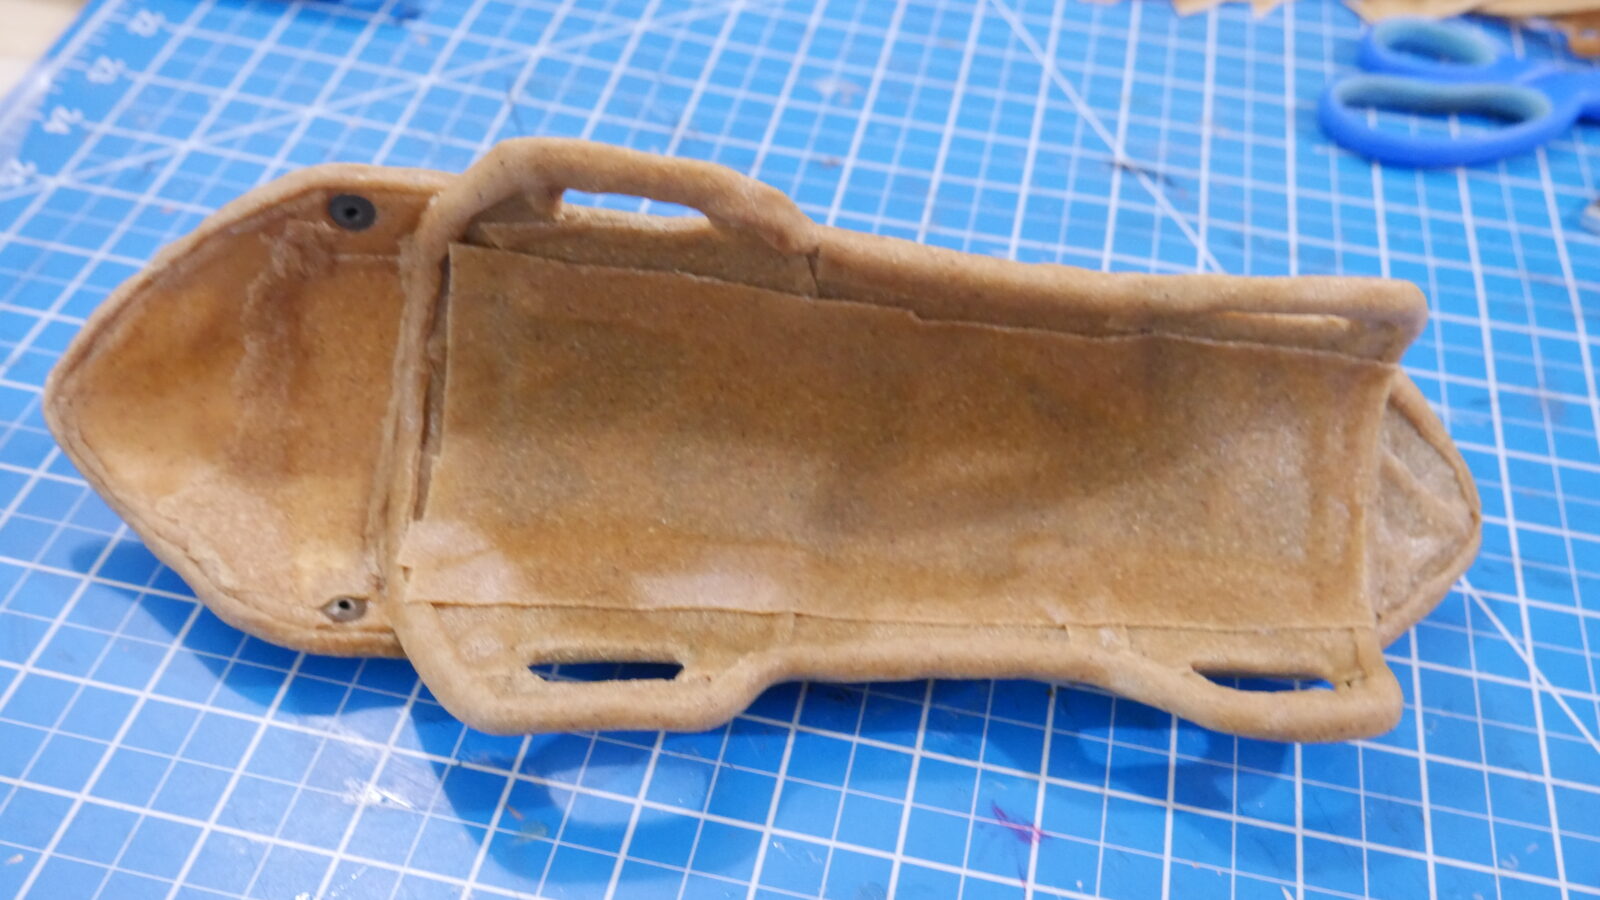

Each of these pieces was then curved to the correct shape and stuck together in the correct layers, flaring the tips upward. Once assembled the structure was primed with spray primer, and painted gold using gold spray paint, with highlights added with rub n buff, and weathering with brown acrylic paint. It attached to the arm using the loops on bracer and a lather cord.
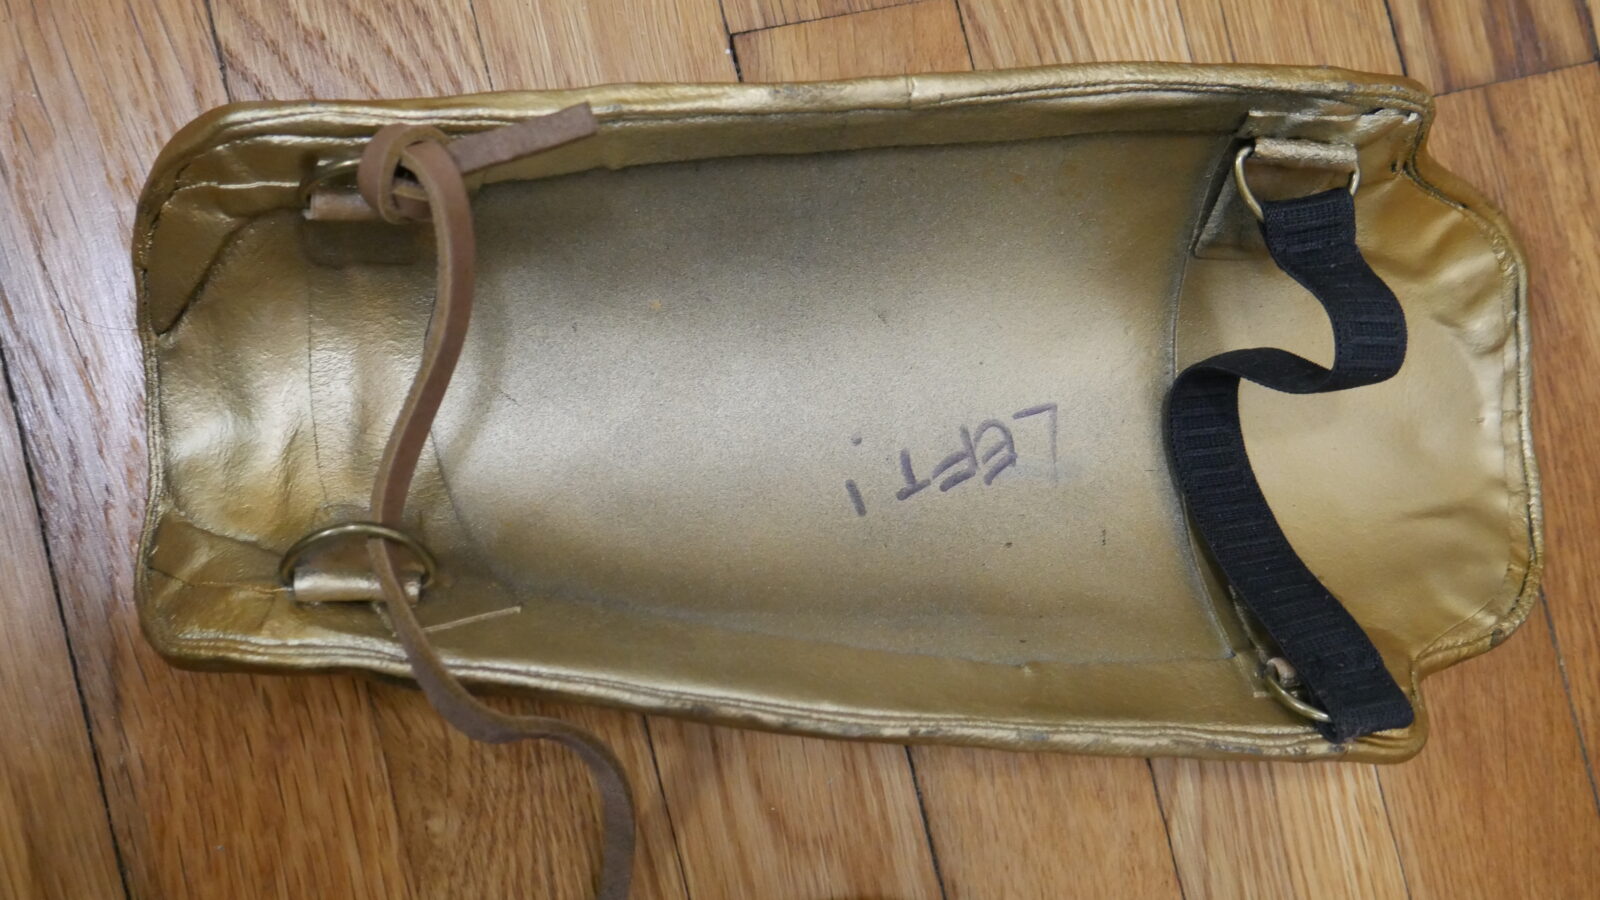
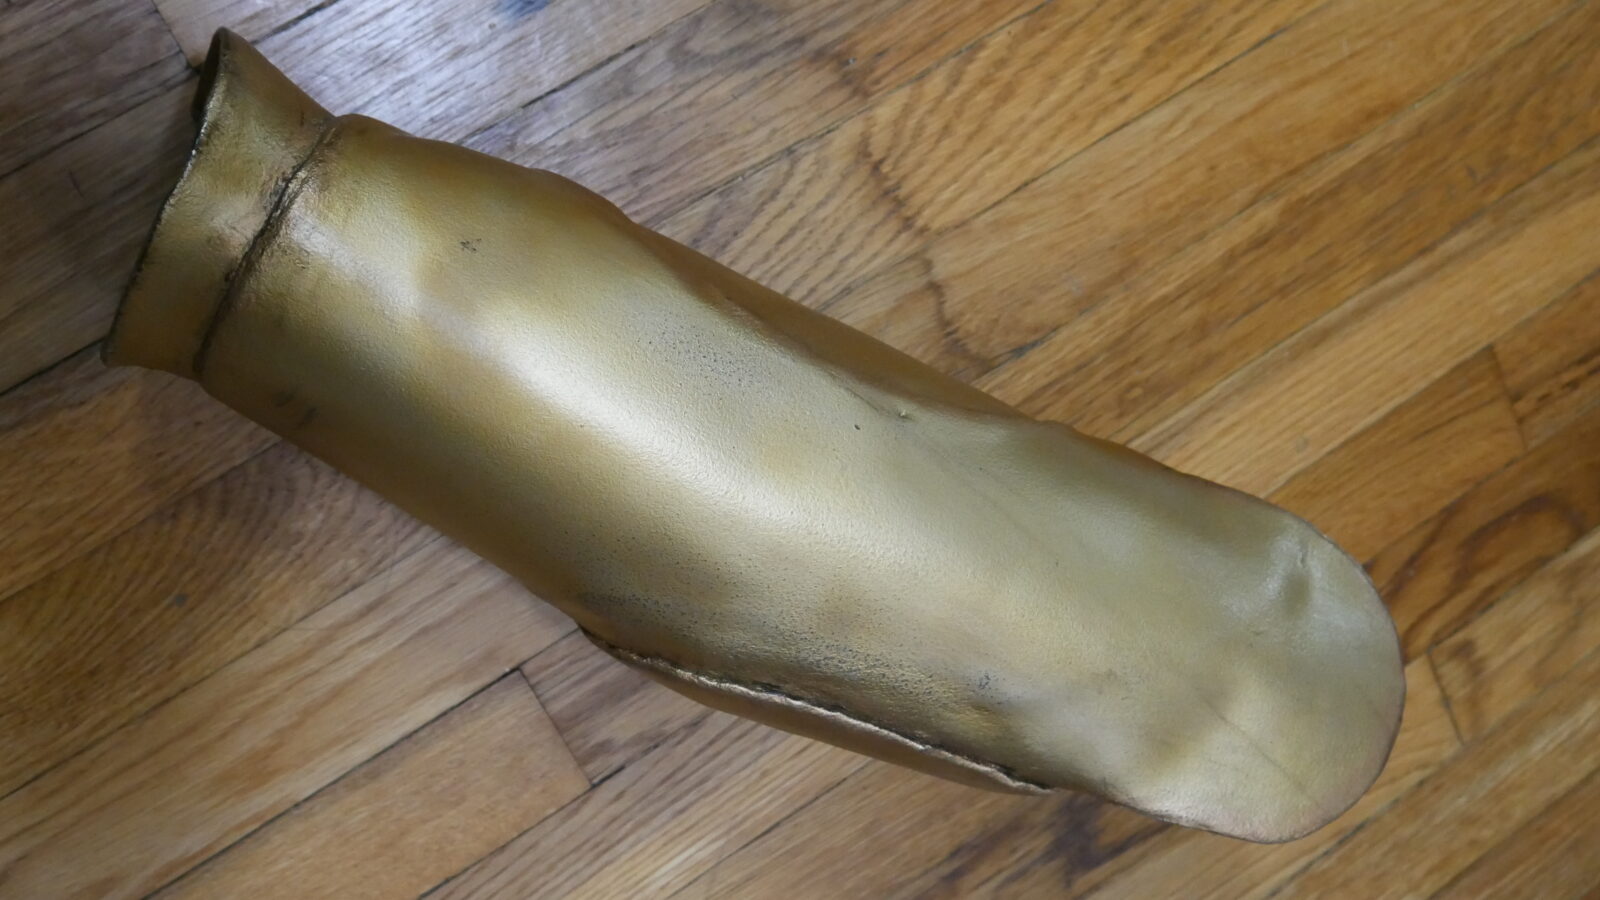
Greaves
Like the bracers Kassandra has two different greaves. To go under both greaves I once again used a fake suede fabric rather than leather for increased comfort, both legs just use a rectangle of fabric I wrap around my leg and the hold in place with the greaves.
The right greave I patterned using tracing paper, then created and EVA foam based which I them covered in worbla, I then shaped this to my leg, flaring the base and curving the overall structure. The designs were added with a combination of strips of wrobla and insta-morph plastic to make the medusa face. On the back I added d-rings using worbla, which would allow the elastic and lather strapping to attach in order to keep in on my leg.

The greave was then painted with a spray primer, gold spray paint, run n buff and acrylic to weather (like all the other painting, my Patreon has more details).
For the left leg greave I patterned it using the cling film tape method to create shapes that would wrap all the way around my leg. The pieces were then cut out of form, wrapped in worbla and molded to my leg. I then stuck the pieces together and did additional molding to get the right shape, this took some struggle and trial and error. I also added d-ring tabs to later connect the elastic too in order to keep i closed on my leg.
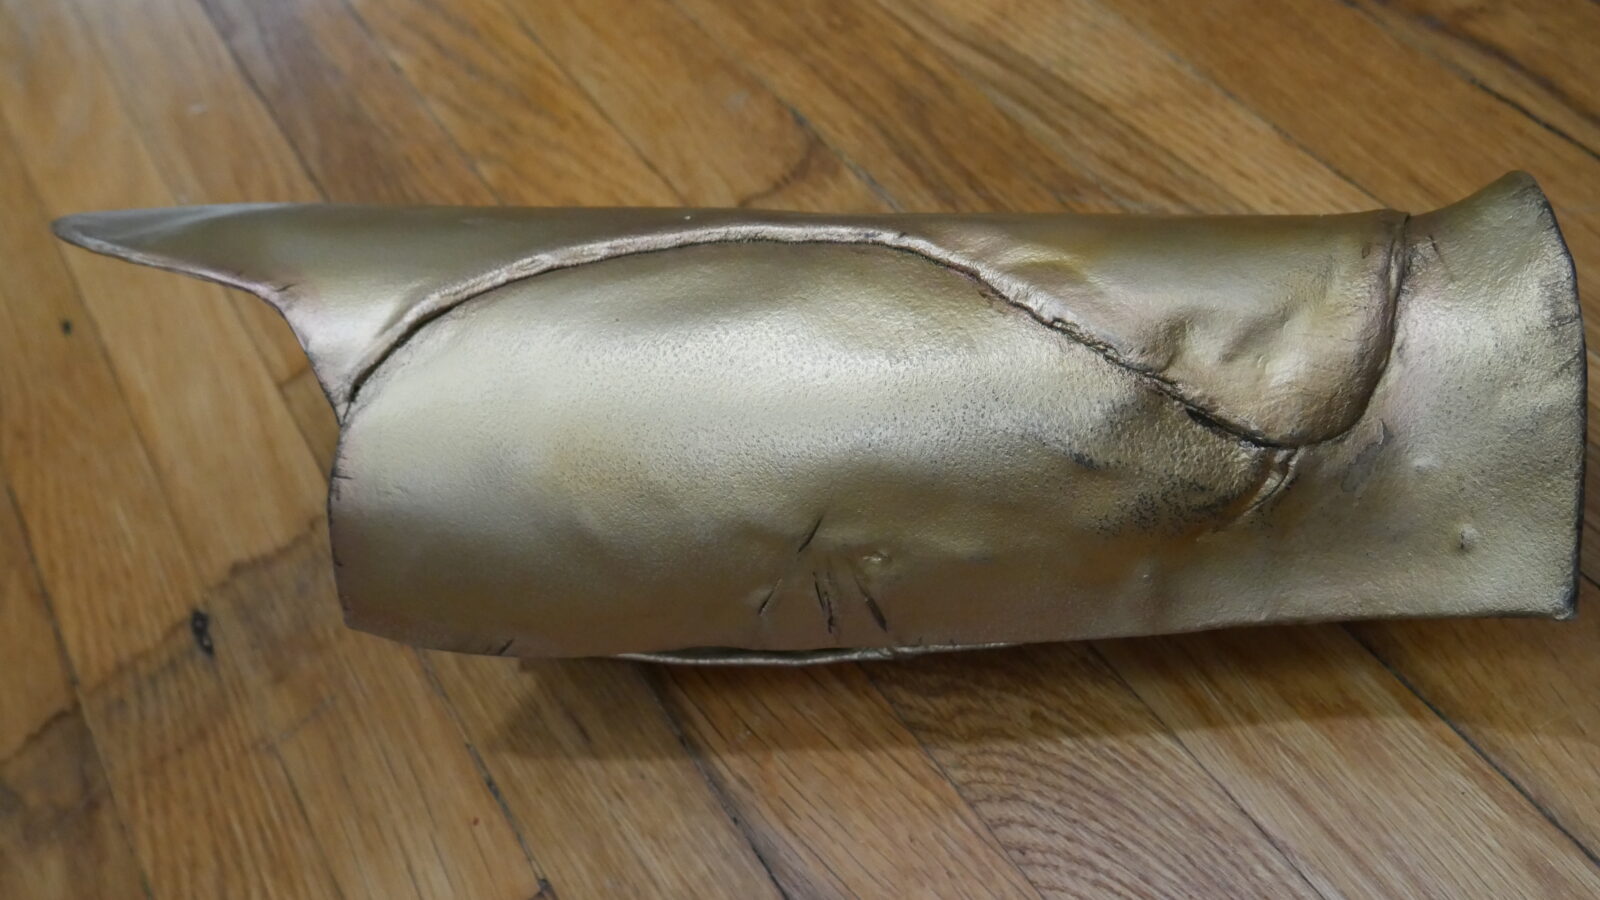
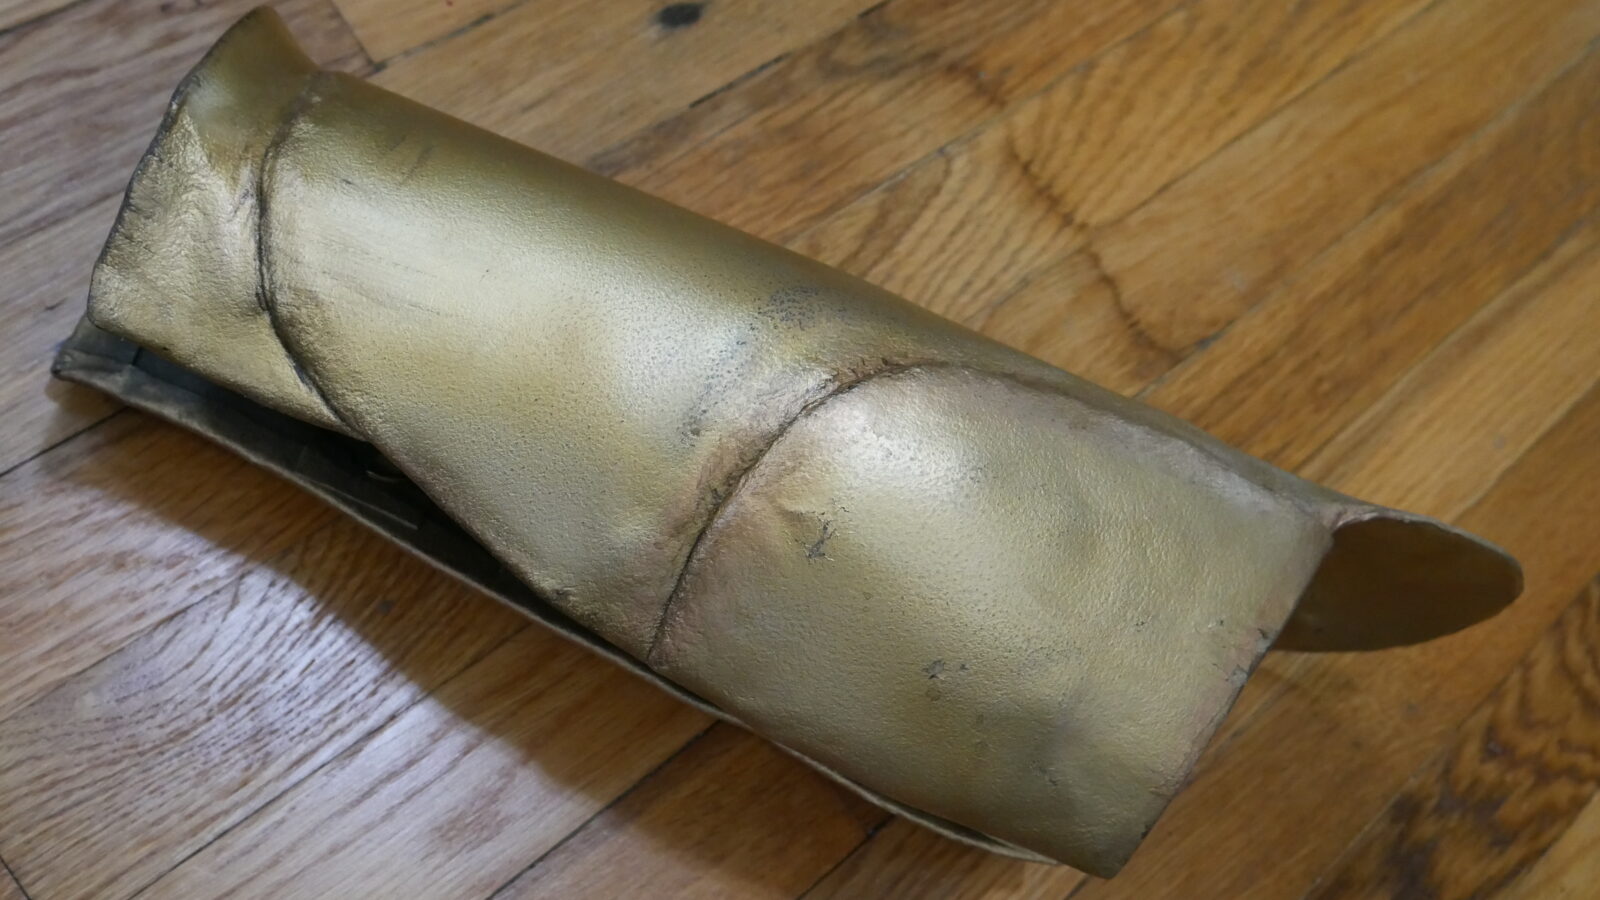
Painting the greave was the same as all the others, primer, gold spray paint, run n buff and acrylic.
Accessories
The cape was a little bit of a struggle, mostly because I had a hard time trying to identify what piece of clothing it was based on. In the end I made a semicircle with one squared off edge that I then stitched into one big loop that goes on over my head. The back hanging section is a separate piece that is also stitched in place. All the folds and stitching I added in with lots of clever tucking and stitches, I did double layer the fabric to give it more weight a drape and also make it easier to hide stitching. A pattern for the cape can be found along with the rest of the template in my store.
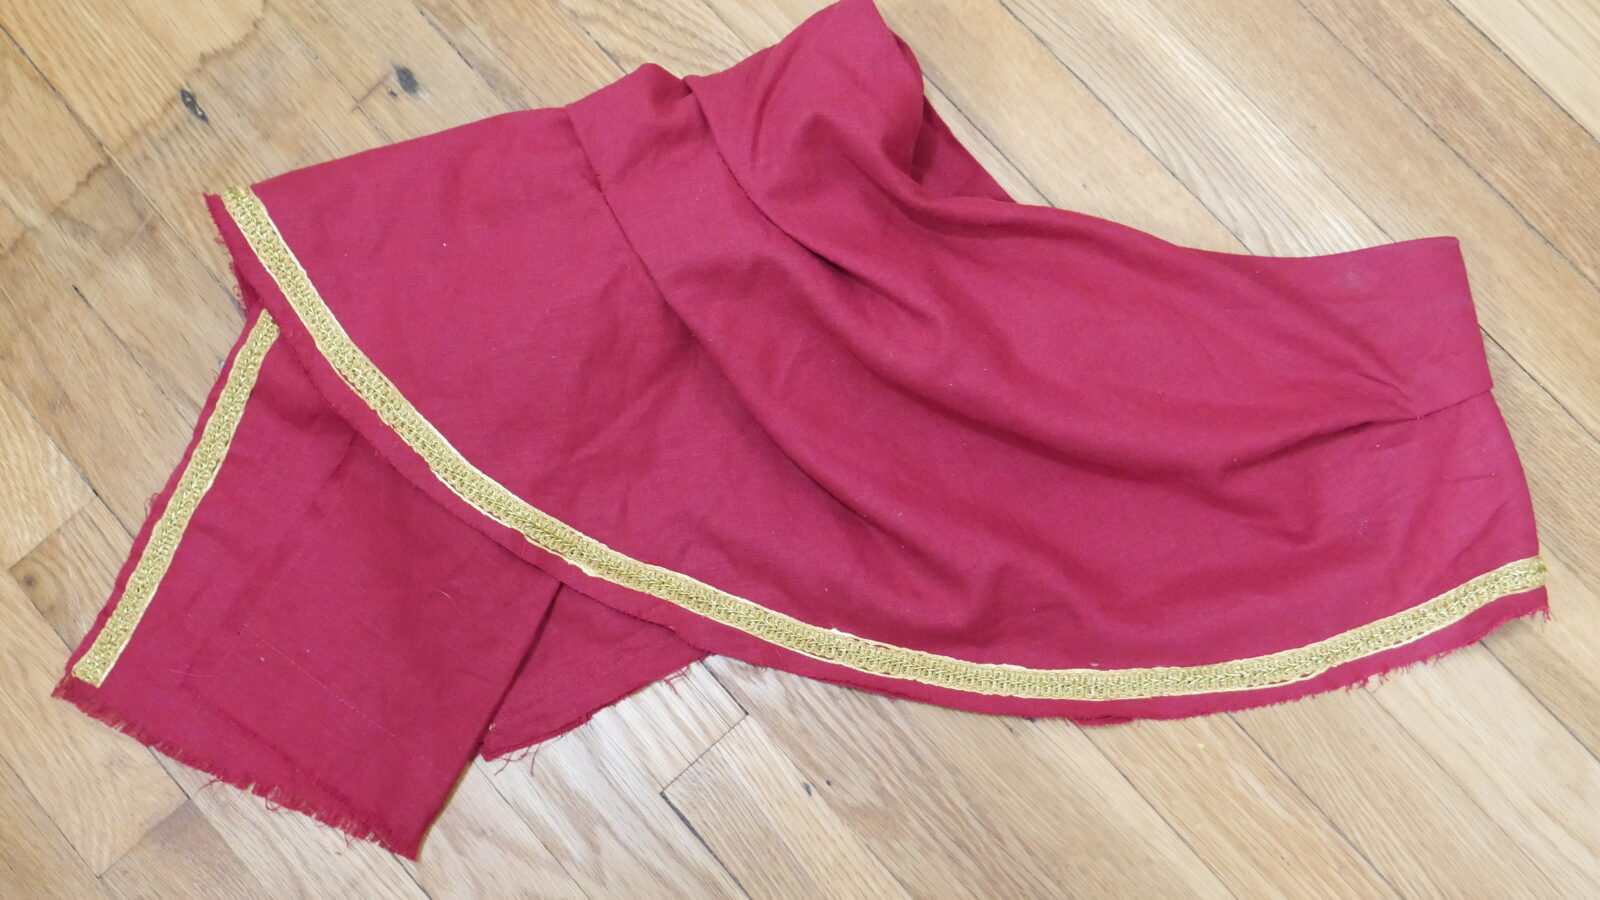
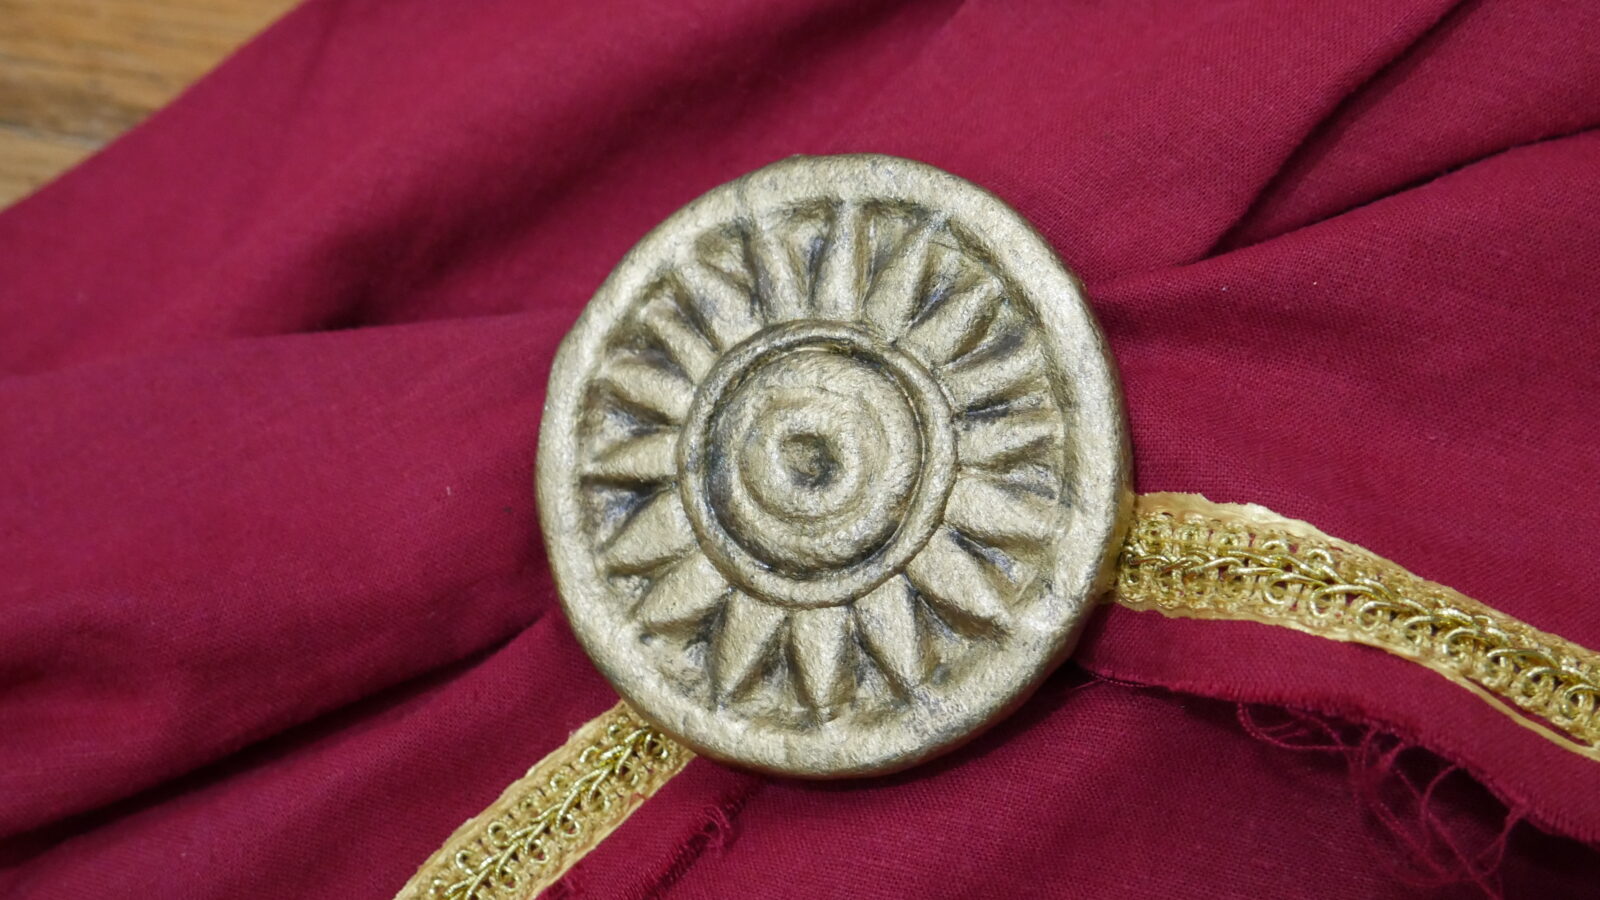
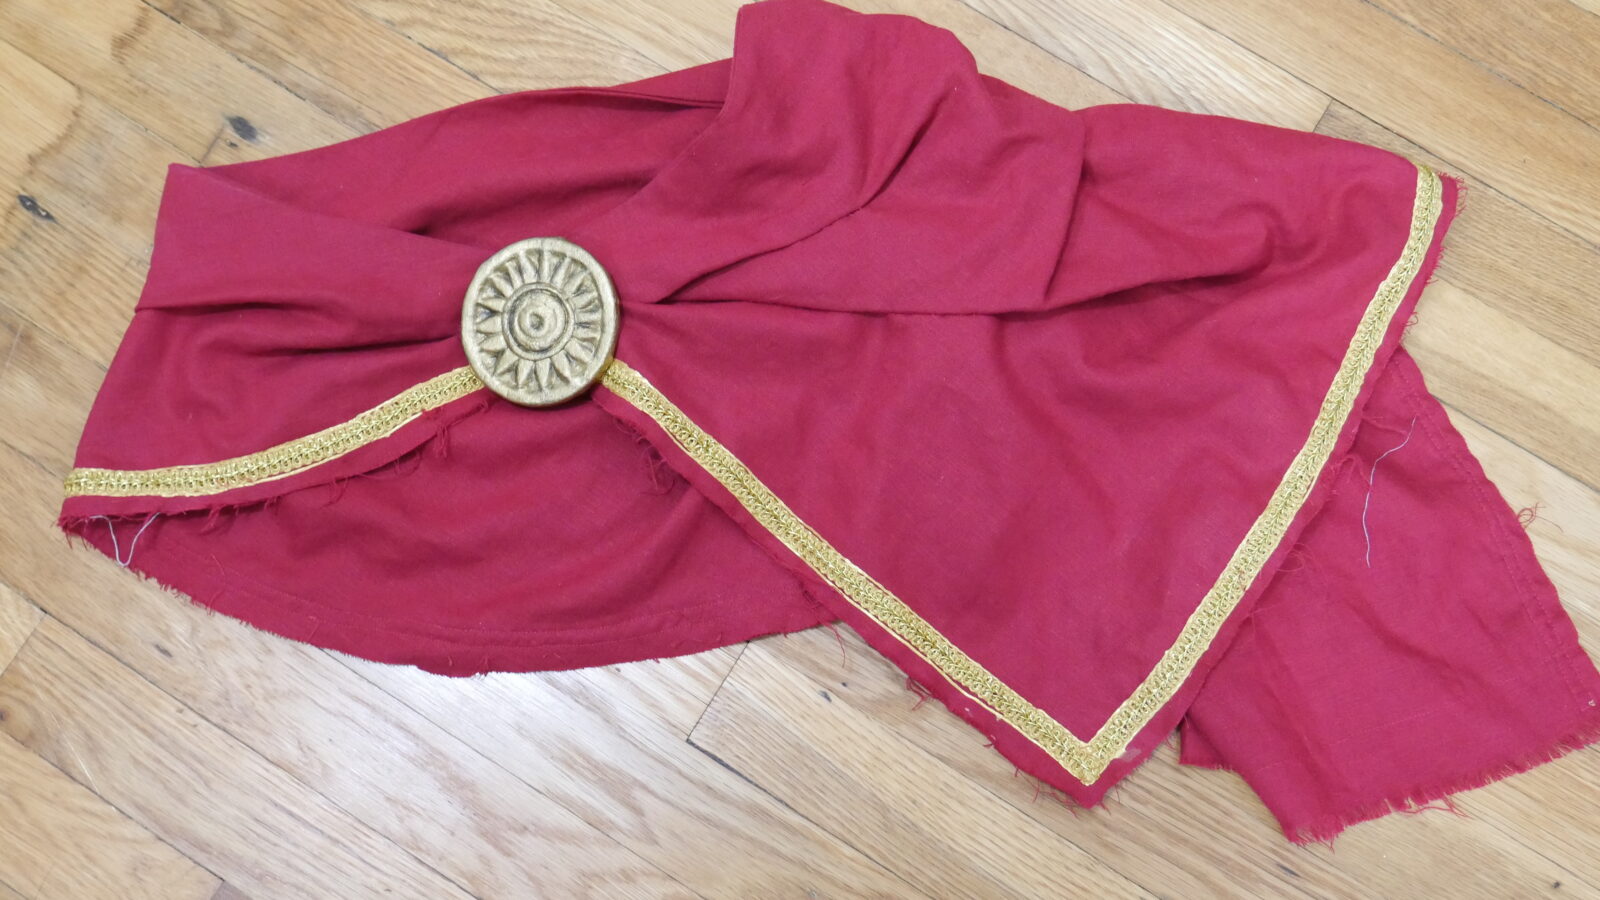
I used a gold trim from Jo Ann for the edging and then added the lines using gold 3D paint. The brooch was made of a base layer of EVA foam, with the raised detailing being another layer of foam, and then worbla added over the top and pressed into the design. This was painted gold and the stitched directly to the front of the cape to hide the seam.
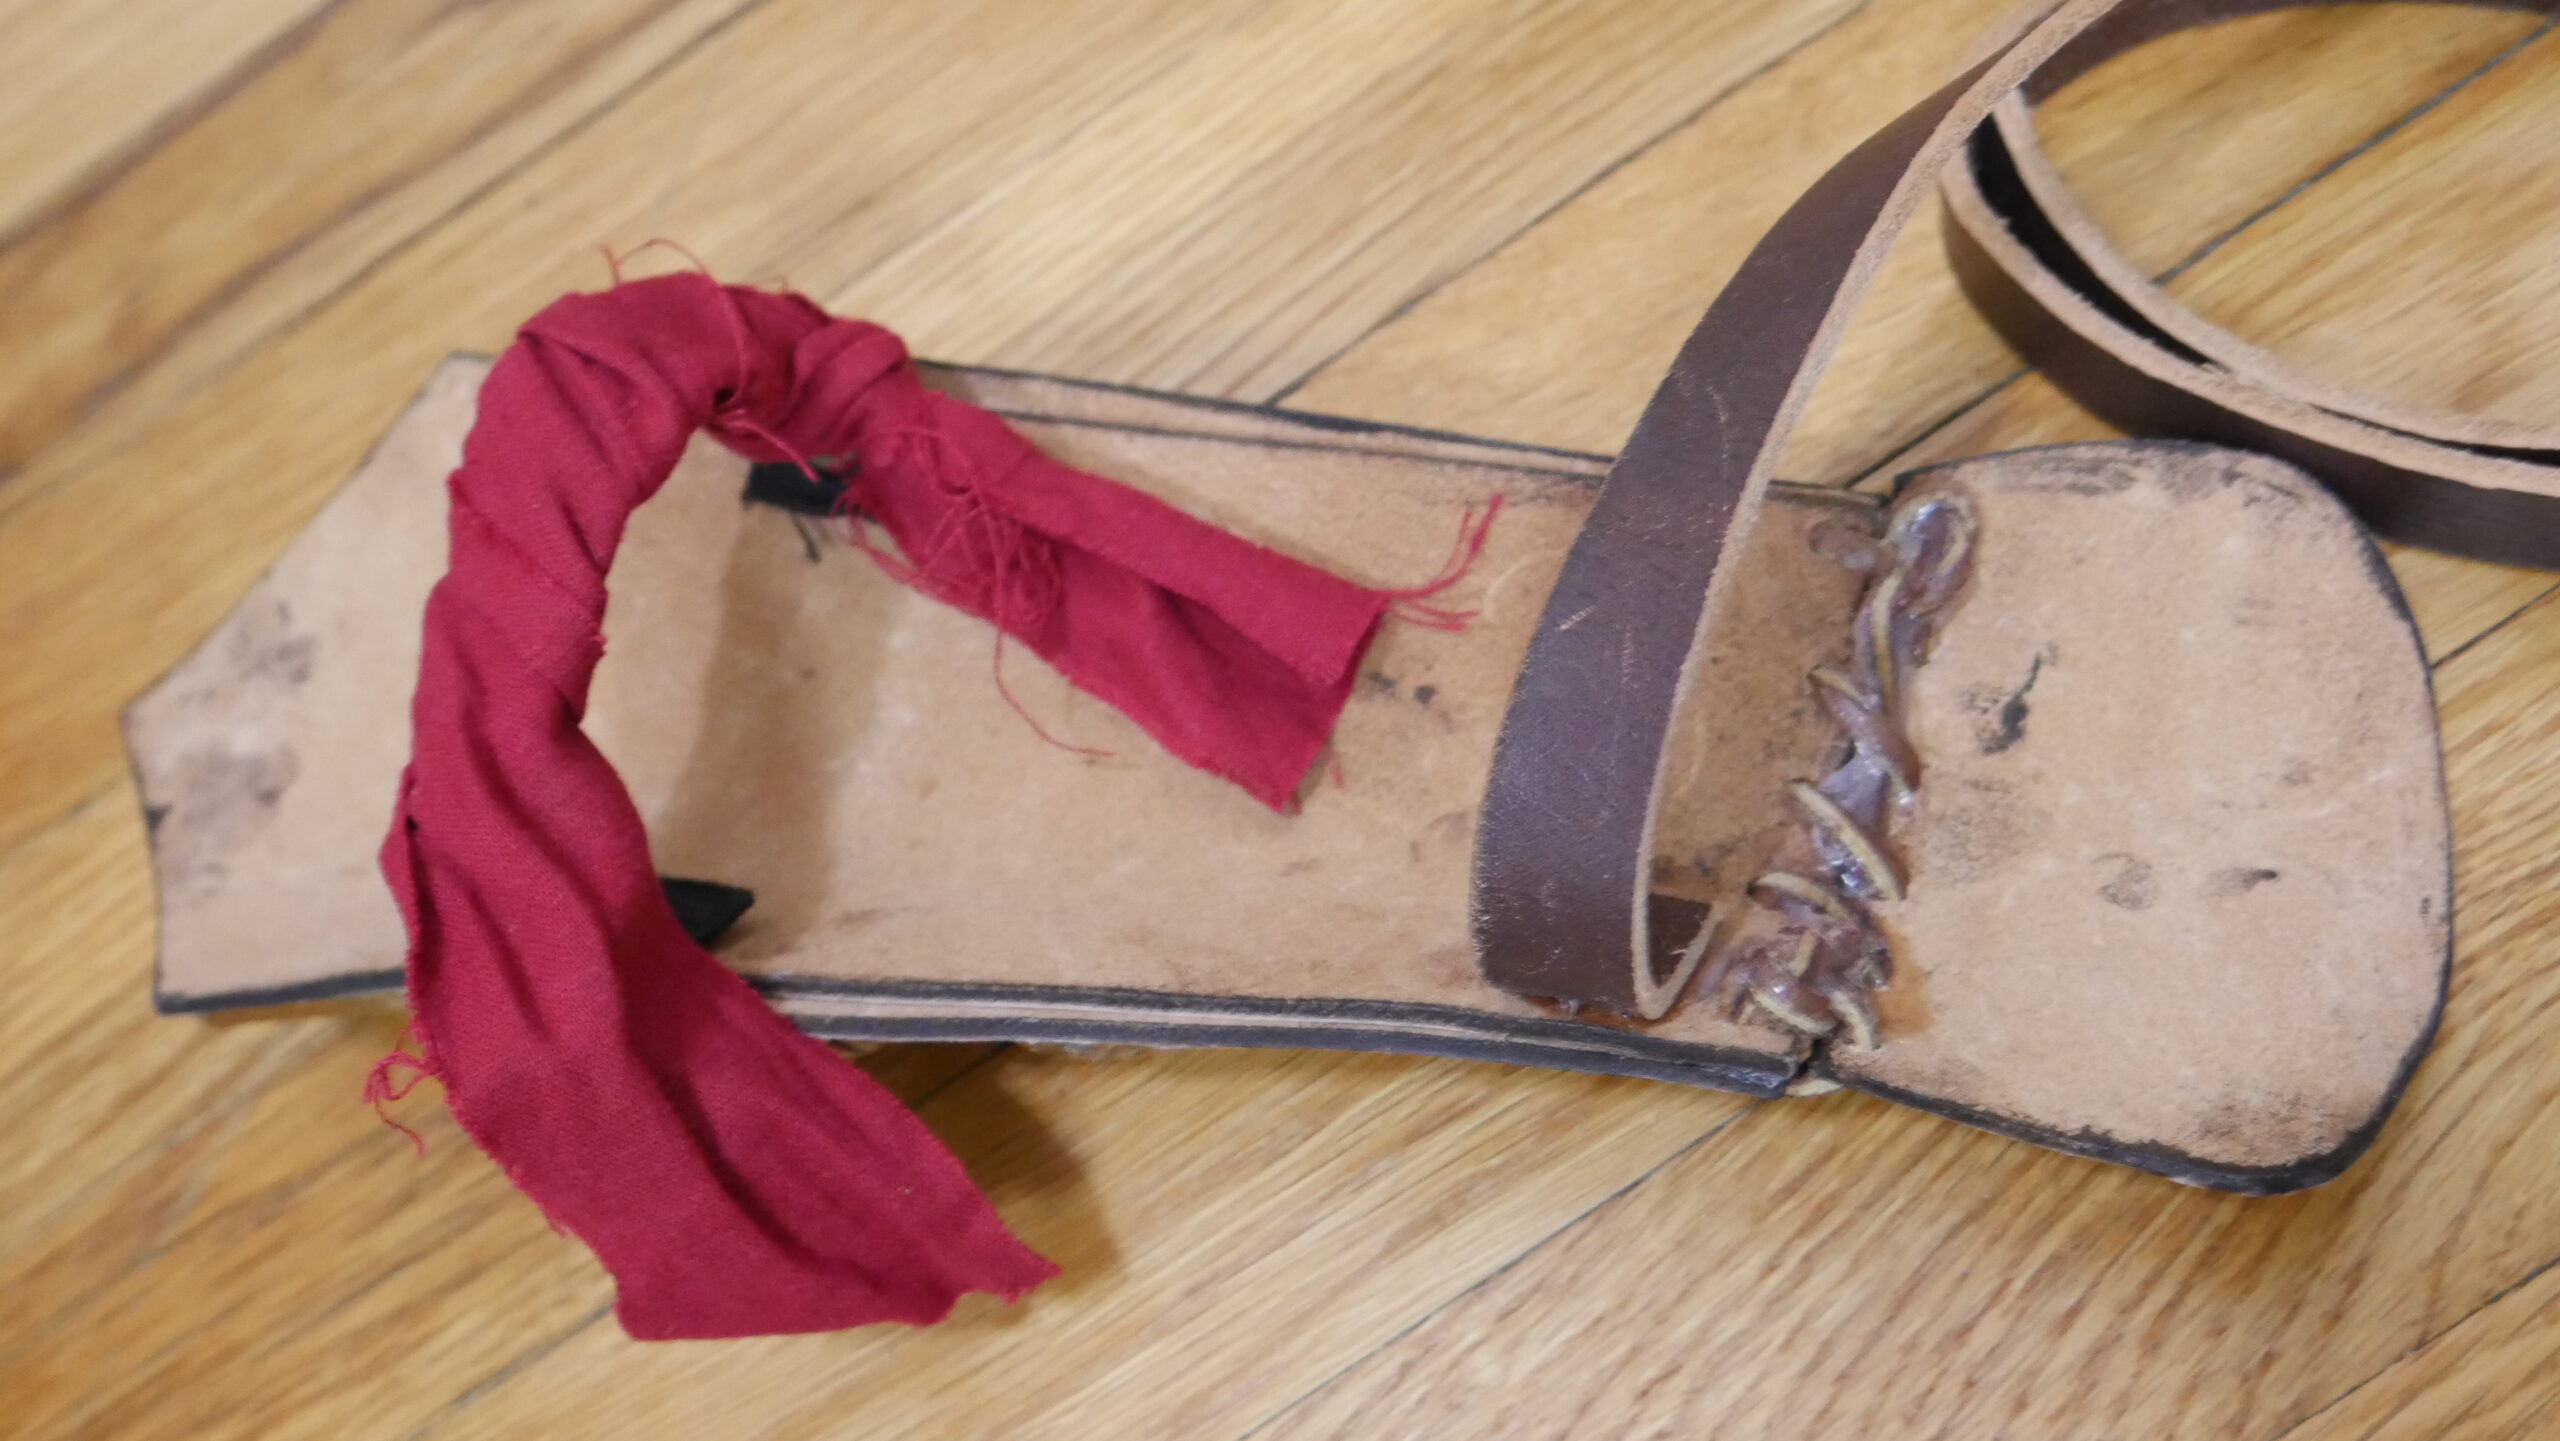
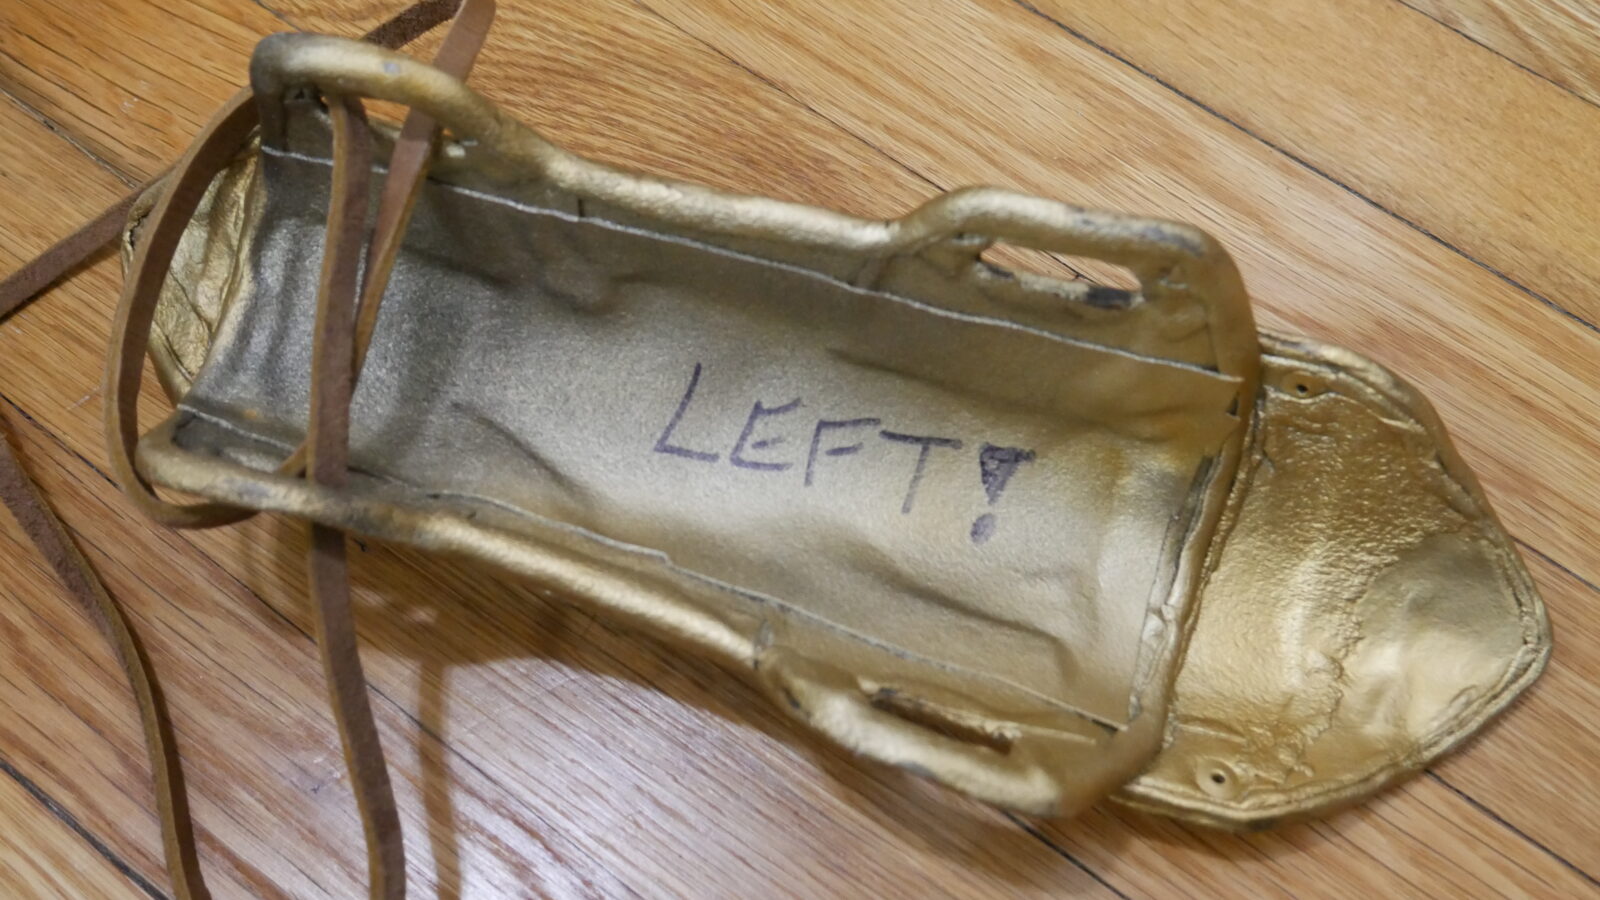
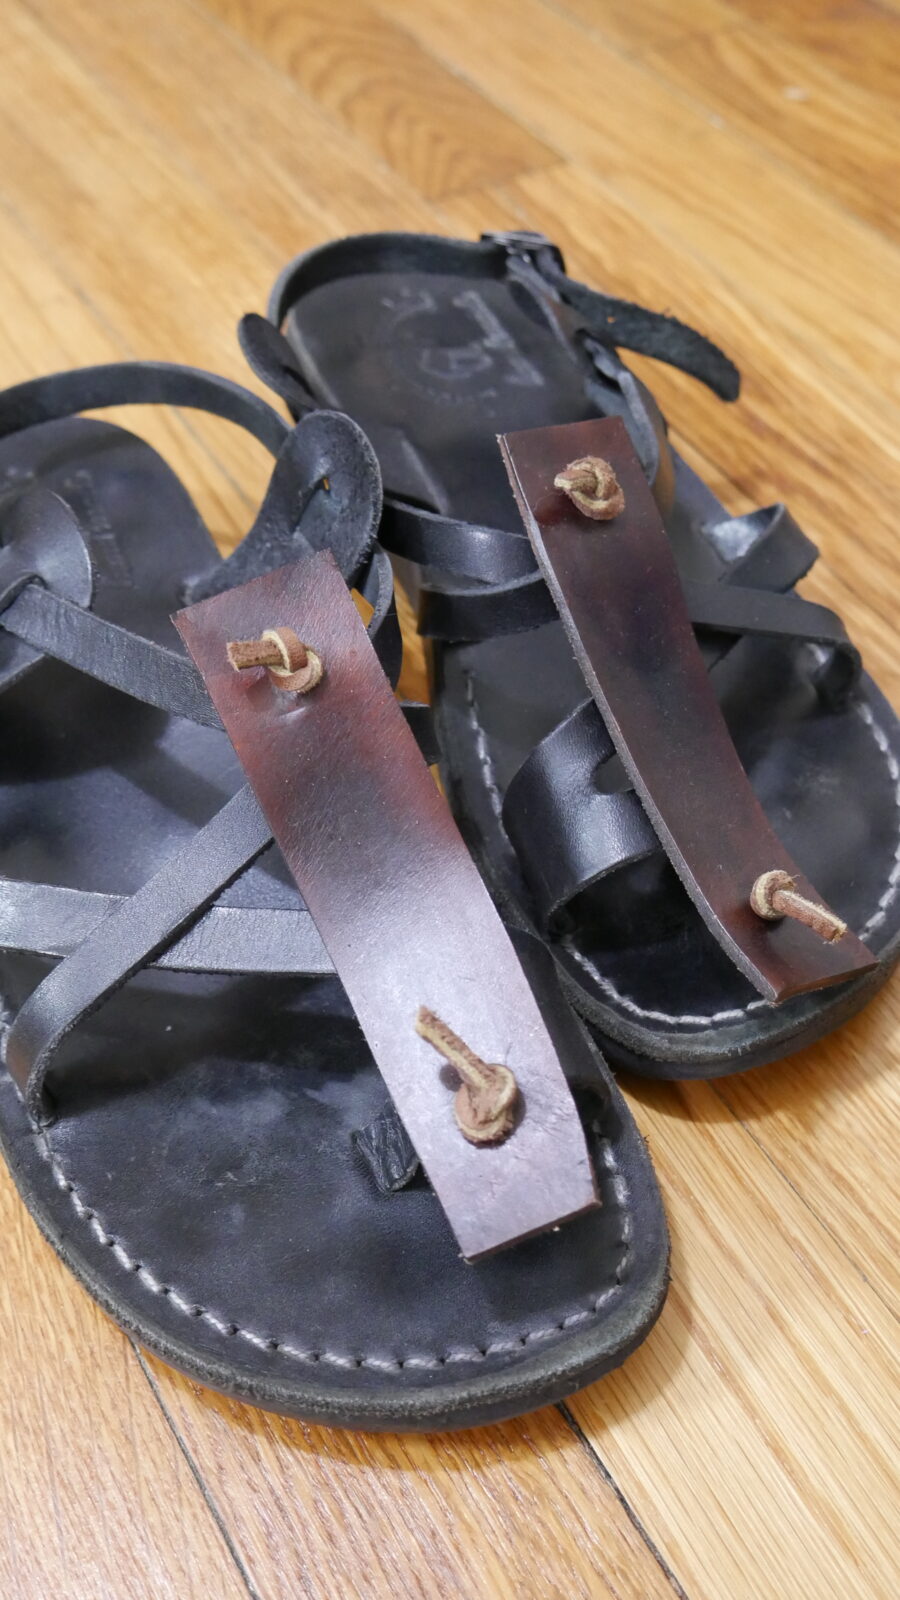
For the shoes I used a pair of gladiatorial sandals I had already, mostly for increased comfort. Though I did add a strip of leather over the top to help it blend with the costume overall.
The wig I used was the Buttercup Silky in Coffee from Arda wigs, while the deep skin cap was great for getting the right part, the wig was overall too short to easily get into a braid. I would recommend some of the longer wigs from Arda, Epic Cosplay or Purple Plum.
Weapons
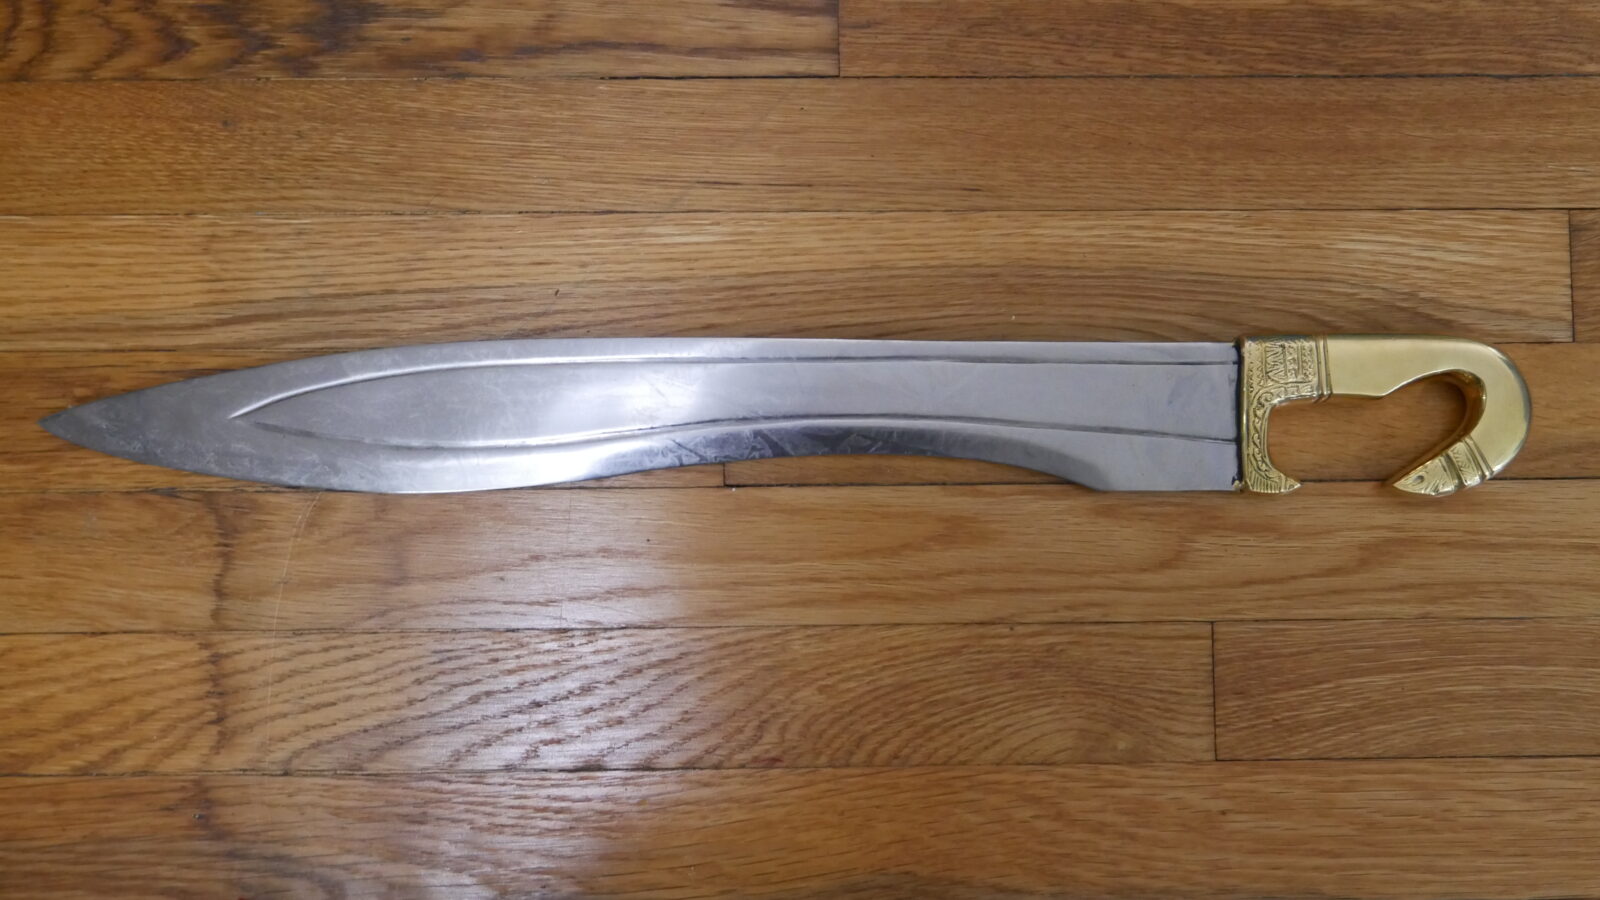
I got lucky and stumbled upon a replica Kopis (Falcata) blade online for a reasonable price and decided it was worth buying rather than making a more accurate version. The main downside is the metal blade was way to heavy to hang off the costume, so if you want to wear the prop then I would suggest making one out of lighter materials such as foam (Punished Props have many great tutorials).
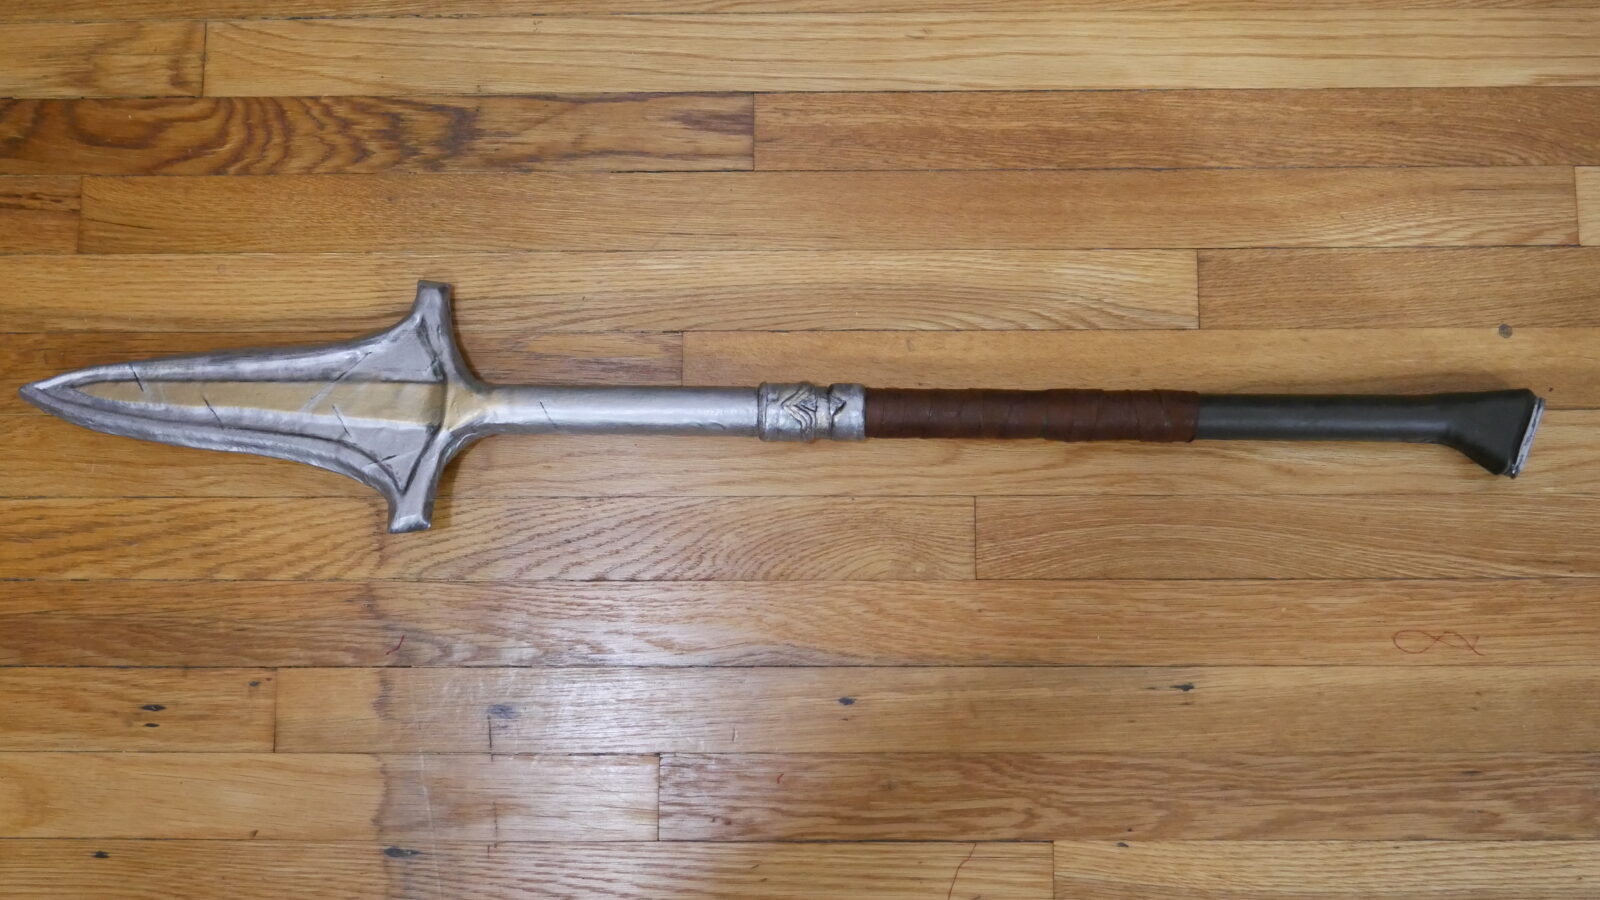
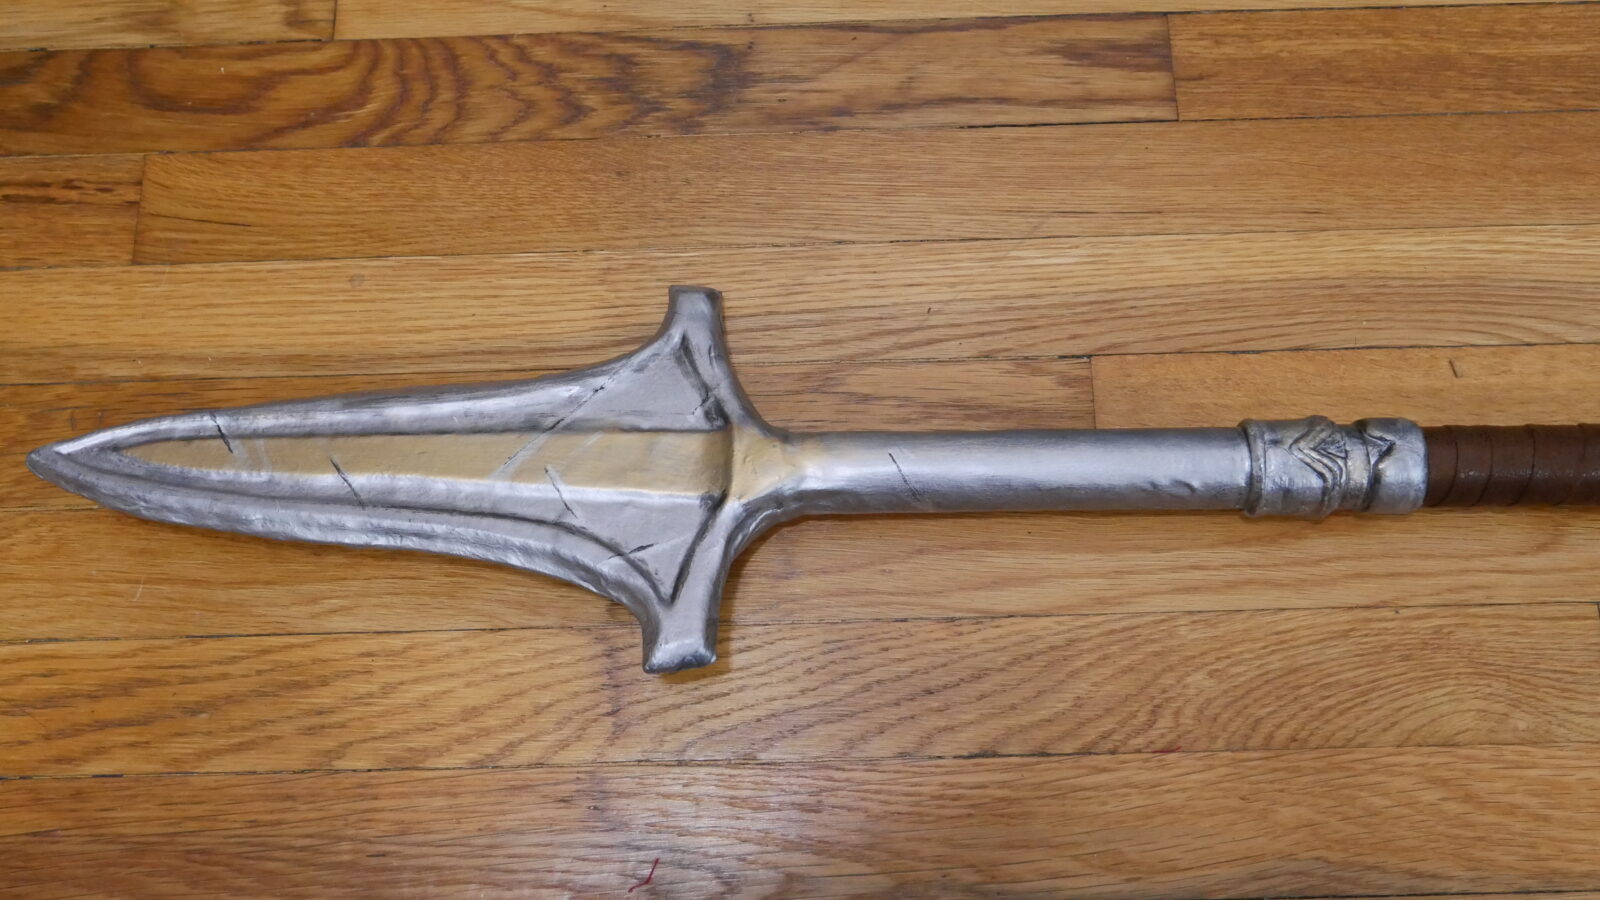
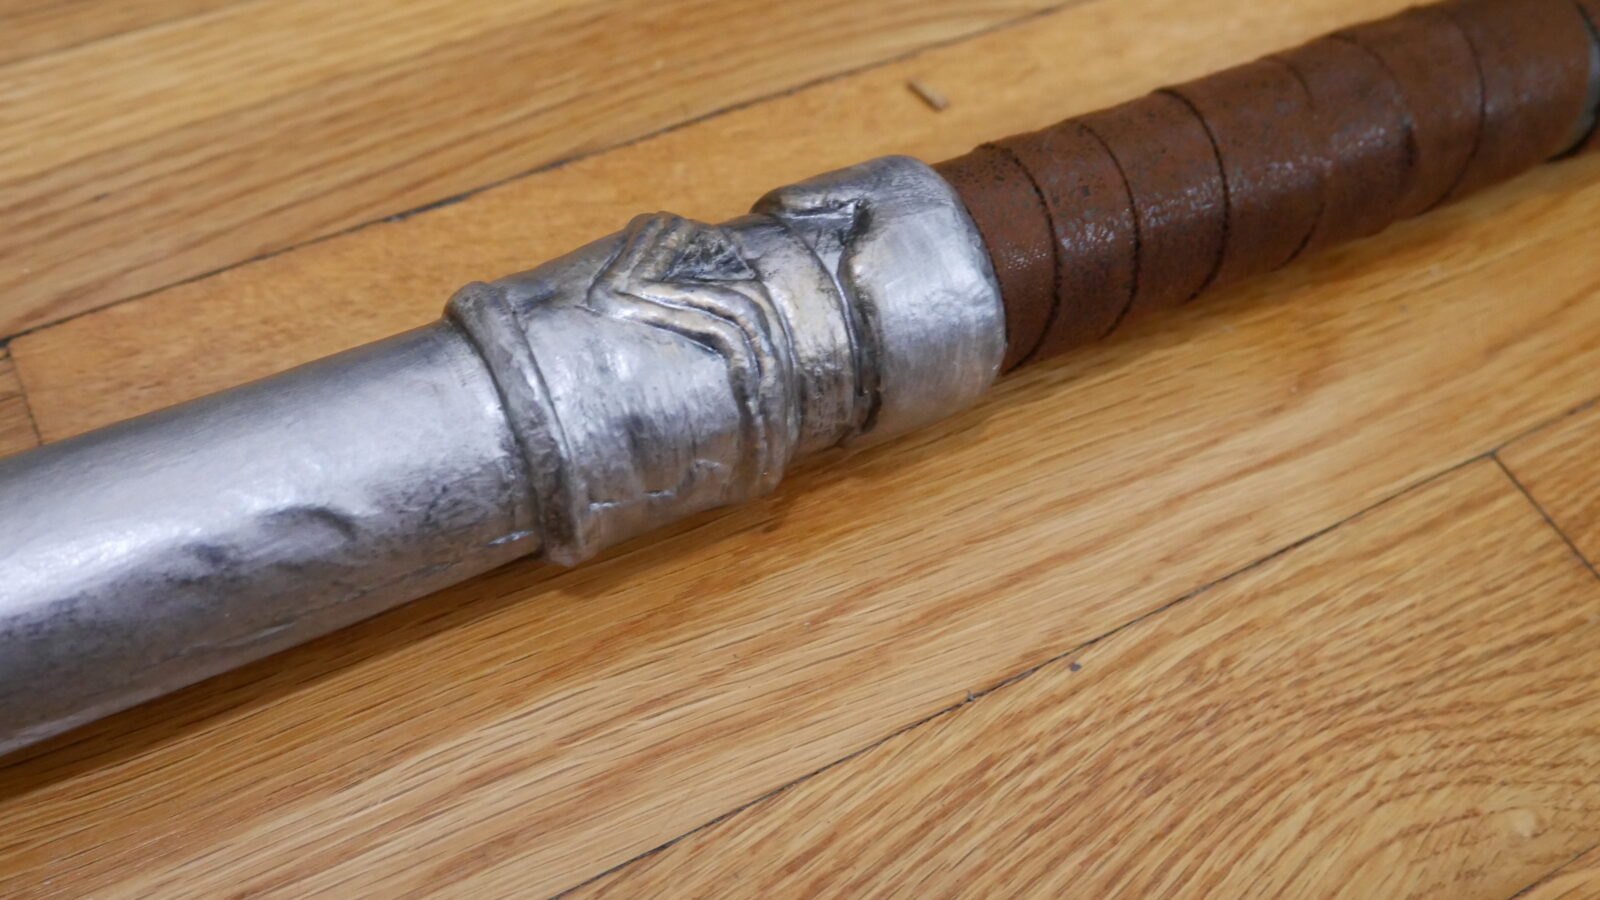
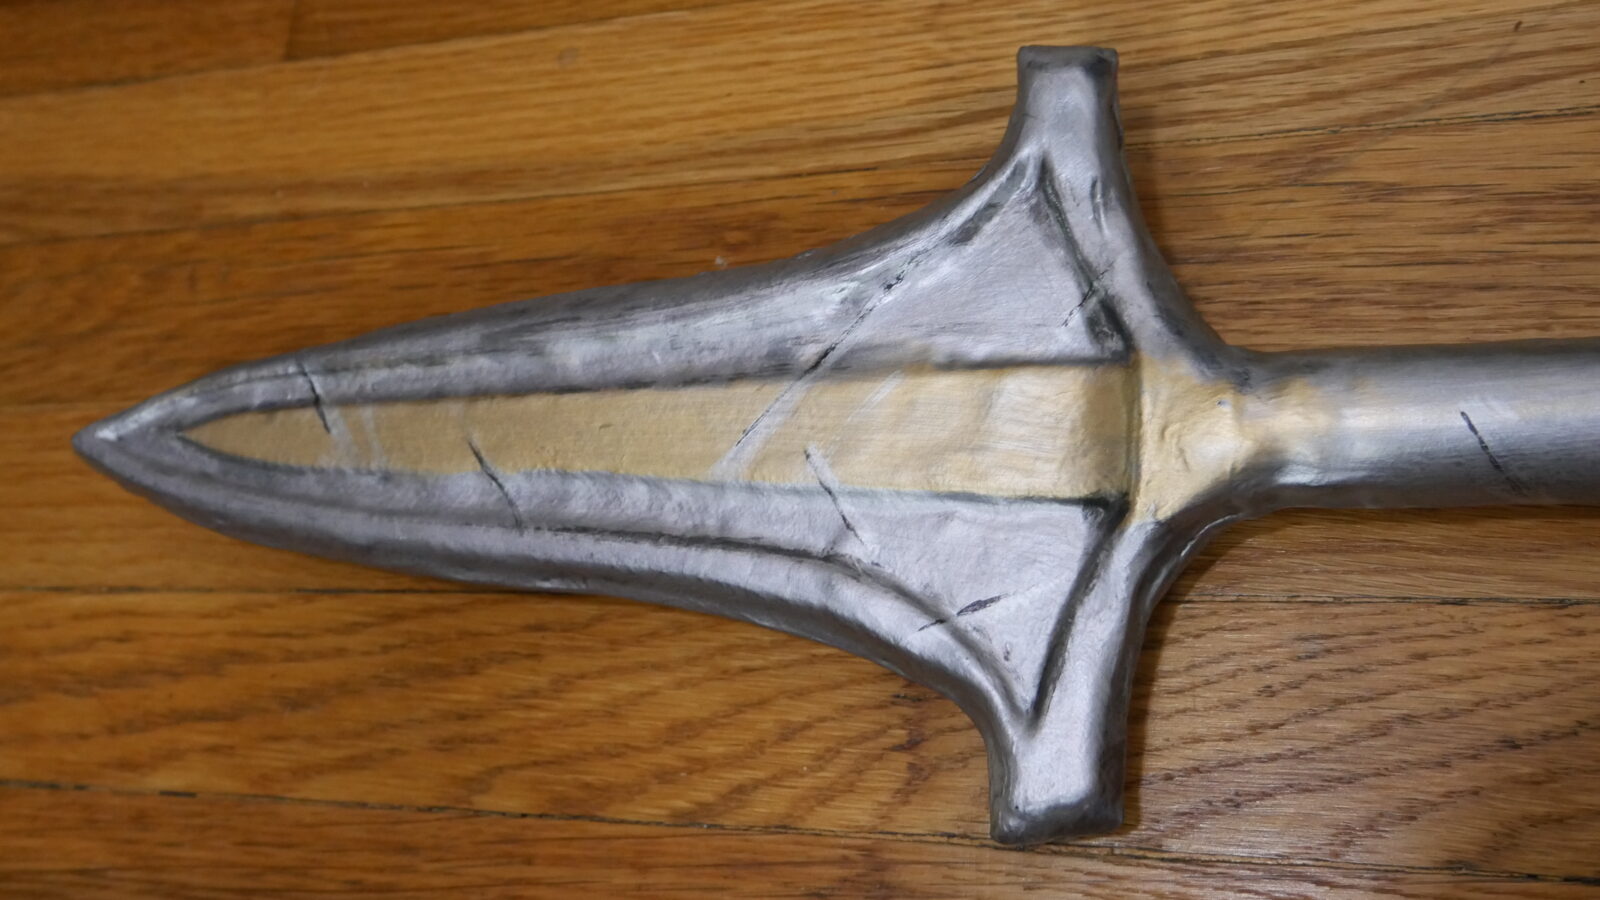
The spear on the other hand I constructed. The base is a core of 2 feet of 1 in diameter PVC pipe, I scaled the whole spear to be about 3 feet long but I think it should have been closer to 2 or 2 and a half feet. The blade was then made of 1 piece of 1/2 in EVA foam (I had to smooth one side of mine as I only had the textured floor mat), I left a tab to stick it inside of the PVC pipe to hold it in place and then beveled the edges with a dremel.
I used thinner 2mm EVA foam to add the details to the blade and blend the blade into the rest of the shaft. The who thing was then wrapped in worbla to add structure and blend the sections together. The center design was done using layers of worbla sculpted into the correct shapes.
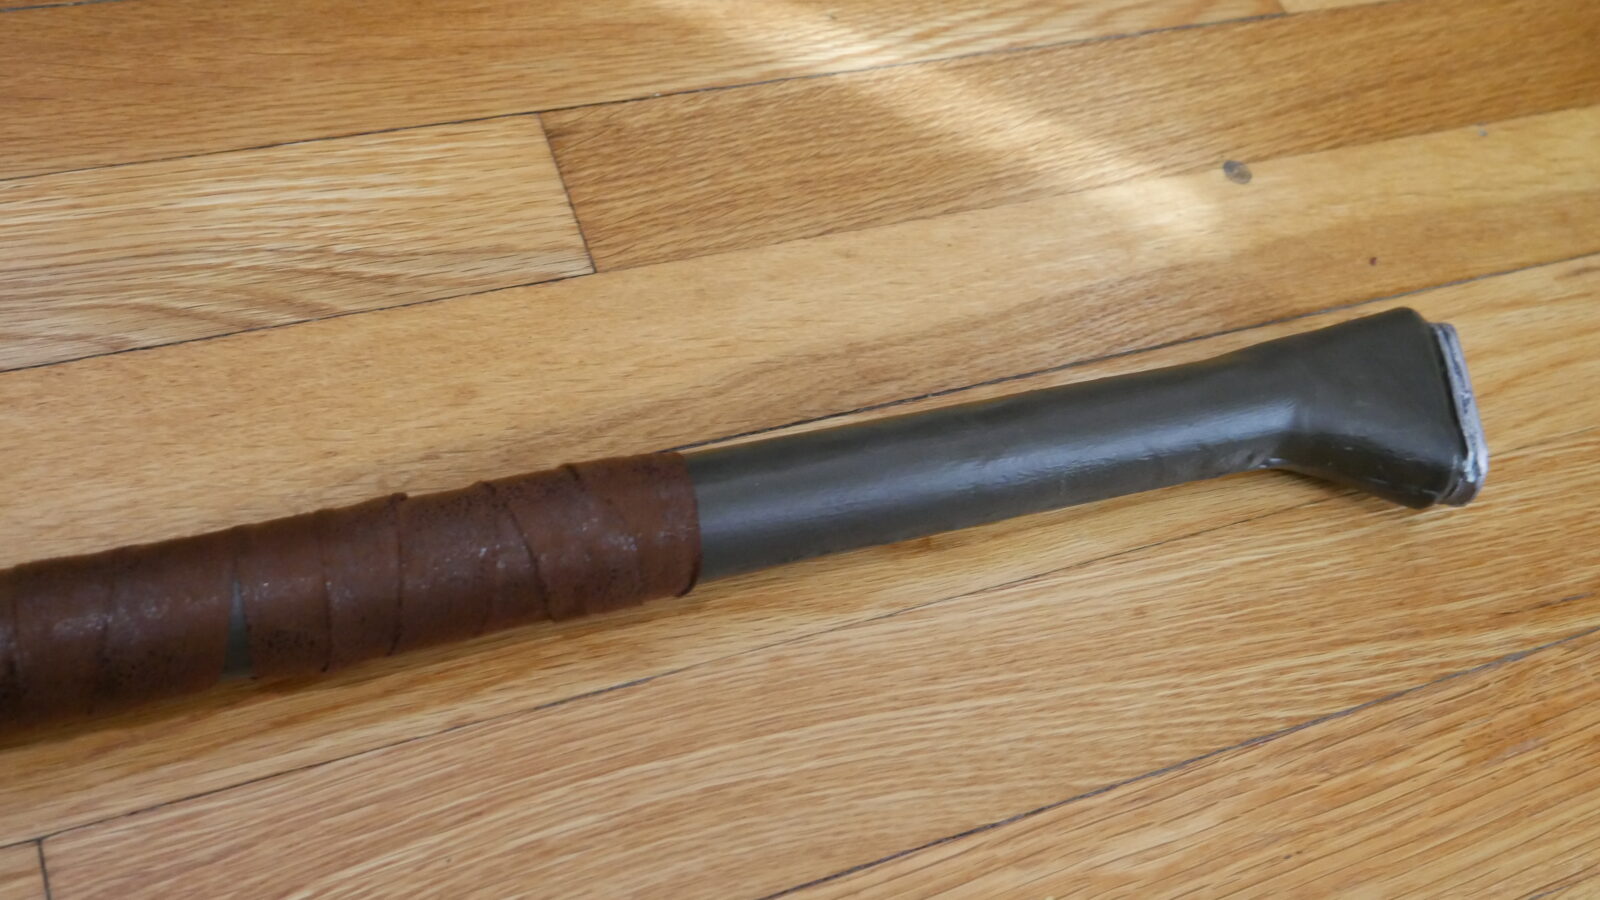
The curved end of the spear handle was made from two layers of 1/2 in EVA foam sandwiched together and shaped with the dremel. The whole handle was then wrapped in 2mm EVA foam to add bulk and blend the sections.
The spear was primed using Flexbond and a spray primer and then painted silver using rub n buff and silver acrylic paint. The highlights were added using lighter shade of silver and also god rub n buff. The handle was painted dark brown with acrylic which I used the texture of the brush strokes to suggest a wood like texture. I used silver and black acrylic to add the weather lines and dirt. Lastly I used a doubled strip of the fake suede to wrapped the handle.
Good luck with your cosplay making and be sure to check out more pictures on Flickr.